

Deployment and Automation
Caching and Amazon CloudFront
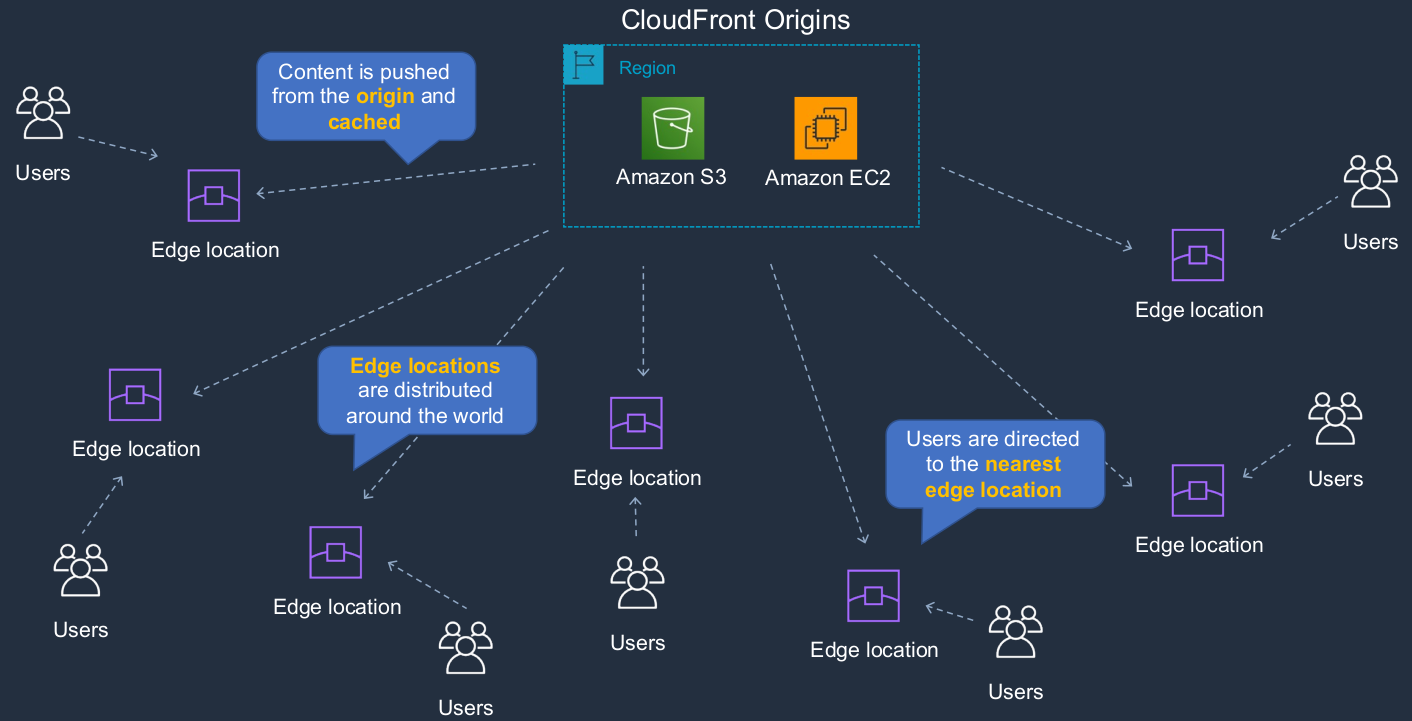
Amazon CloudFront is a service we can use to improve performance for accessing content by caching it around the world. Latency is mainly caused by distance. So if you’re connecting to download an image from Australia and the image is actually in New York, that’s quite a long distance. The time to download it might be a little bit longer than if you were in, say, Boston and you’re connecting to New York, where the actual physical distance is much shorter. So distance is one of the biggest factors that cause latency, which reduces performance.
Amazon CloudFront
CloudFront is a service we can use to cache our content and it has something called an Origin. An origin can be an Amazon S3 bucket or an EC2 instance. That’s where your content is and maybe your website content is sitting in S3 or it’s sitting on an EC2 Web server. That content then gets pushed to something called an Edge Location. There are lots of edge locations around the world. They’re part of the AWS global infrastructure. So the content, the images, the videos, the files get pushed out into these edge locations all around the world. So the content gets pushed and then cached at those locations for a period of time. That means that your users can now connect to the nearest edge location. So maybe the edge location on the upper left side is in New York and some users who are in New York themselves will connect to that edge location and that means that it doesn’t matter if the bucket is a long distance away or the EC2 instance is running on the other side of the world because the content is cached very close to the user.
S3 Static Website with CloudFront
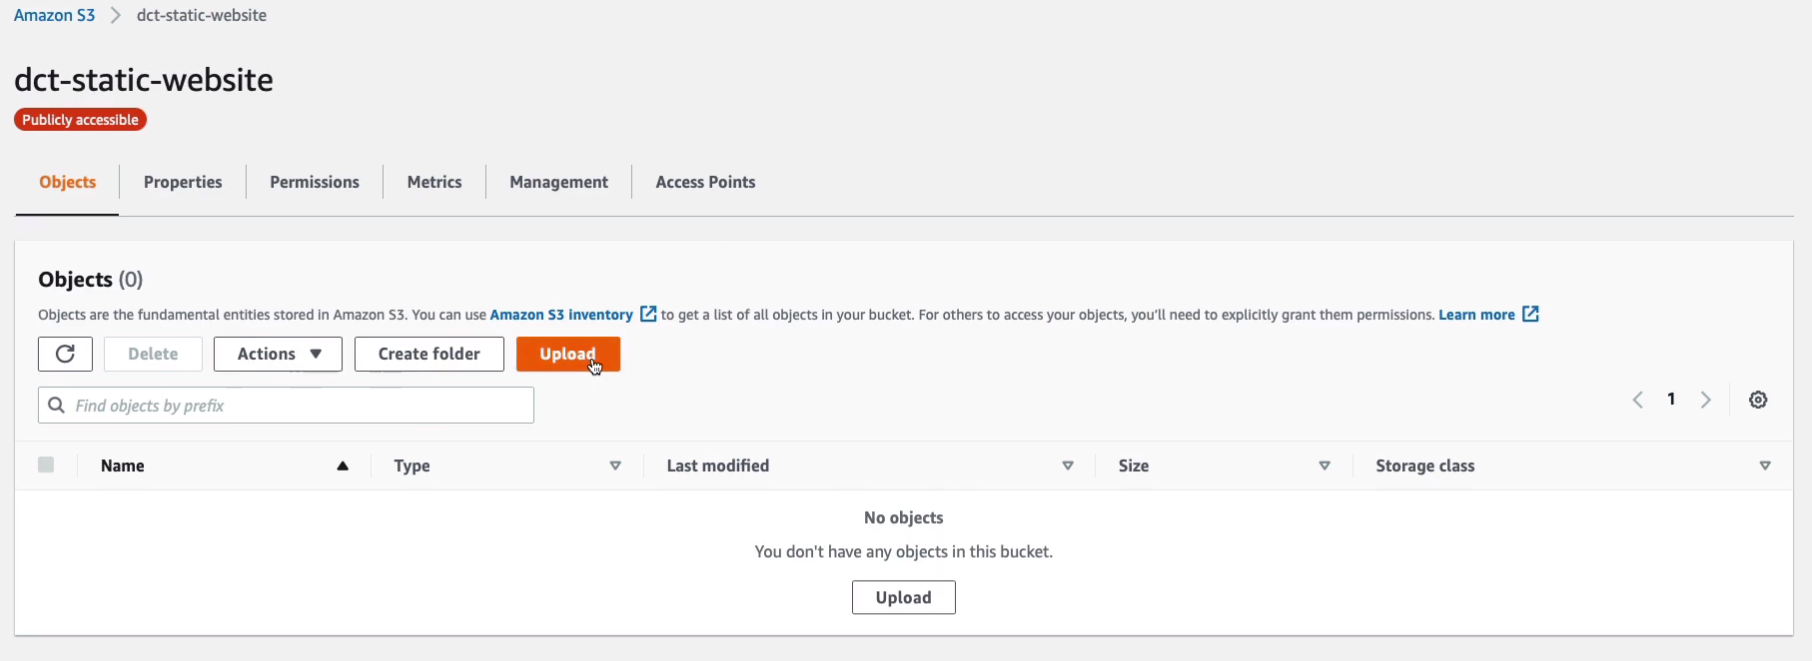
Back in the AWS Management Console, Services > Storage > S3, we actually have a static website that we created earlier.
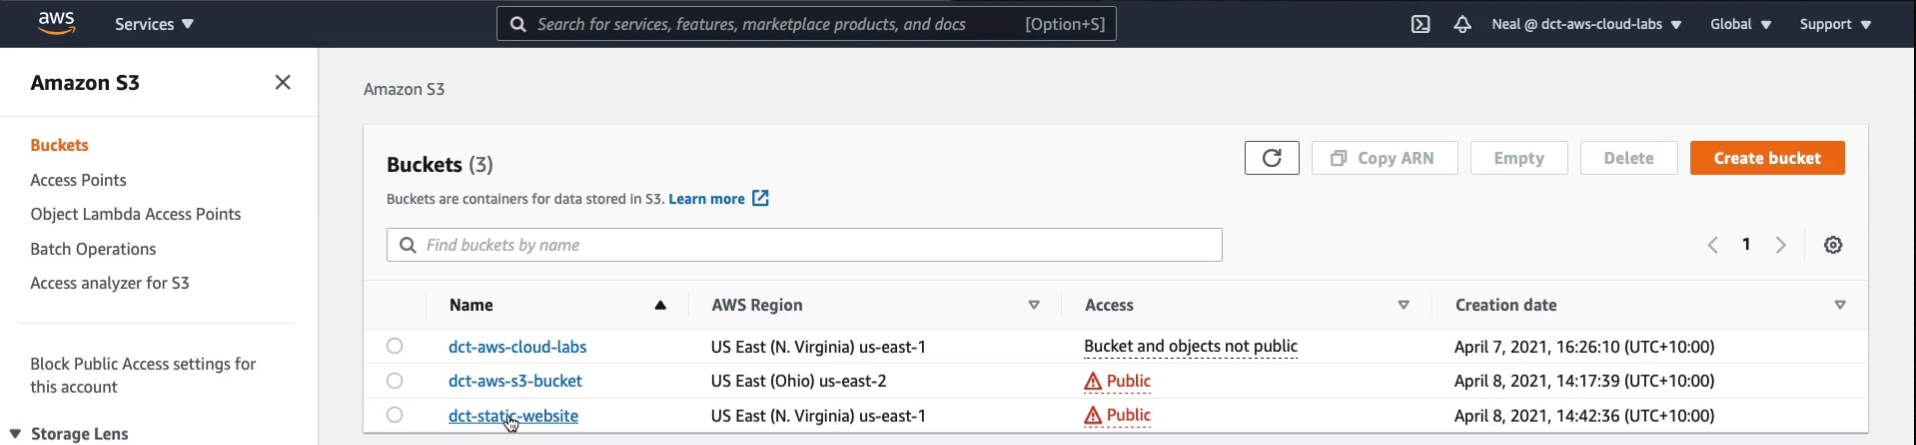
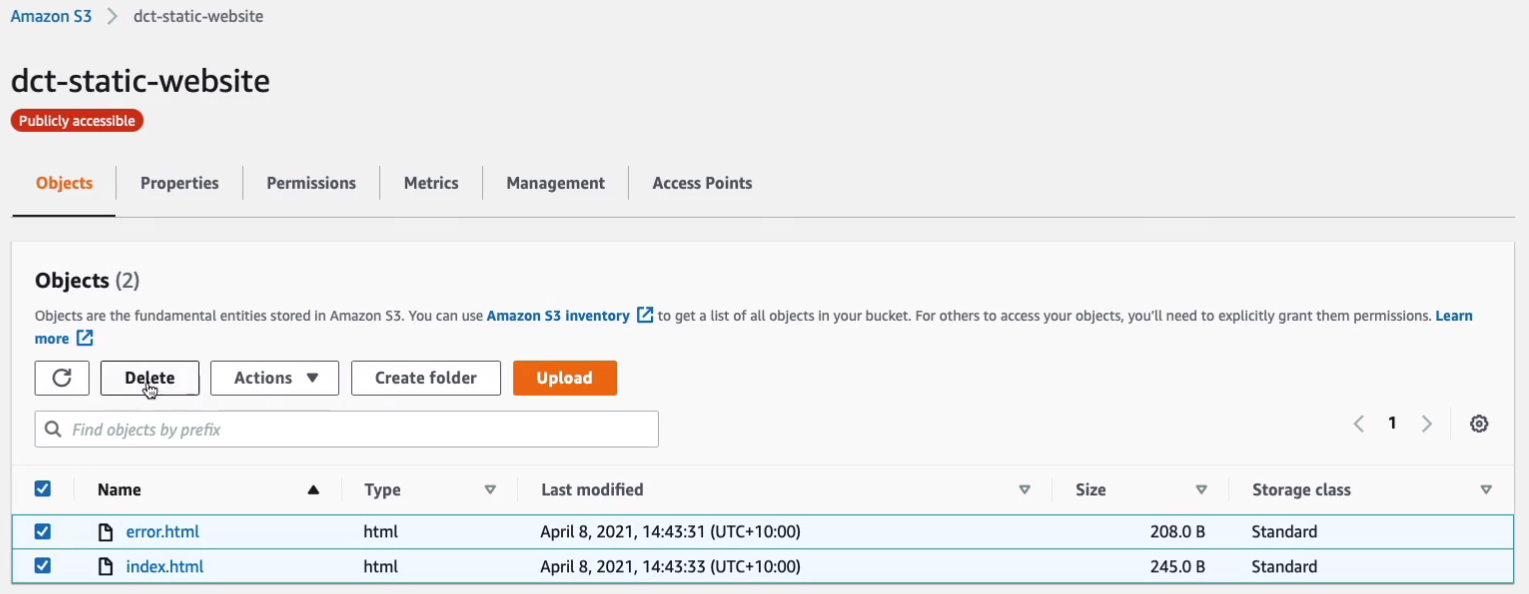
Go to your static website and Delete the two objects that you have in there.
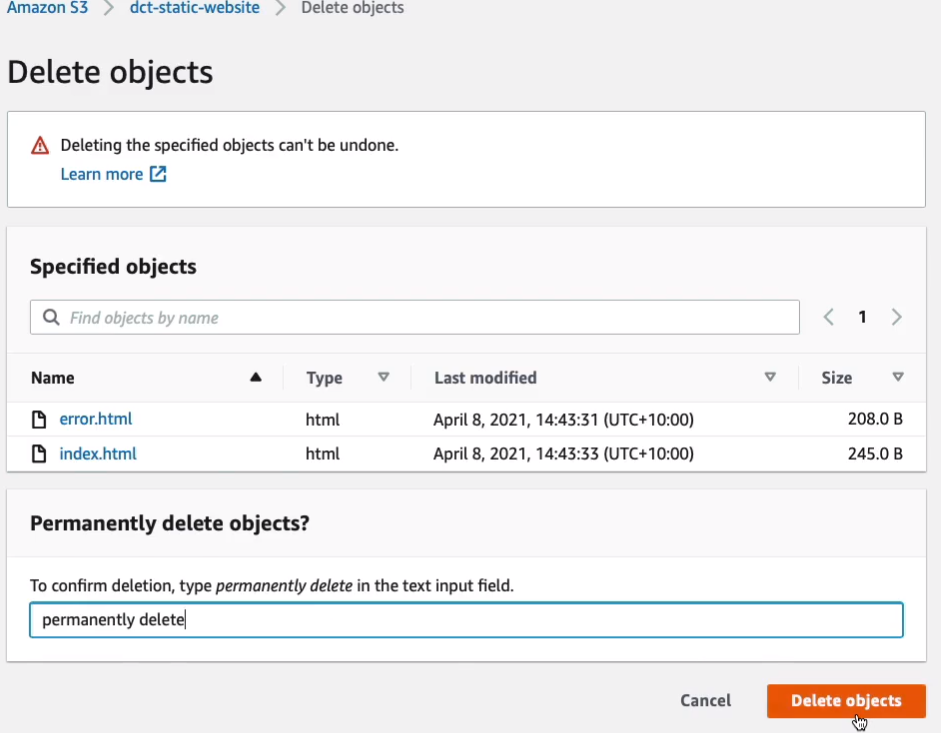
Type permanently delete and then just Delete objects.
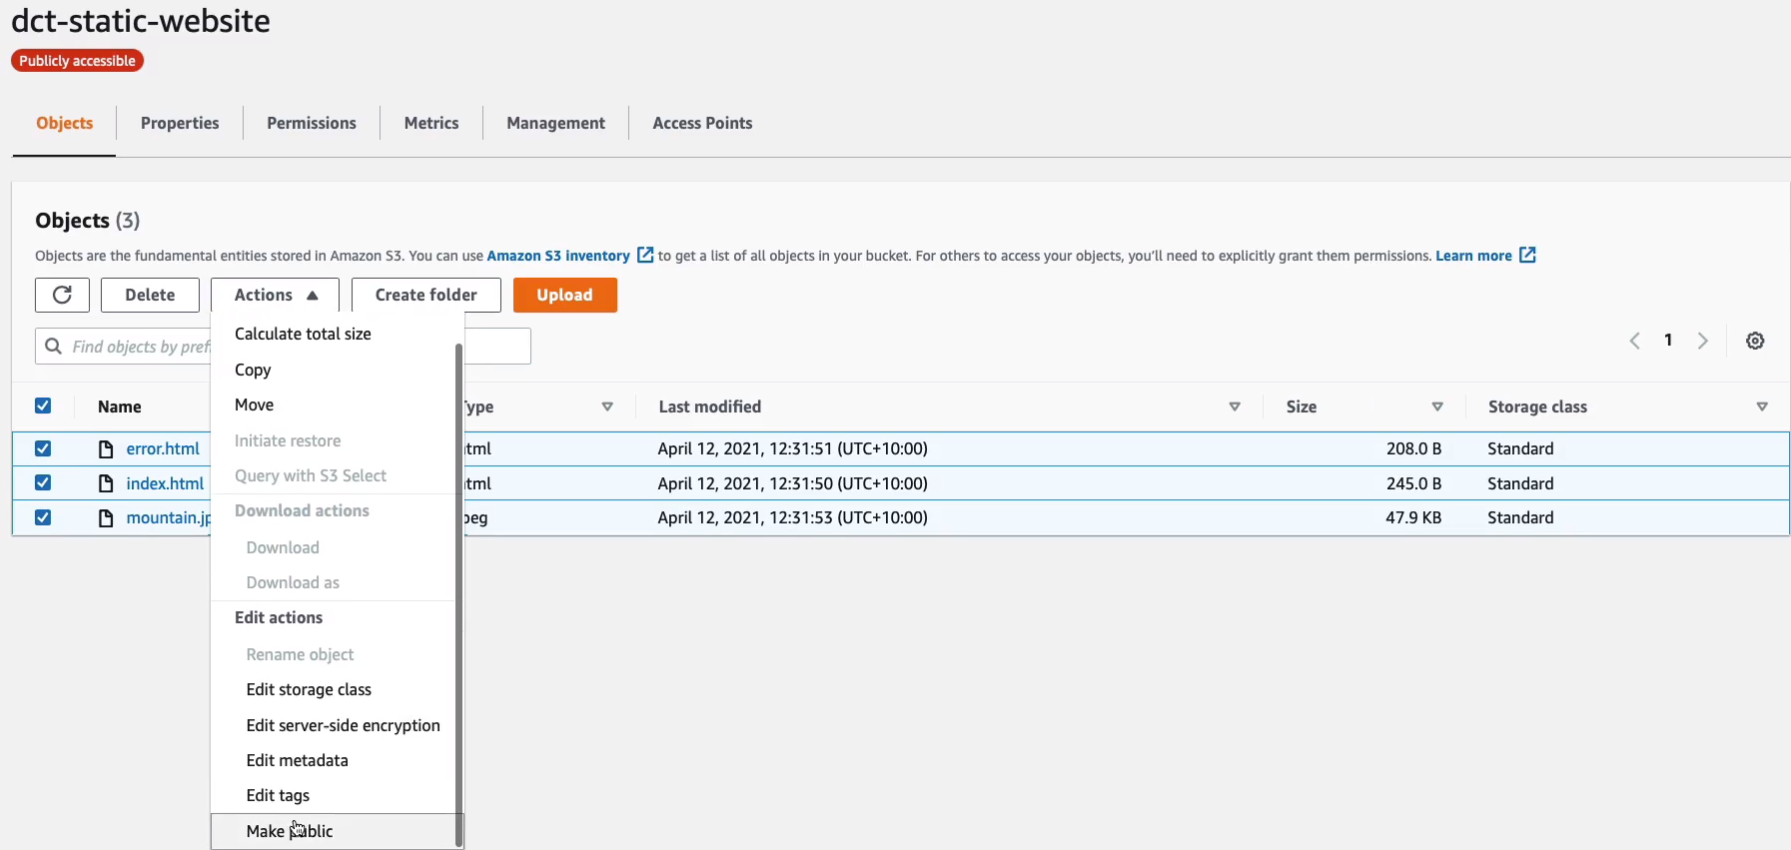
Go back to dct-static-website and Upload a couple more objects.
Here’s the code for the HTML file that you need to upload. For the image, you can download this mountain.jpeg, and please rename it before saving it.
<html>
<head>
<style>
body {
  background-color: #33342D;
}
h1 { color: white; }
h1 {
 text-align:center
}
</style>
</head>
<body>

<h1>Congratulations, you've launched a static website on Amazon S3</h1>
<img src="mountain.jpeg">
</body>
</html>
<html>
<head>
<style>
body {
background-color: #33342D;
}
h1 { color: white; }
h1 {
text-align:center
}
</style>
</head>
<body>
<h1>Error: this is an error page generated on Amazon S3</h1>
</body>
</html>We do need to make sure that the files that you uploaded are public. Select all objects > Actions > Edit actions / Make public.
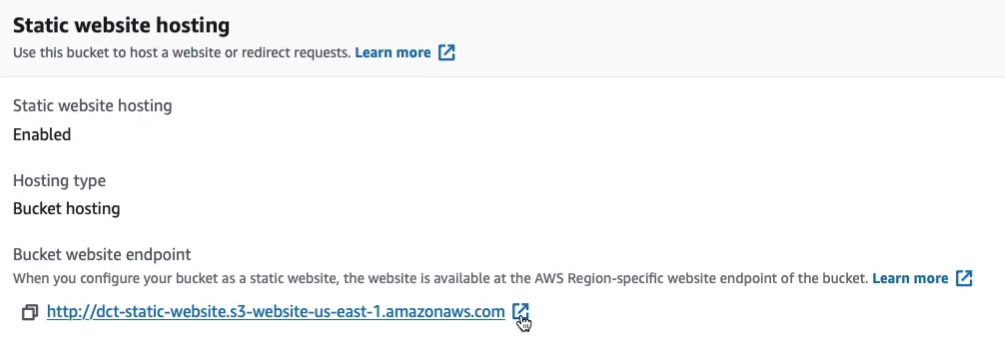
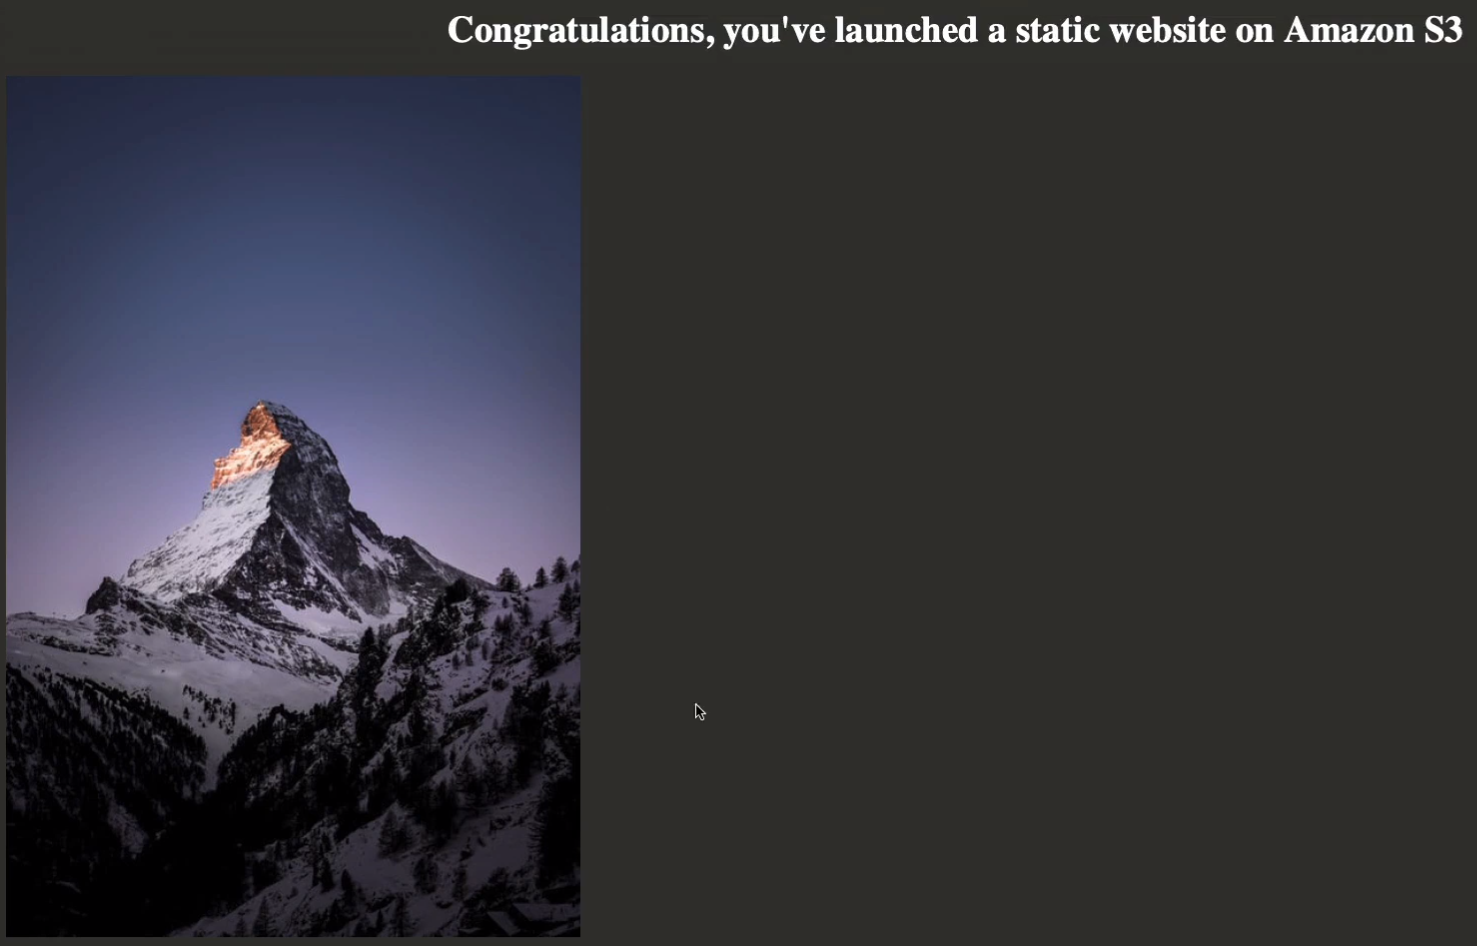
Once that’s done, go to the Properties tab and scroll down and we can click on the Bucket website endpoint.
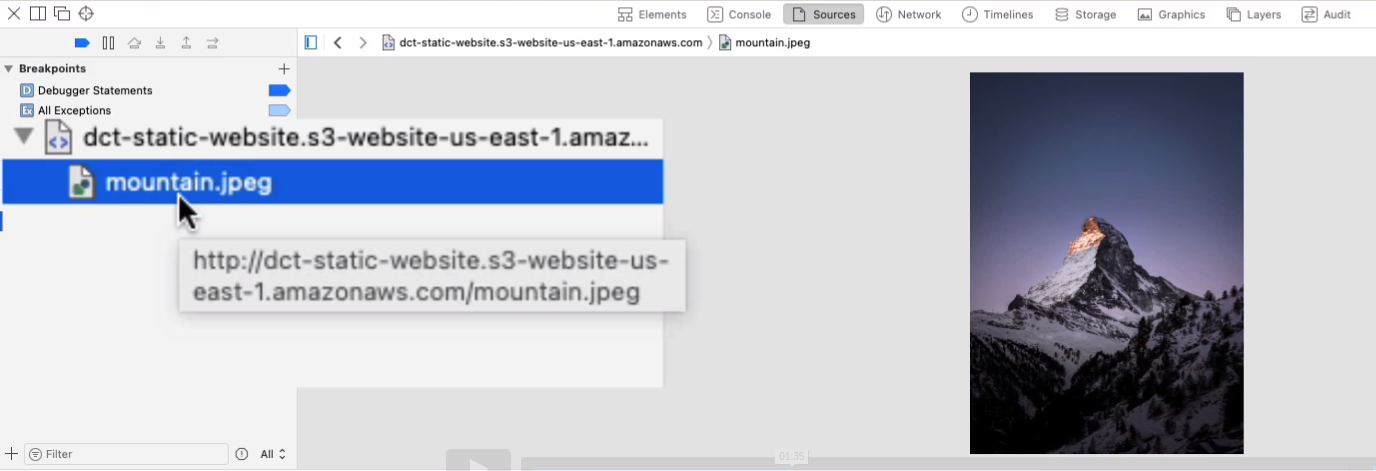
We should see this page here. This time we actually have an image here. If I go and inspect element, I can actually see some information.
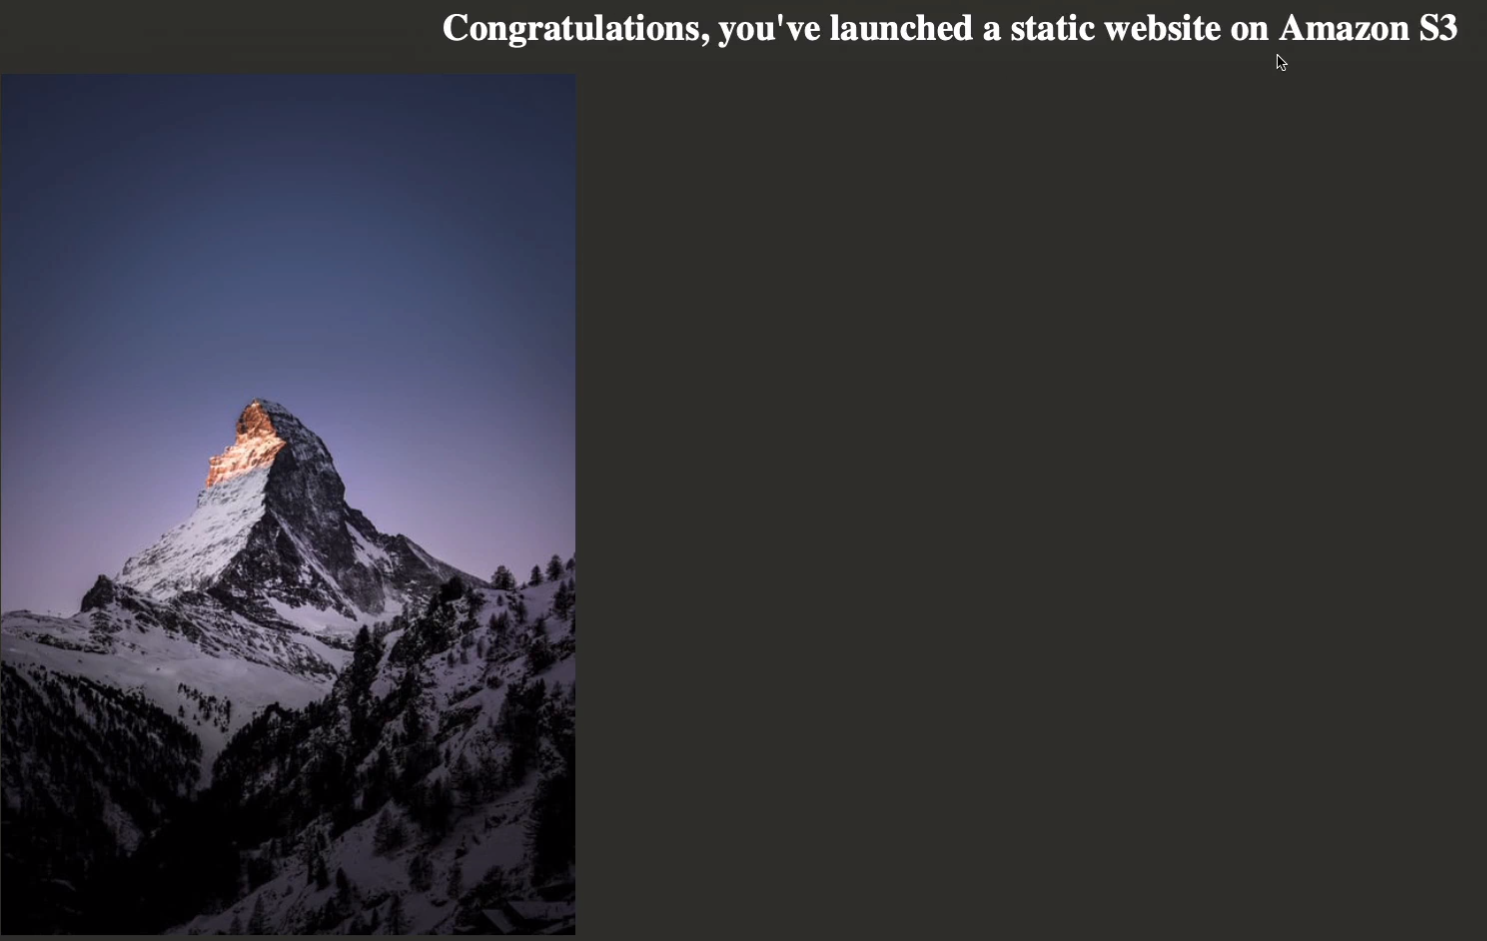
It’s actually telling that the address is the S3 bucket. Obviously, that’s where it’s coming from.
So what we’re going to do now is create a CloudFront distribution that’s going to cache that file so that when we render the web page the object will get delivered from CloudFront instead of from the source bucket. Back in the management console, go to Services > Networking & Content Delivery > CloudFront. In CloudFront, we want to Create Distribution and then choose to Get Started.

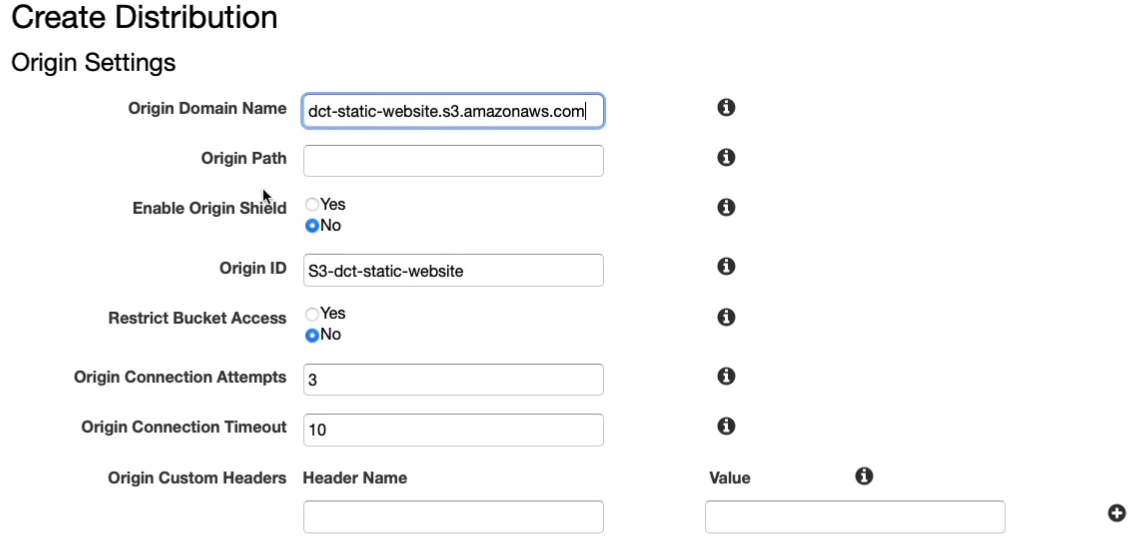
For Origin Domain Name, we’re going to choose an Amazon S3 Bucket. For us, we’re going to use the static website that we created earlier.
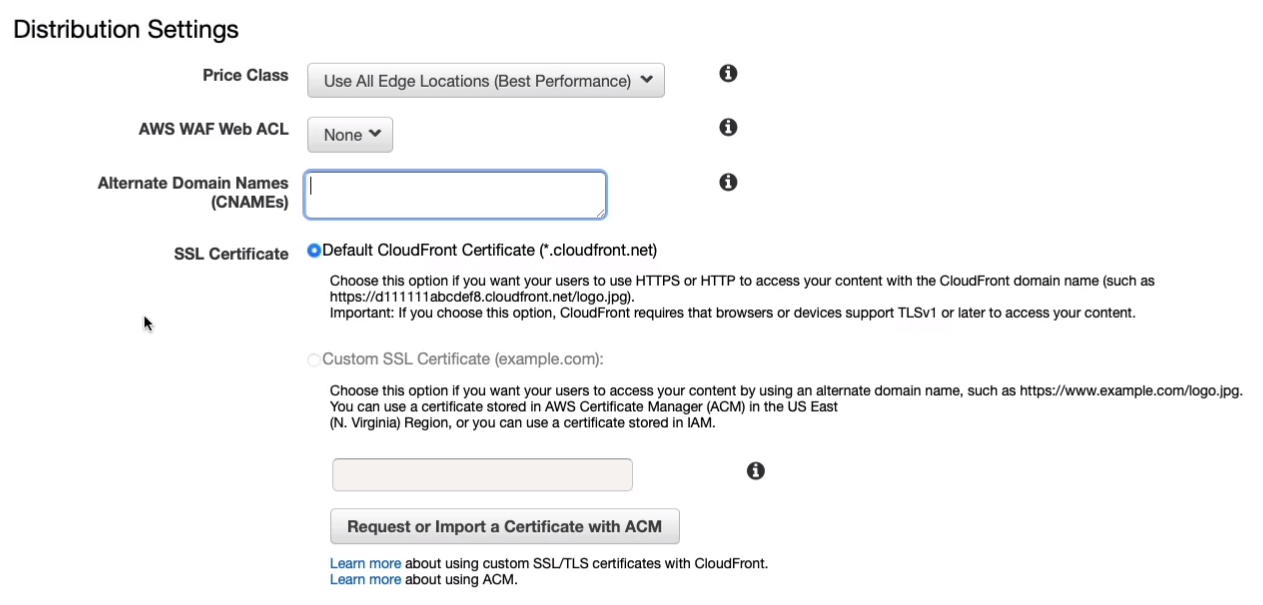
If we scroll down, if you want to, you can actually set up an Alternate Domain Name so you could use your custom domain name but you also need to attach a certificate.
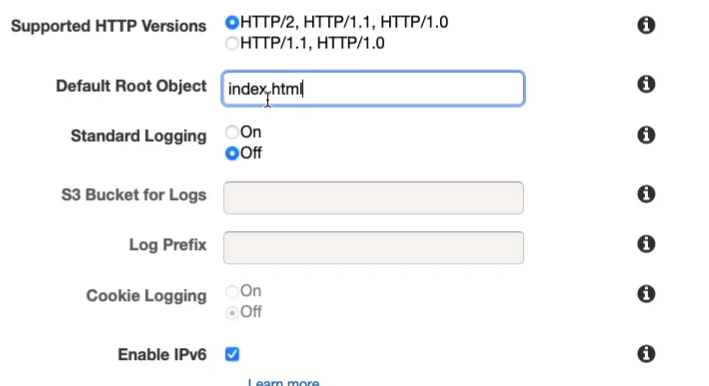
Come down to the Default Root Object and we need to put an index.html. So this is the name of the page that’s going to get rendered when we actually connect to our distribution.
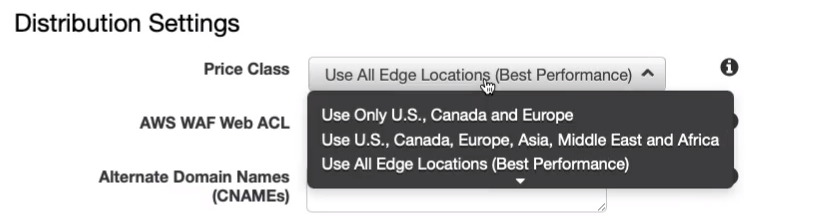
Another thing to show you is there is a Price Class. You can choose to Use All Edge Locations (Best Performance) and it will cache your content all around the world or you can choose specific regions to lower the price. Let’s just come down and Create Distribution.
Now, CloudFront Distributions do take quite a few minutes. So you’re going to have to leave this one for at least 10, maybe 15 minutes before it’s ready.
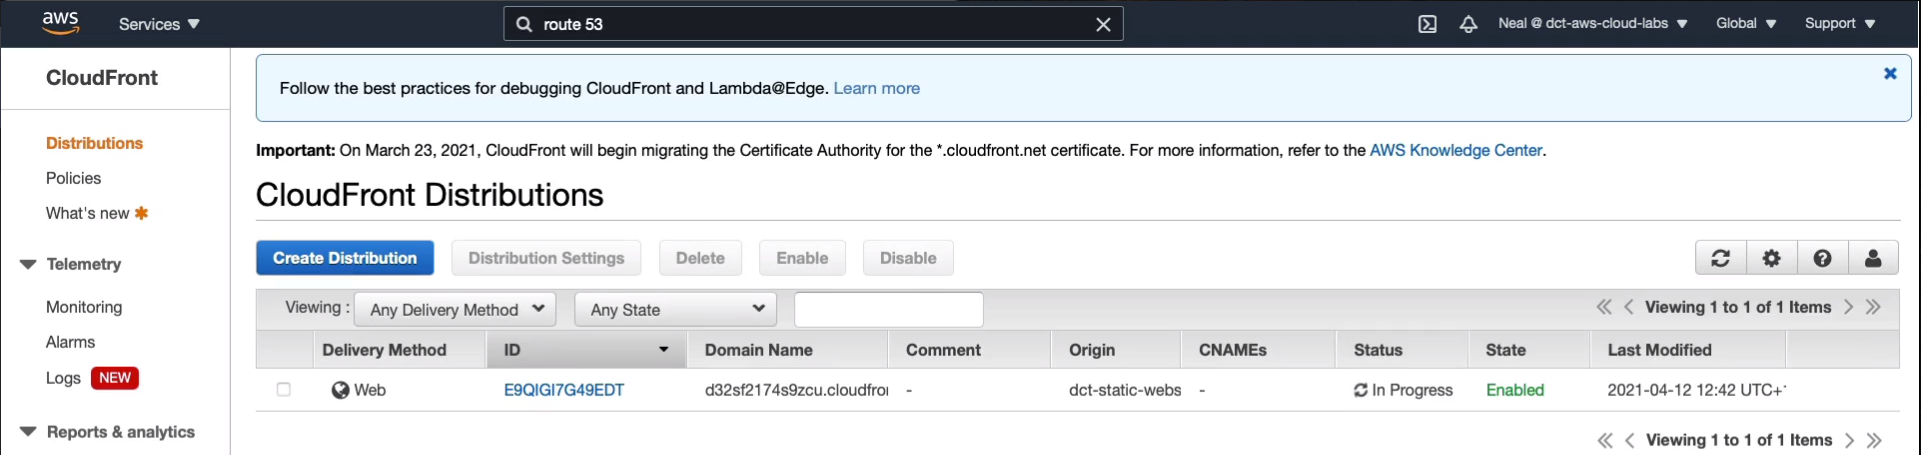
I’ve given it a few minutes, so what I’m going to do is copy the domain name, and then we’re going to go and open a new tab, paste it in, hit enter and sure enough, we get the index.html rendered.
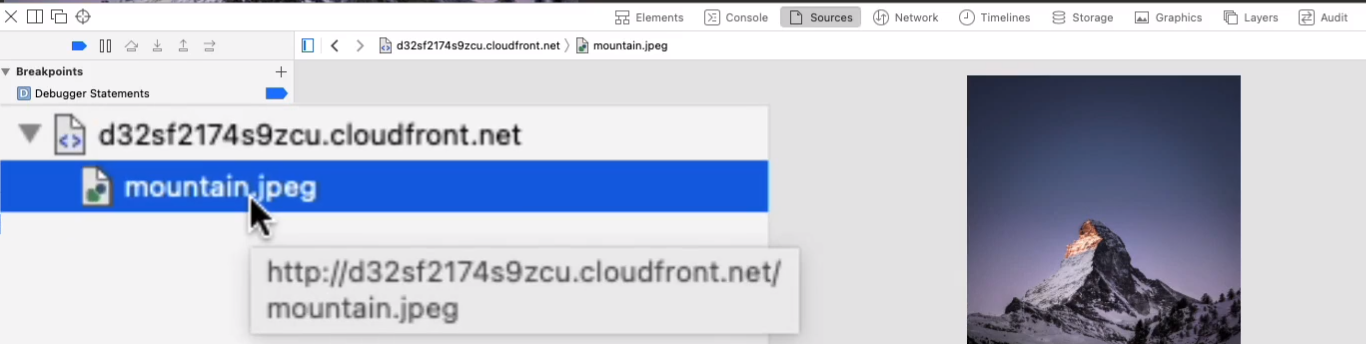
Now, this time, if I go and inspect the element and I click on the image, what I should find is that the URL for the image is this time being sent from CloudFront itself. That’s because this actual object is actually located now in a cache in an edge location.
We do need to go and remove our distribution so we don’t get charged. Now it’s a two-step process. So back in CloudFront Distributions, we click on Disable and click on Yes, disable.
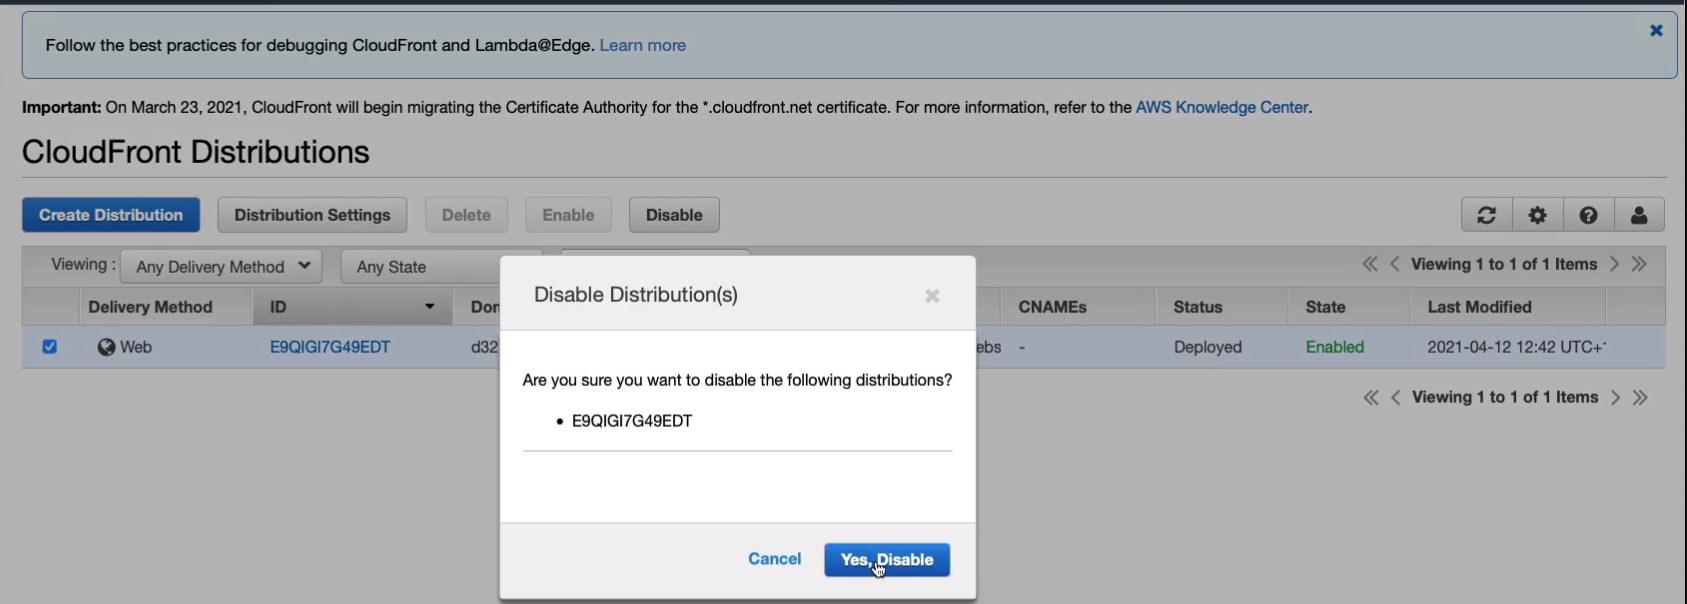
You’ll see this is in progress. Now, once it’s complete, you can select the distribution and Delete. But that will take again 10 or 15 minutes and then you’ll be able to do that.

Reference:
Are you having an issue creating a distribution on CloudFront and showing this kind of message below?
Solution: https://forums.aws.amazon.com/thread.jspa?threadID=307967
AWS Global Accelerator
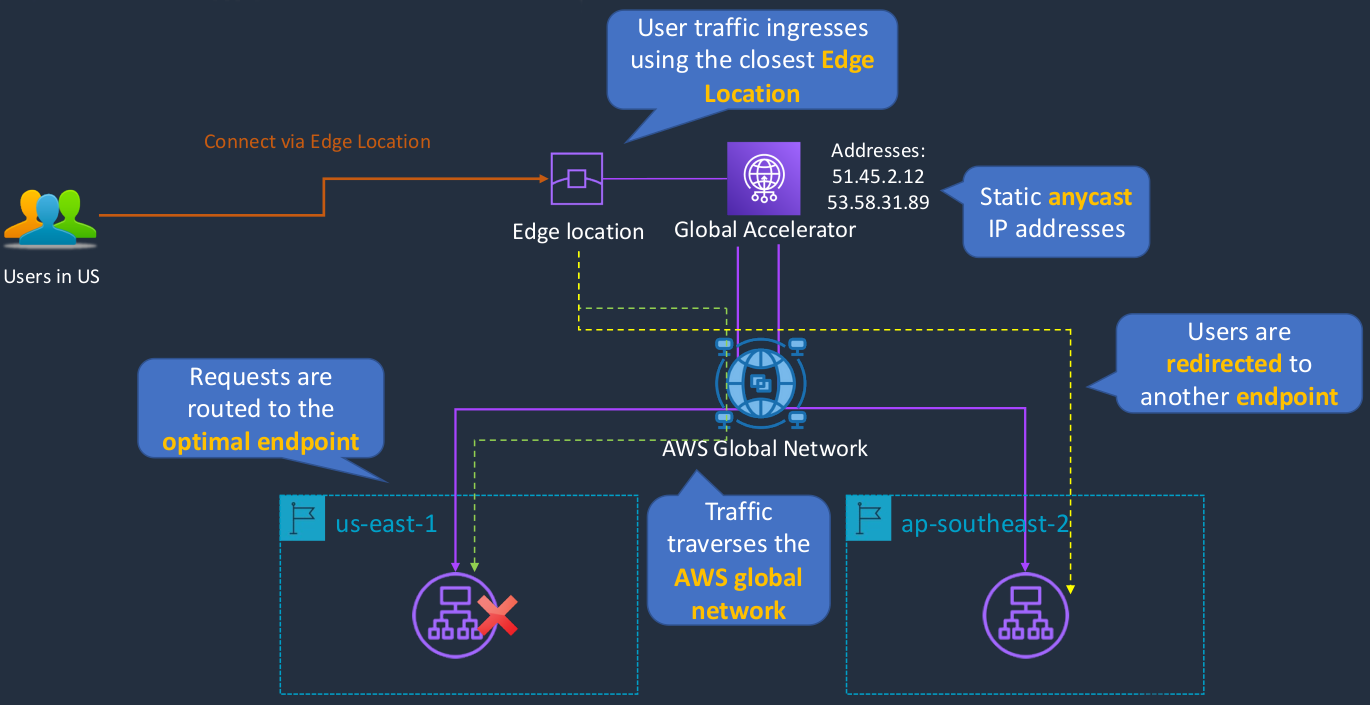
AWS Global Accelerator is another service that we can use to improve the performance of access to our AWS resources. Let’s say we have two different regions here and these are in different parts of the world. We’ve got us-east-1 and ap-southeast-2, which is in Australia, and in these regions, we have an Elastic Load Balancer and behind that, we’ve got some EC2 instances. Now we’ve got some users, and let’s say the users who want to access the application are in the US. So what happens is when the users connect, they’re going to connect via an edge location. So just like with CloudFront, the AWS Global Accelerator service leverages these edge locations that are around the world. So the connection hits the edge location, and then AWS Global Accelerator will then send the traffic to one of these endpoints. Now, Global Accelerator has a couple of IP addresses that are public. These are two IP addresses to which you can point your applications and it doesn’t matter whether your application is running in any one of these regions that you’ve connected to Global Accelerator. The static anycast IP addresses don’t change. So they’re the only addresses you need to know and they’re the only addresses you need to configure in your application or your firewalls to be able to connect to these applications.
Now, Global Accelerator then takes care of routing the connections that are coming into the application, and it does so through the global network. That means that once the traffic is hit, the edge location, from that point on through to the application, everything goes over the AWS Global Network rather than the Internet. Global Accelerator can prioritize the traffic so it’s sent to the actual region that’s closest to the user. In this case, that means the us-east-1 region because these users are in the US. So, Global Accelerator will route the connections to the optimal endpoint. Now, if the endpoint fails, it will then simply route the users to another available endpoint. So that gives you that resilience and means you can connect to your applications in different regions.
AWS Global Accelerator vs CloudFront
- Both use the AWS global network and edge locations
- CloudFront improves performance for cacheable content and dynamic content
- Global Accelerator improves performance for a wide range of applications over TCP and UDP
- Global Accelerator proxies connections to applications in one or more AWS Regions
- It’s not about caching content, it’s about sending the incoming connections to the regions where your application endpoints are running
- Global Accelerator provides failover between AWS Regions
CloudFormation
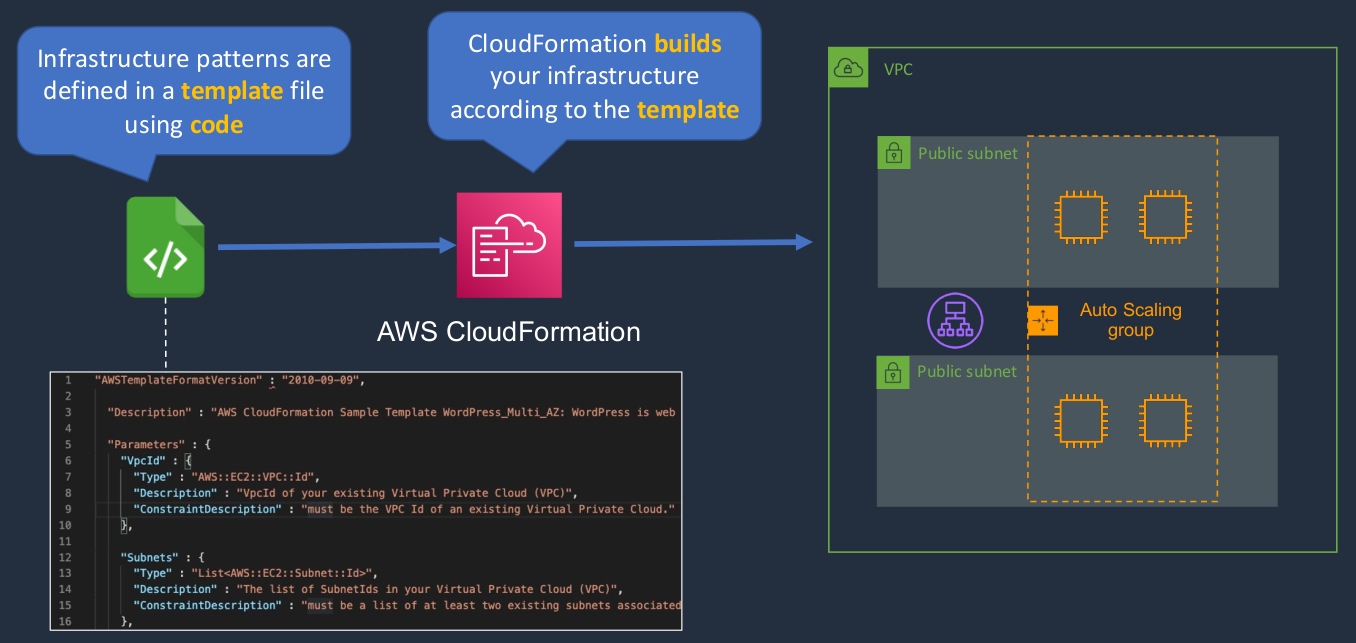
AWS CloudFormation is a service that we can use to deploy infrastructure on AWS using code that’s written in a template file. It allows us to automate the deployment of our resources in AWS all around the world based on what we define in that template. So we define our infrastructure patterns in a template file using code. So essentially we say this is what we want our resources to actually be configured like. It looks like something shown below on the bottom left part (code). We define our code using JSON or YAML and then we send that file, we upload it to CloudFormation and CloudFormation will then build the infrastructure according to the template. So it might build a VPC with subnets, with an autoscaling group. It might launch EC2 instances, it might add a load balancer, and so on. One of the great things about CloudFormation is that once you’ve defined this template if you want to build this application again, you can do so very easily. You don’t have to manually configure resources. That means there’s less chance of making a mistake, less human error, and more chance of consistency and consistent security settings, consistent configuration settings.
Benefits of AWS CloudFormation
- Infrastructure is provisioned consistently, with fewer mistakes (human error)
- Less time and effort than configuring resources manually
- Free to use (you’re only charged for the resources provisioned)
- You don’t pay for CloudFormation, but of course, you pay for the resources that it creates
- A template is a YAML or JSON template used to describe the end-state of the infrastructure you are either provisioning or changing
- So those are the languages with which you can describe the infrastructure you want CloudFormation to build
- CloudFormation creates a Stack based on the template
- The stack is the set of resources created based on the template
- Can easily rollback and delete the entire stack as well
- So it will not just build it for you, it will actually terminate and delete everything for you as well at the end when you delete your stack
Create CloudFormation Stack
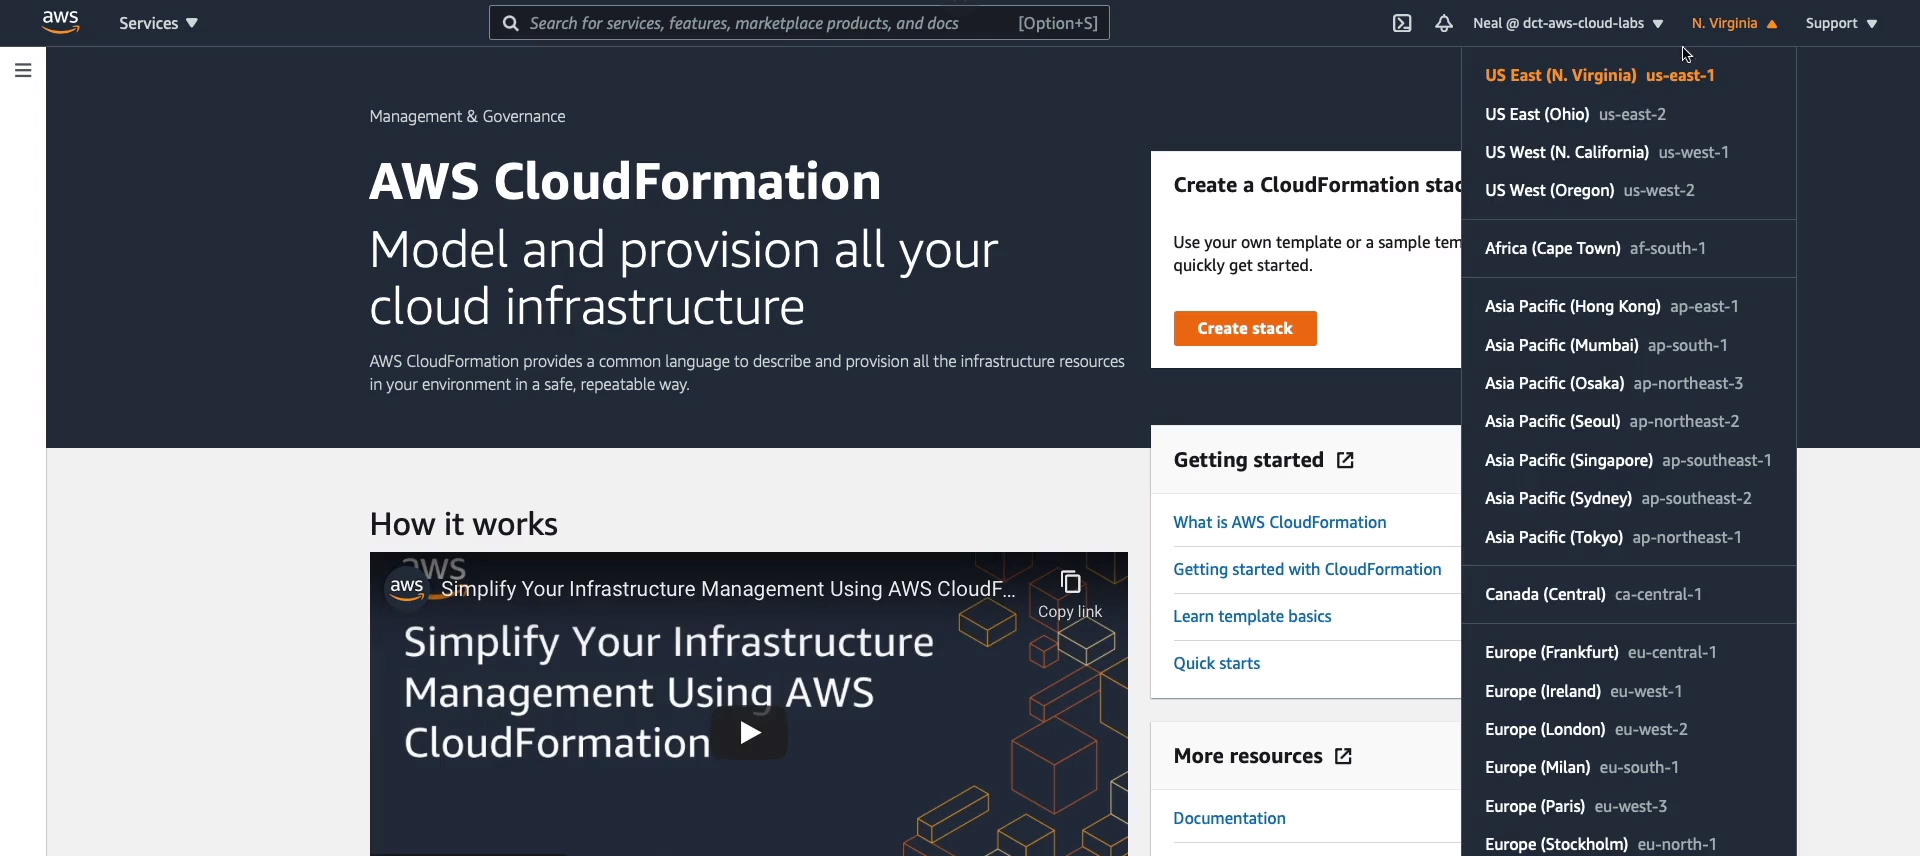
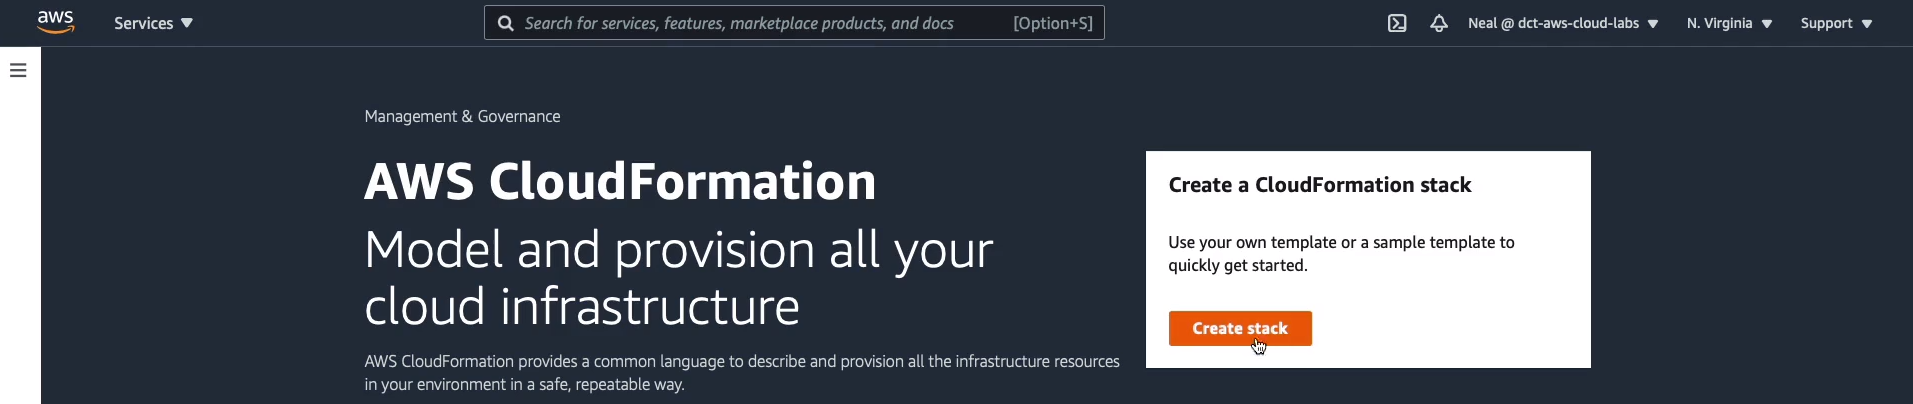
Go to the AWS Management Console, Services > Management & Governance > CloudFormation. I’m in CloudFormation and I’m in the US East North Virginia (us-east-1) region. You need to make sure you’re in this region as well.
Now, I have some template files here.
Resources:
  MyInstance:
    Type: AWS::EC2::Instance
    Properties:
      AvailabilityZone: us-east-1a
      ImageId: ami-0742b4e673072066f
      InstanceType: t2.micro
Resources:
MyInstance:
Type: AWS::EC2::Instance
Properties:
AvailabilityZone: us-east-1a
ImageId: ami-0742b4e673072066f
InstanceType: t2.micro
MyEIP:
Type: AWS::EC2::EIP
Properties:
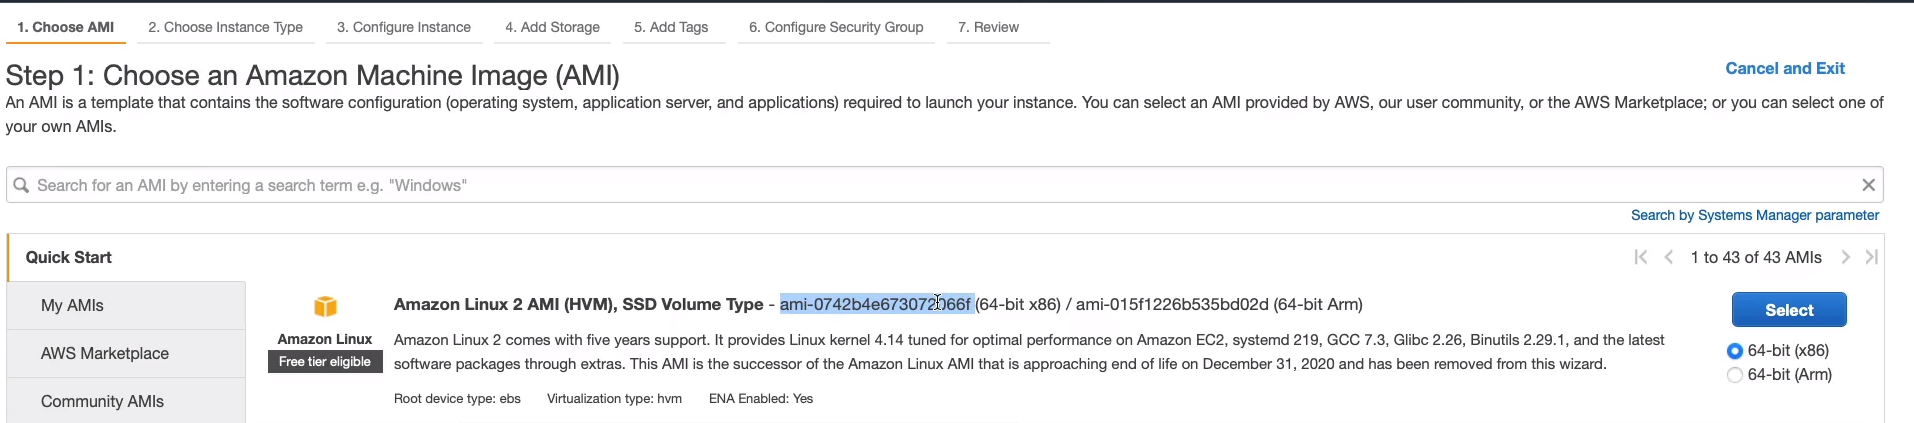
InstanceId: !Ref MyInstanceSo the first one, EC2Instance.yml, is a very simple CloudFormation template. We’re defining Resources and the resource is an instance which is called MyInstance. The Type is where you specify what type of resource you’re creating. In this case, it’s the AWS EC2 instances resource, and all we need to launch an instance are a couple of properties. We need the Availability Zone we want to put it in, so us-east-1a. We need the Image ID, which is the Amazon Machine Image, and the Instance Type. Now, you may need to update your image ID. In order to do that, you need to go to EC2 > Launch instance. In here, you want to copy for the Linux 2 AMI x86 AMI ID. So copy that to your clipboard and paste it in and save your file.
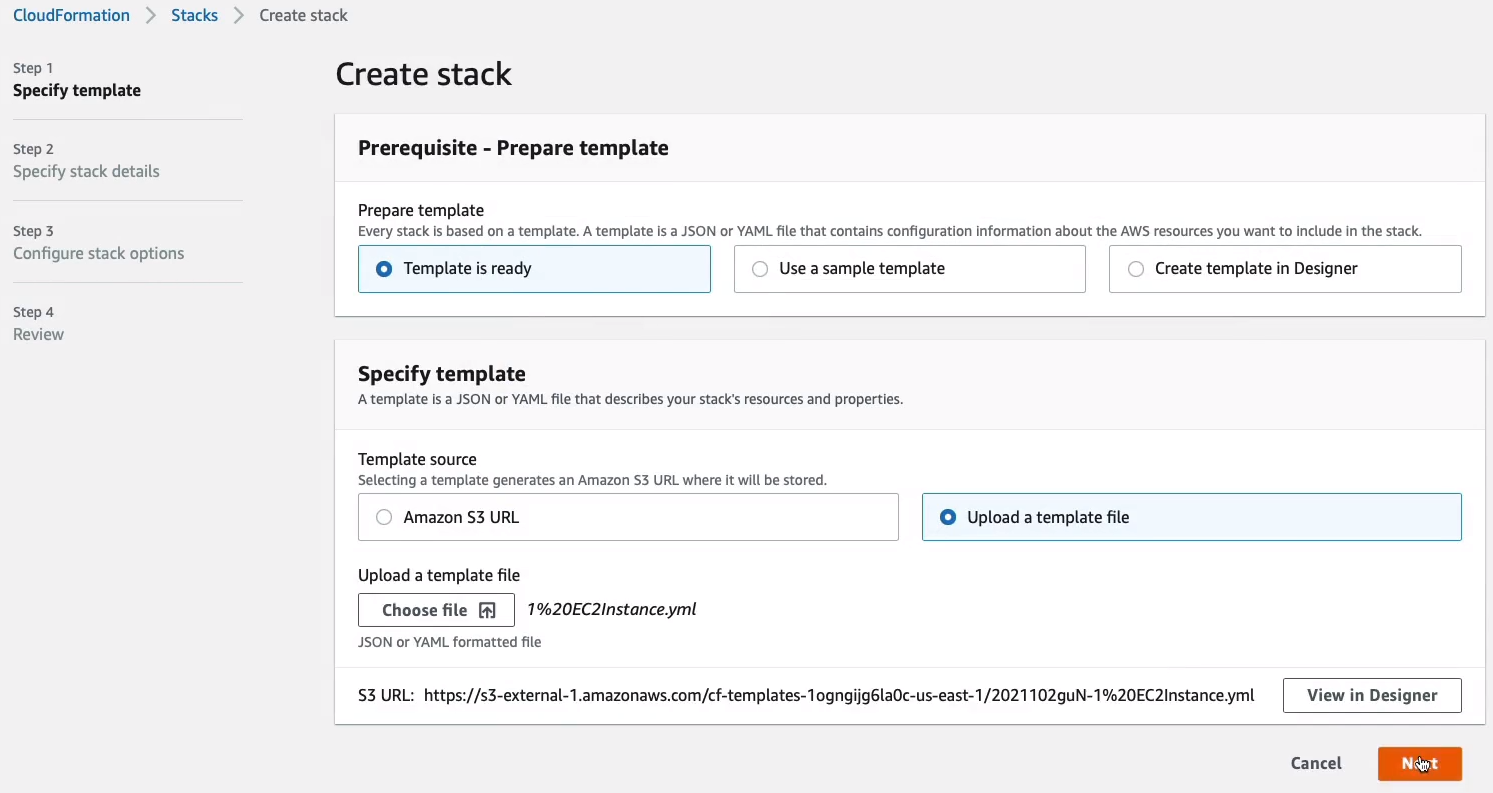
Back in CloudFormation, we’re going to Create stack.
We’ve got Template is ready selected. We’re going to Upload a template file, choose a file, and upload the 1 EC2Instance.yml file. Click on Next.
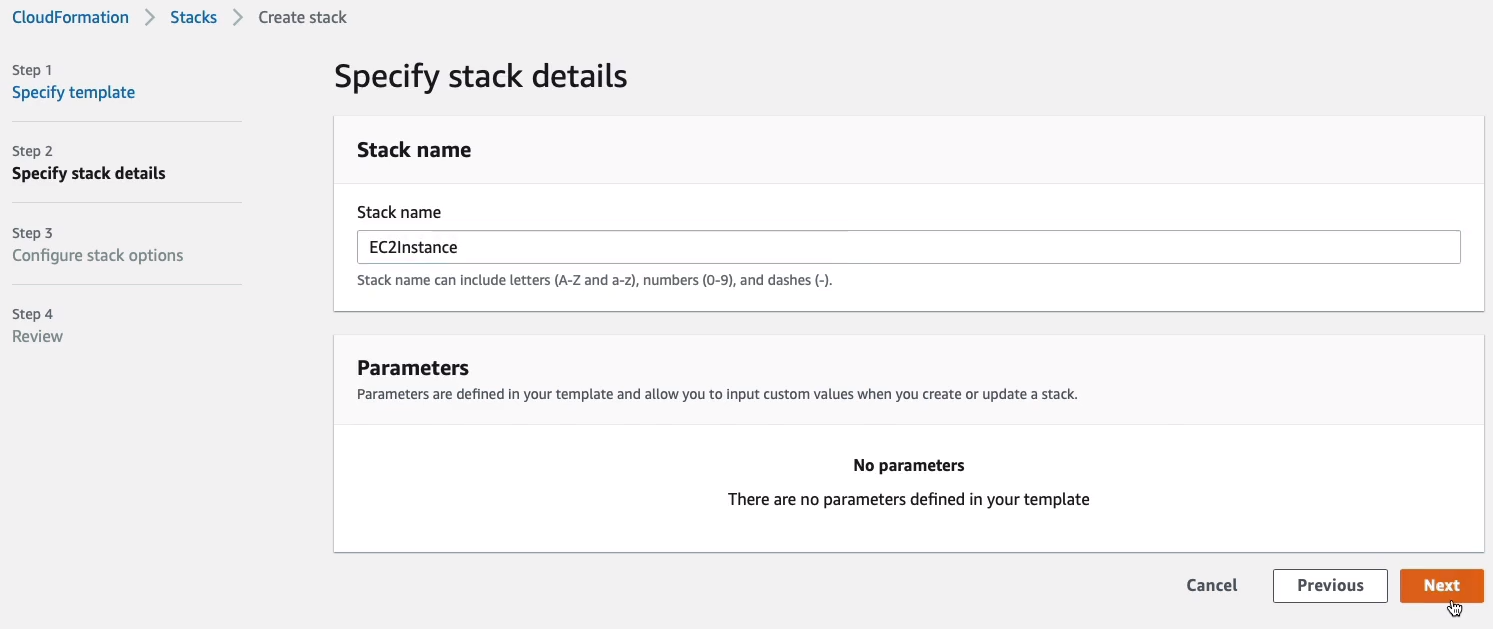
We’re going to give it a Stack name. I’m just going to call it simply EC2Instance. Click on Next.
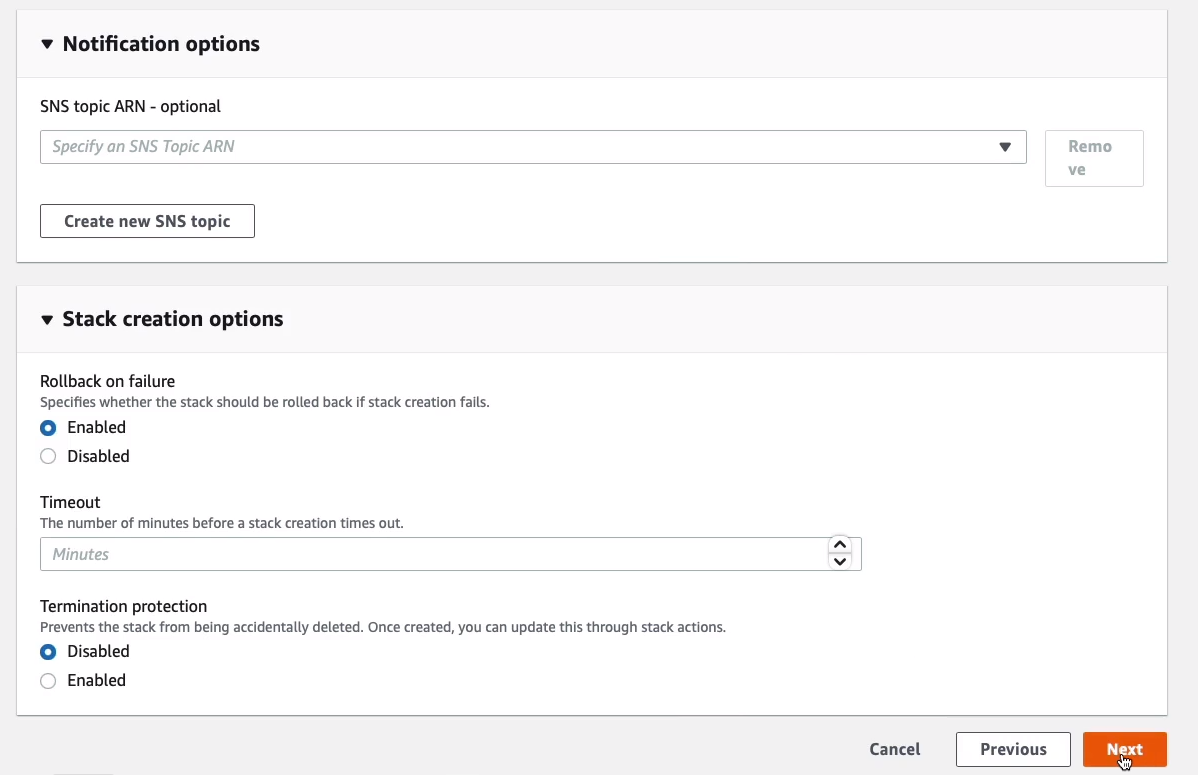
We can now define some of the options like Tags, like an IAM role for creating the resources and there are some Advanced options like the Stack policy. We’ve got Rollback configuration, Notification options, and then Stack creation.
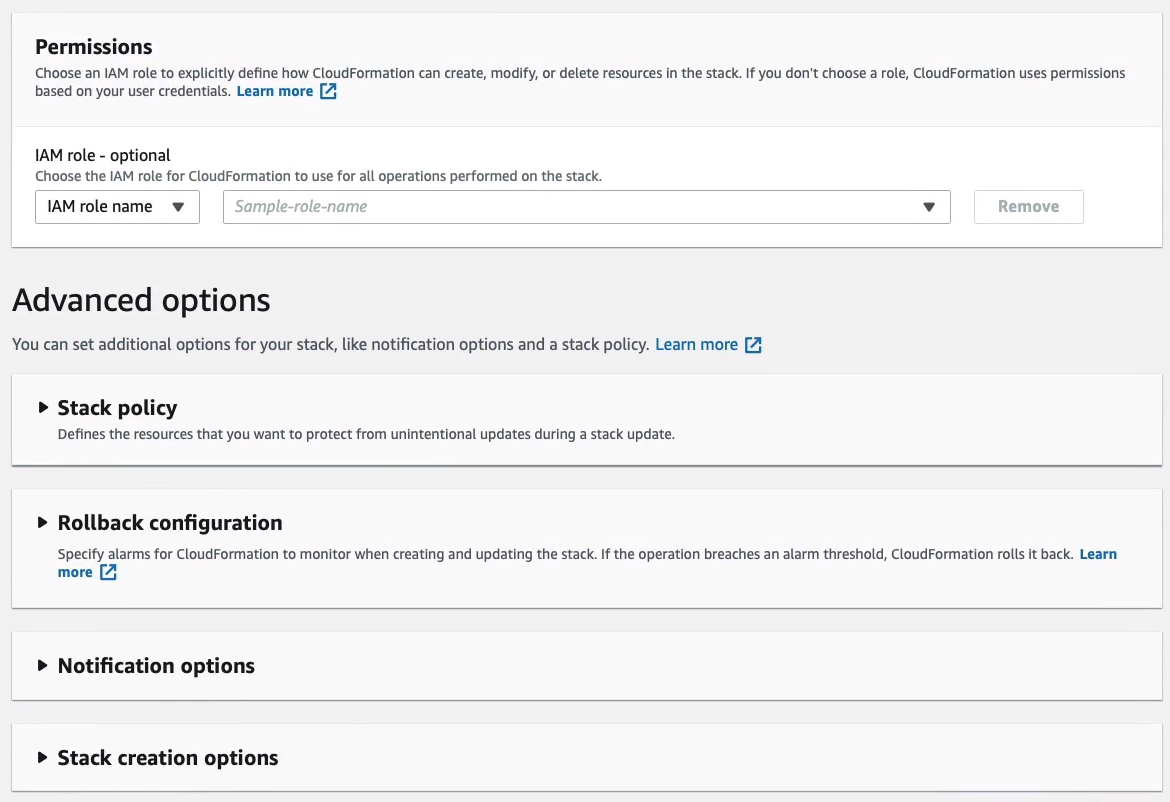
Now, notice on the Stack creation options > Rollback on failure is Enabled. So if anything goes wrong, it should automatically roll back and terminate our resources for us. We don’t need to change any, so let’s click on Next.
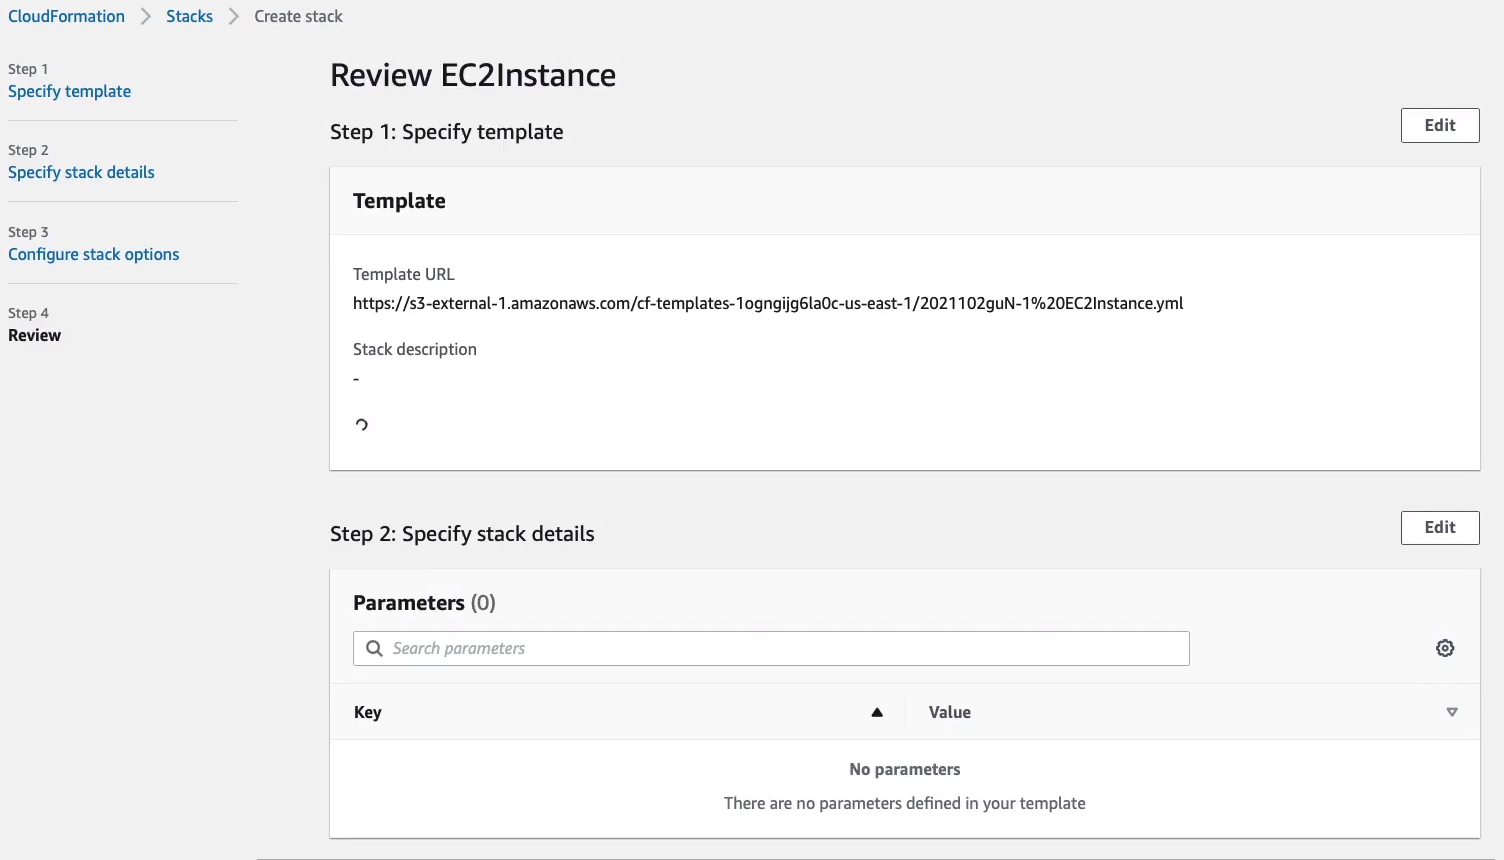
Scroll down to the bottom and then just Create stack.
We’ve now got a Create in progress happening and we can watch what’s going on in the events here.
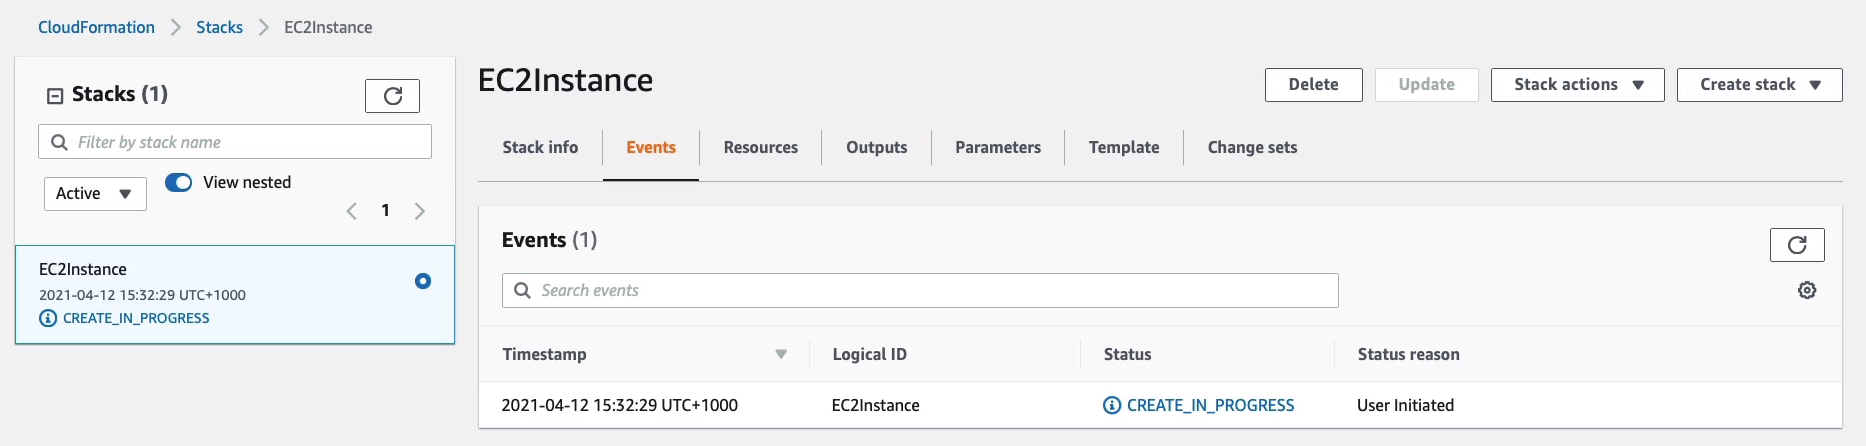
So you may want to just keep hitting refresh to see what’s happening and in just a few seconds, we can see that the creation is complete.
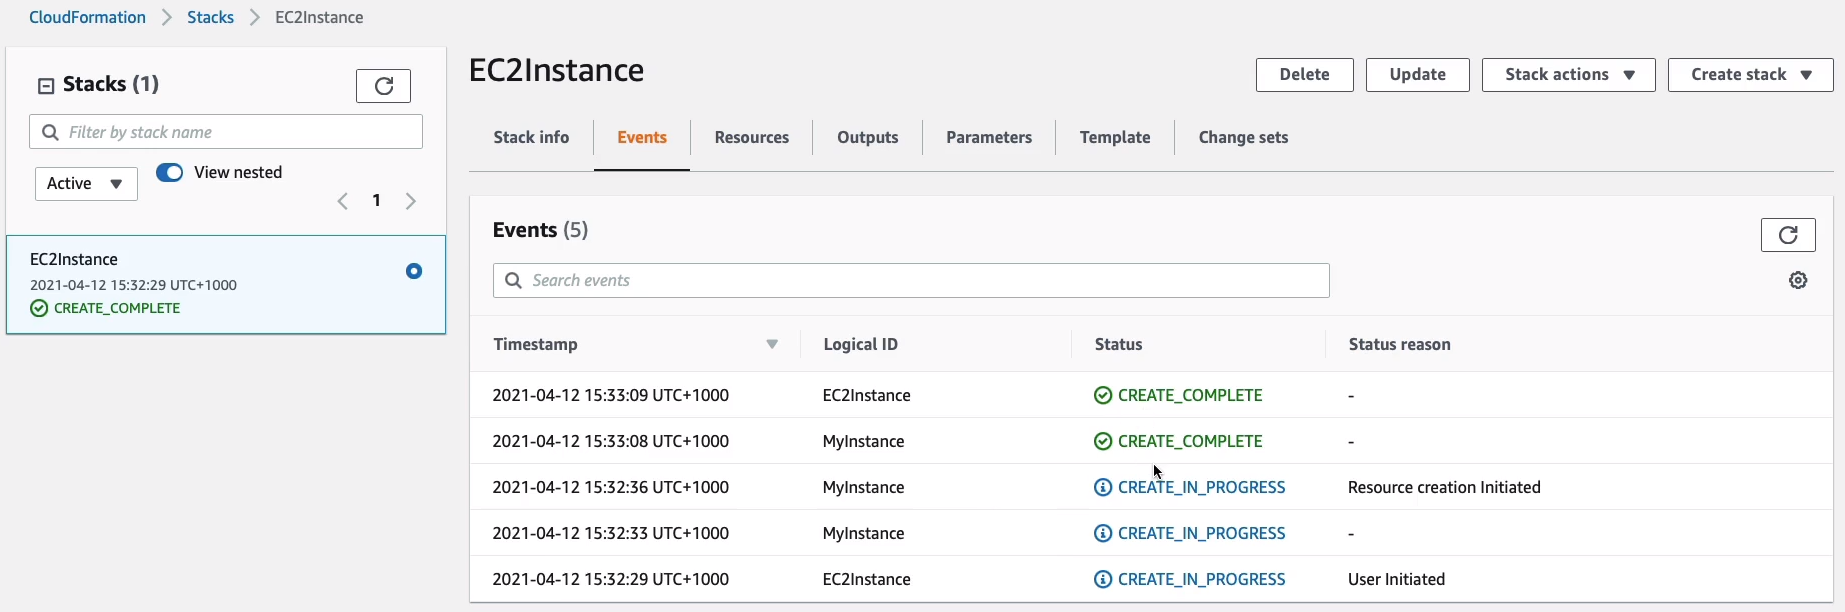
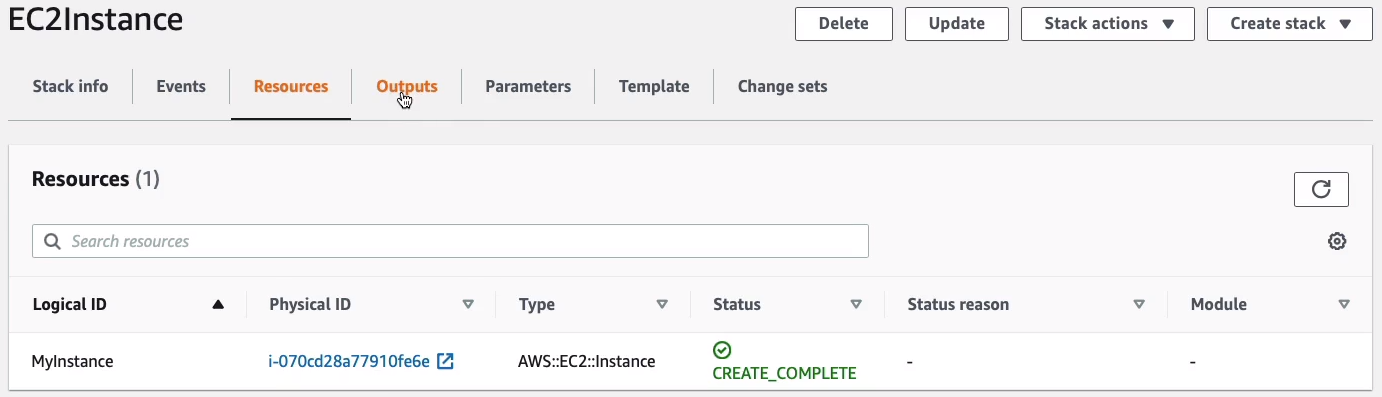
Now, sometimes you can see some information on these various tabs. It’s quite simple with this template, but we can see a resource. We can see it has a logical ID. The physical ID is actually the instance ID for this instance outside of the CloudFormation template.
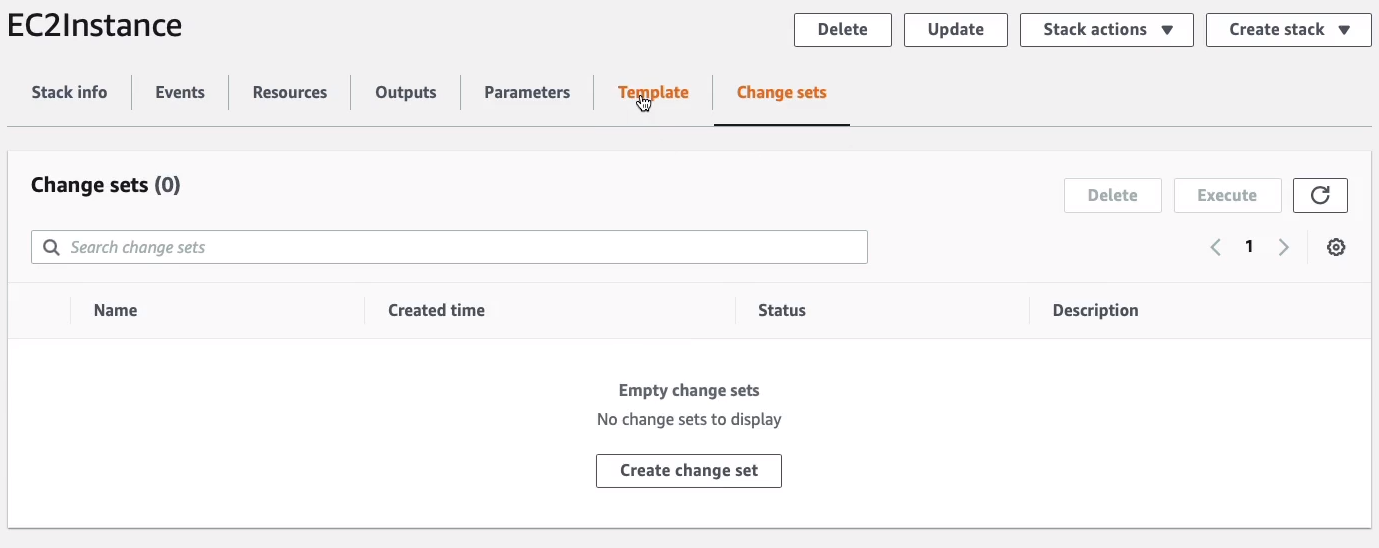
Then there’s something called a Change sets which helps us to test our changes before we put them into productio.
Now let’s just see in Services > Compute > EC2 > Instances. Sure enough, we now have a running instance.

Now let’s take a look at our 2nd template file, 2 EC2InstanceIP.yml. This template file is the same down to the Instance Type but then we have an additional resource. You can see the indentation helps you to understand the different levels. So we have Resources at the top and then indented is MyInstance. That’s one type of resource and then we MyEIP which is another type of resource. In that case, the Type under it is AWS EC2 EIP. It’s an Elastic IP address. Now the Properties has something called Reference (!Ref) function, which allows us to reference MyInstance. What this is going to do is it’s actually going to add an elastic IP address to our instance. Now, I mention that we could test our changes with a Change set. So what we are going to do is to go back to Services > Management & Governance > CloudFormation > Stacks > EC2Instance > Create change set. Replace current template. Upload a template file and then choose the 2 EC2InstanceIP.yml. Click on Next.
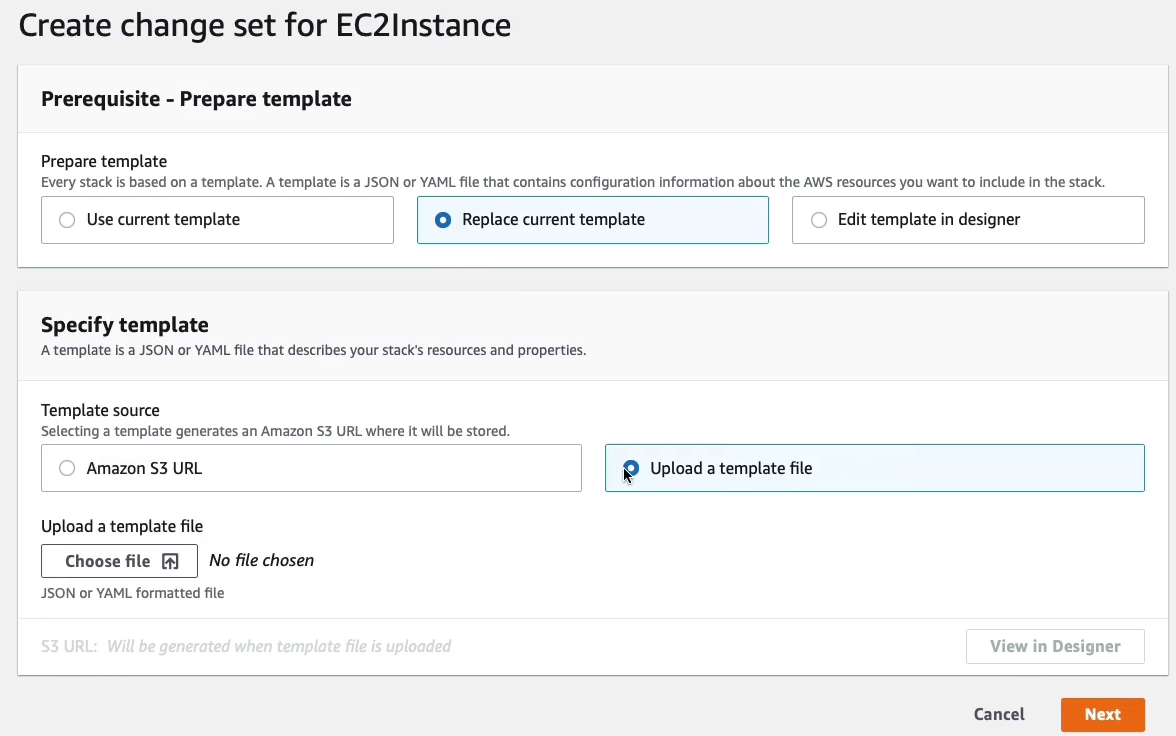
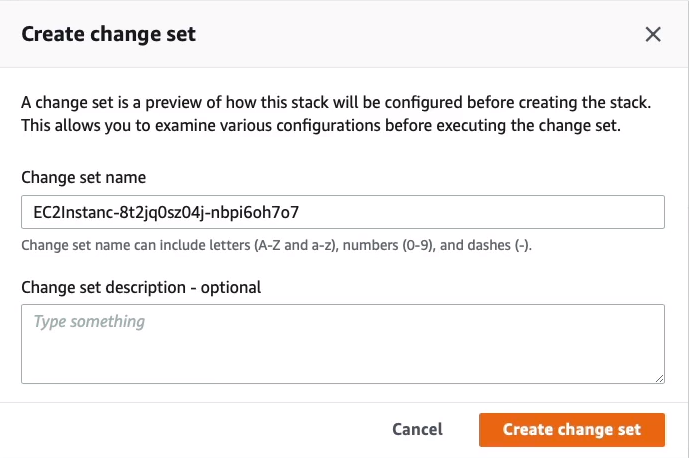
Click on Next again and then just go free until you can click on the Create change set button.
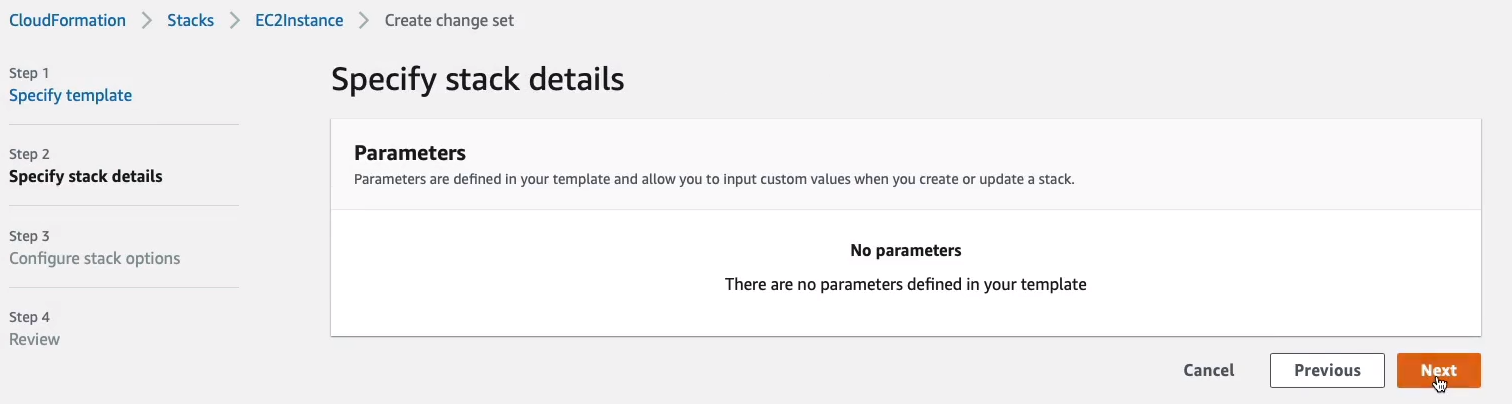
And we’re just going to create the change set with the configuration there.
This won’ take long. It’s going to validate what the changes would be if we actually deployed this live and then it gives us that feedback so we know what’s going to happen when we actually deploy this live. We’re not deploying this live yet. We’re just seeing what it’s going to do. So let’s just refresh and sure enough, the changes are that it’s going to add an Elastic IP address, simple as that.
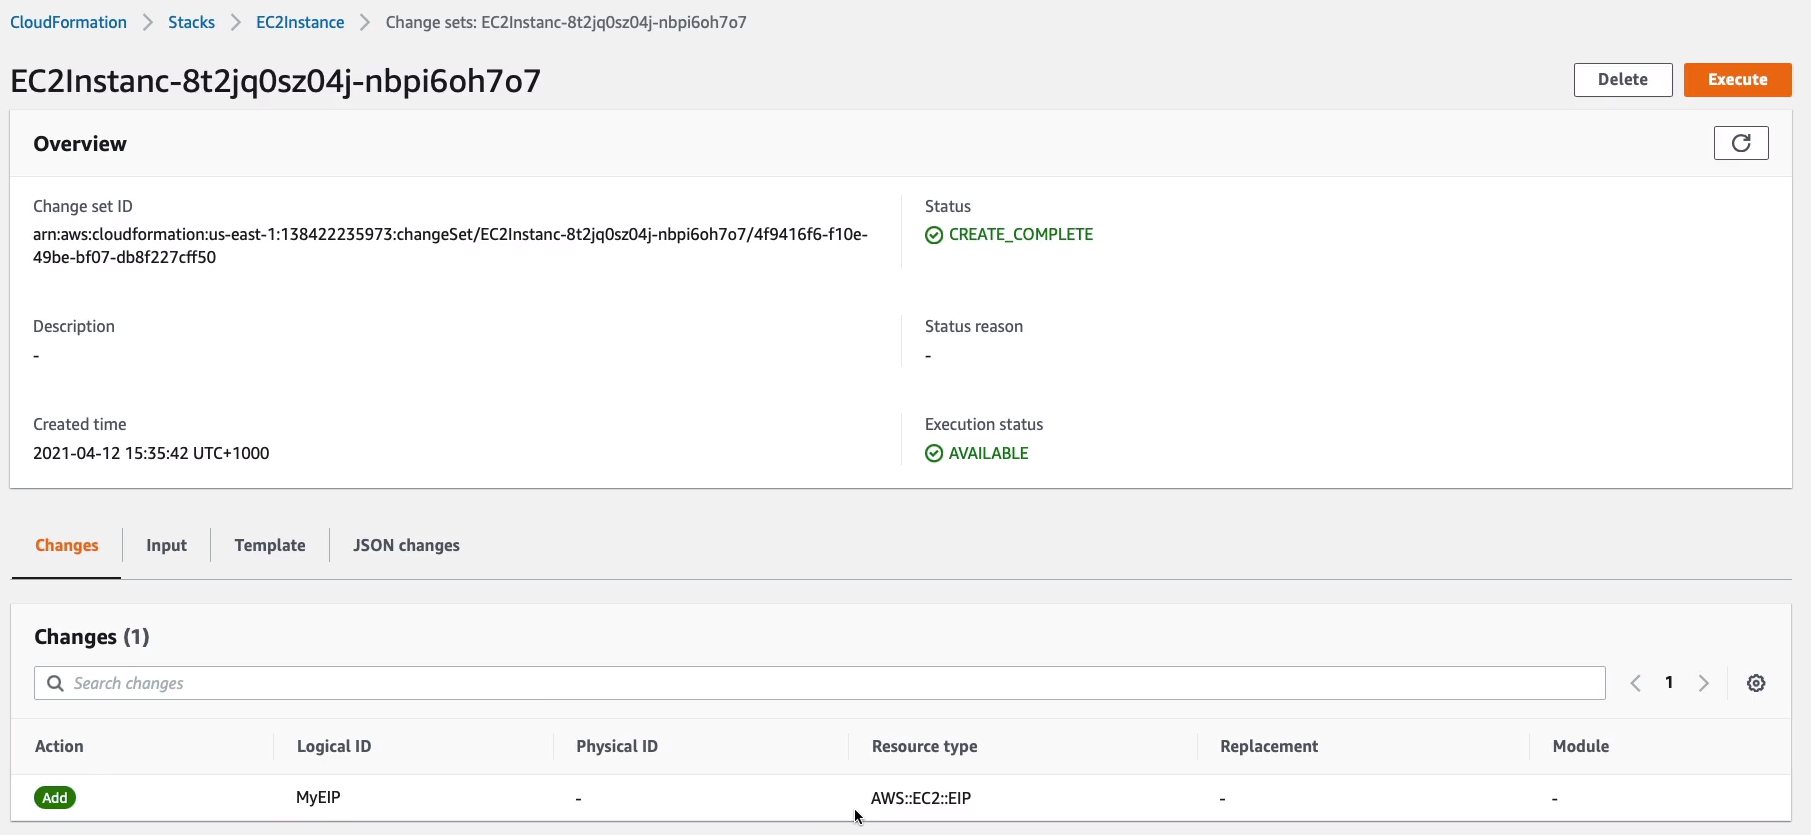
Now we can actually go and execute our change set and it’s going to deploy at that change into our production infrastructure, which shouldn’t take too long. That update is now complete.
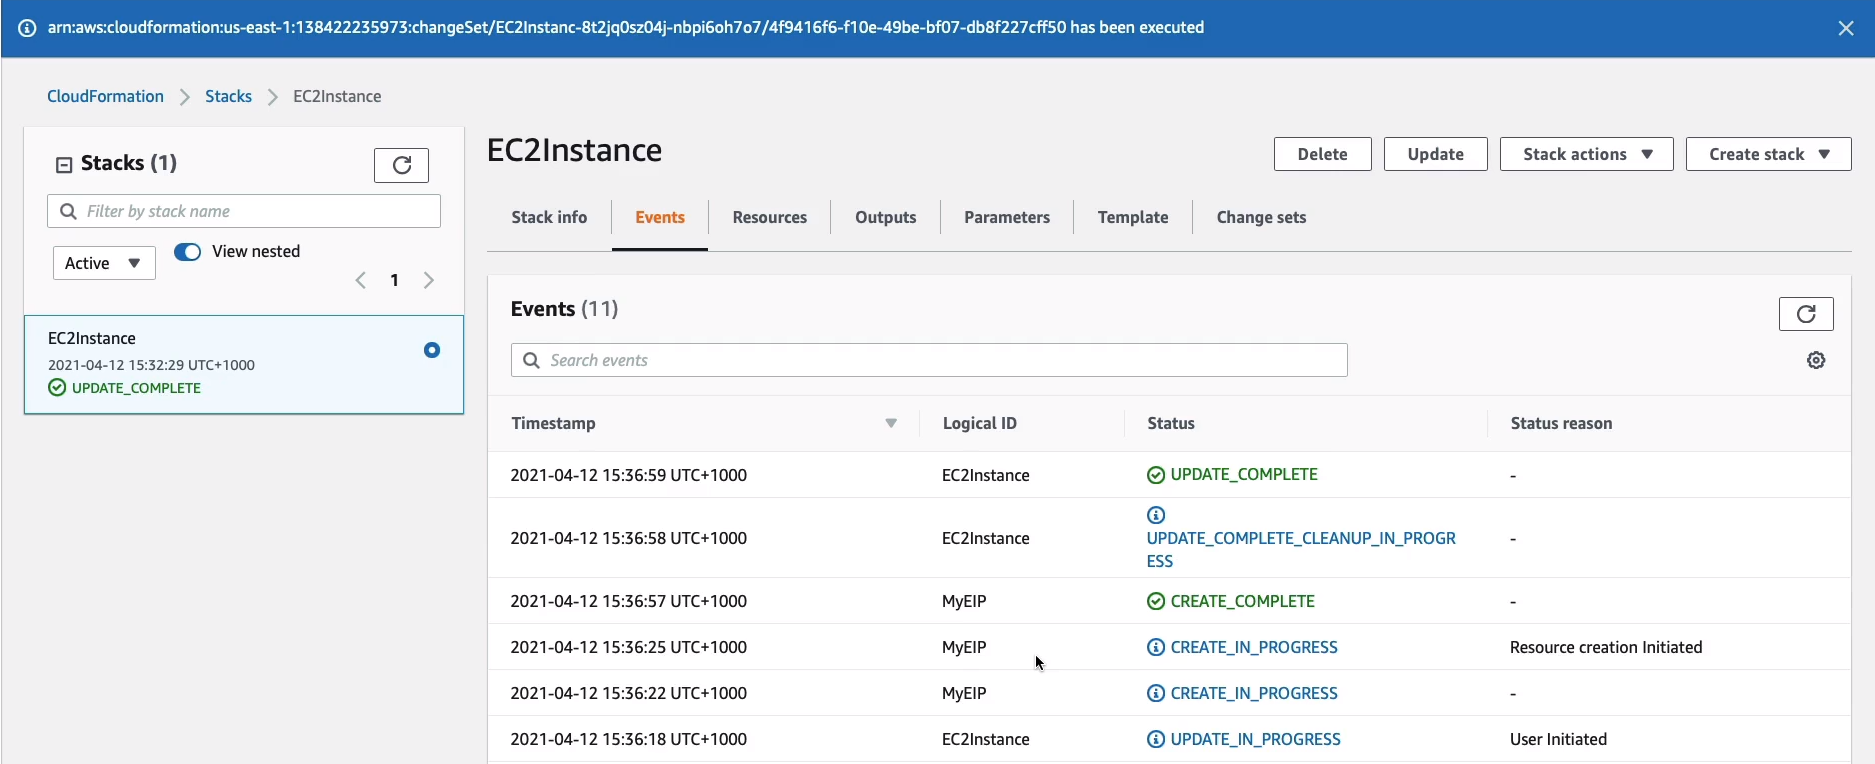
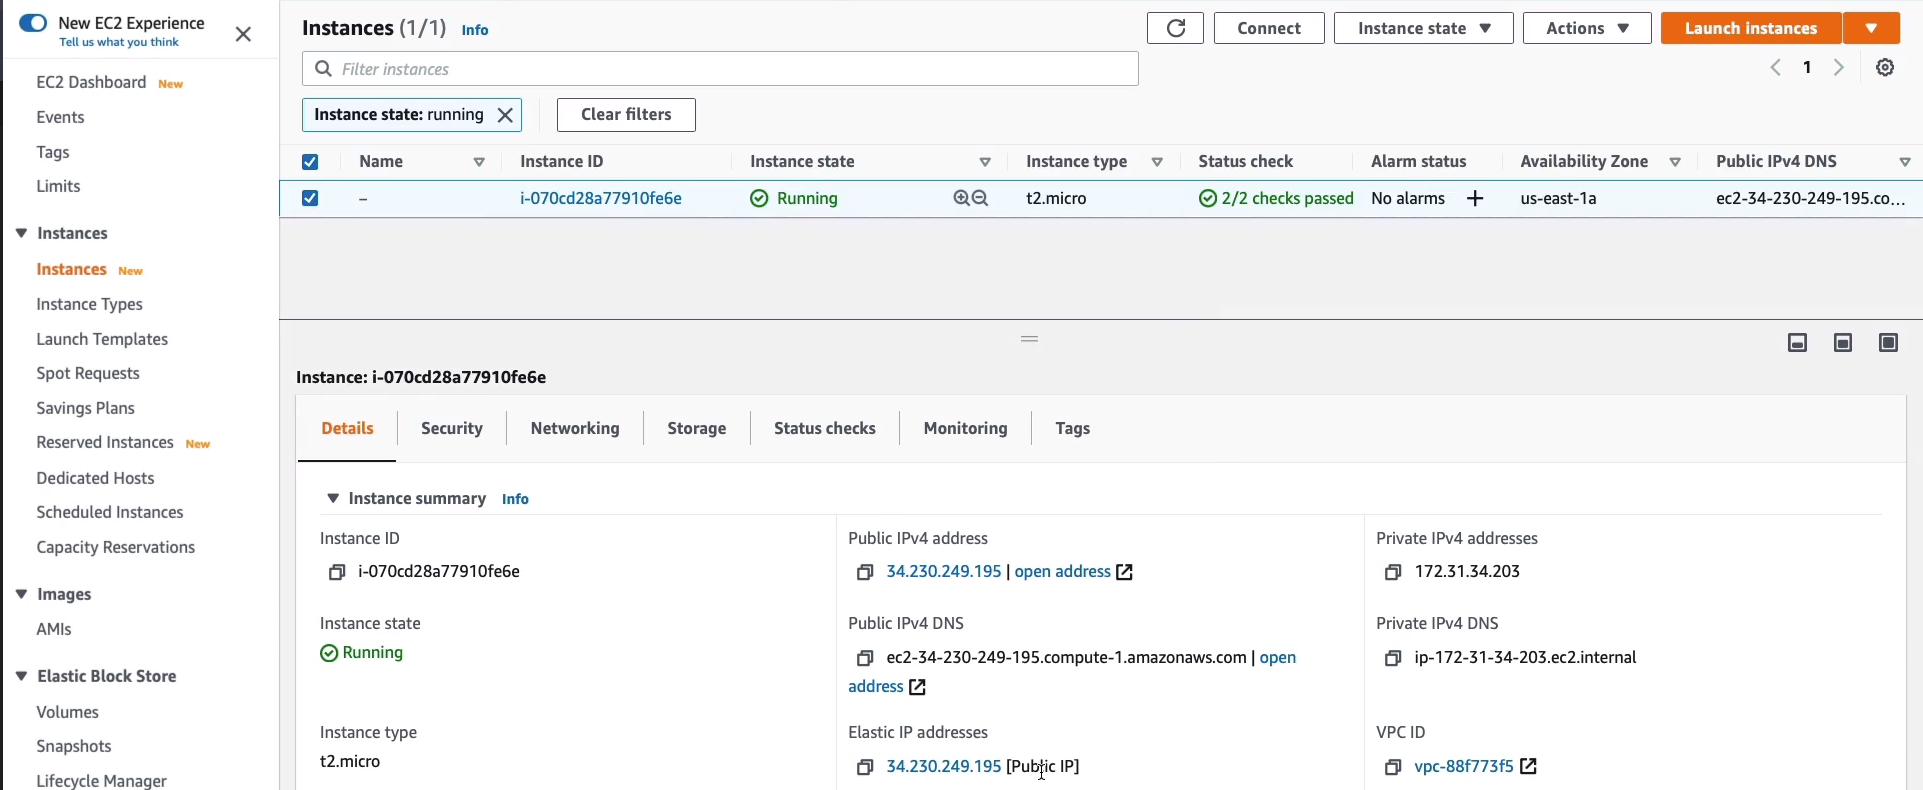
Let’s head back over to Services > Compute > EC2, with the instance selected, I can see it now has an elastic IP. So that worked very well.
Now, coming back to Services > Management & Governance > CloudFormation > Stacks, select our stack (EC2Instance), and then we’re going to delete the entire stack.
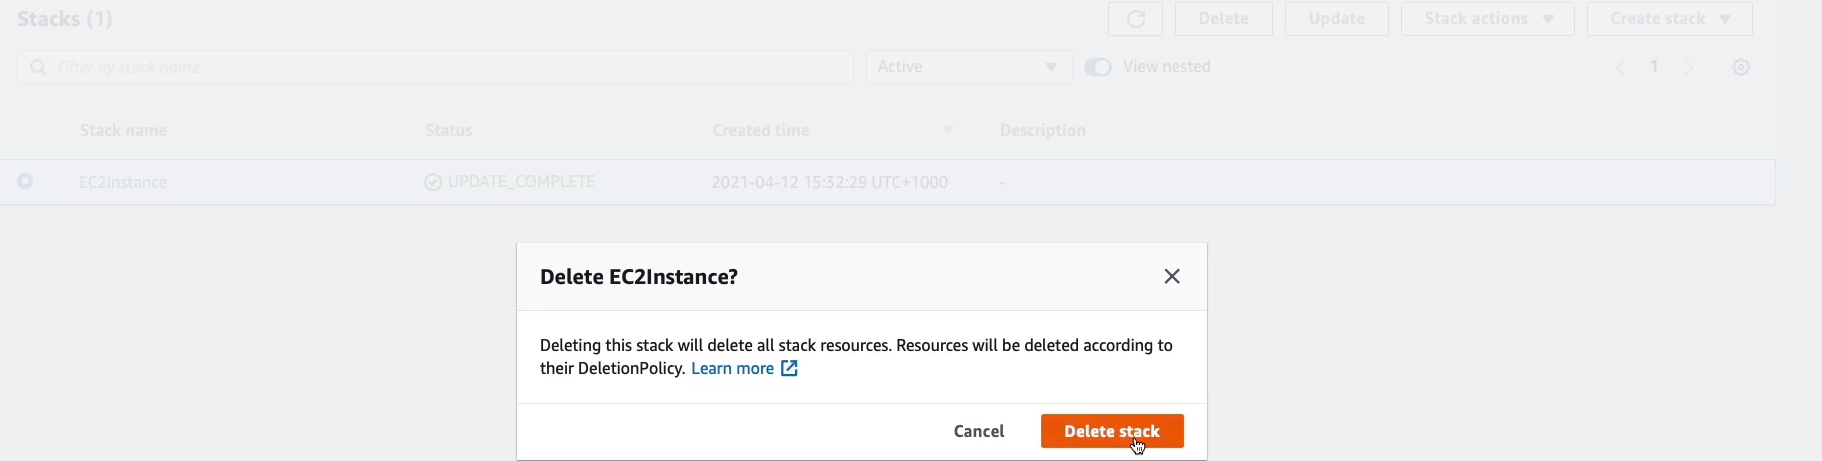
This should now actually roll back everything that it’s done. So it should terminate our EC2 instance, it should release elastic IP address and leave us with nothing behind.
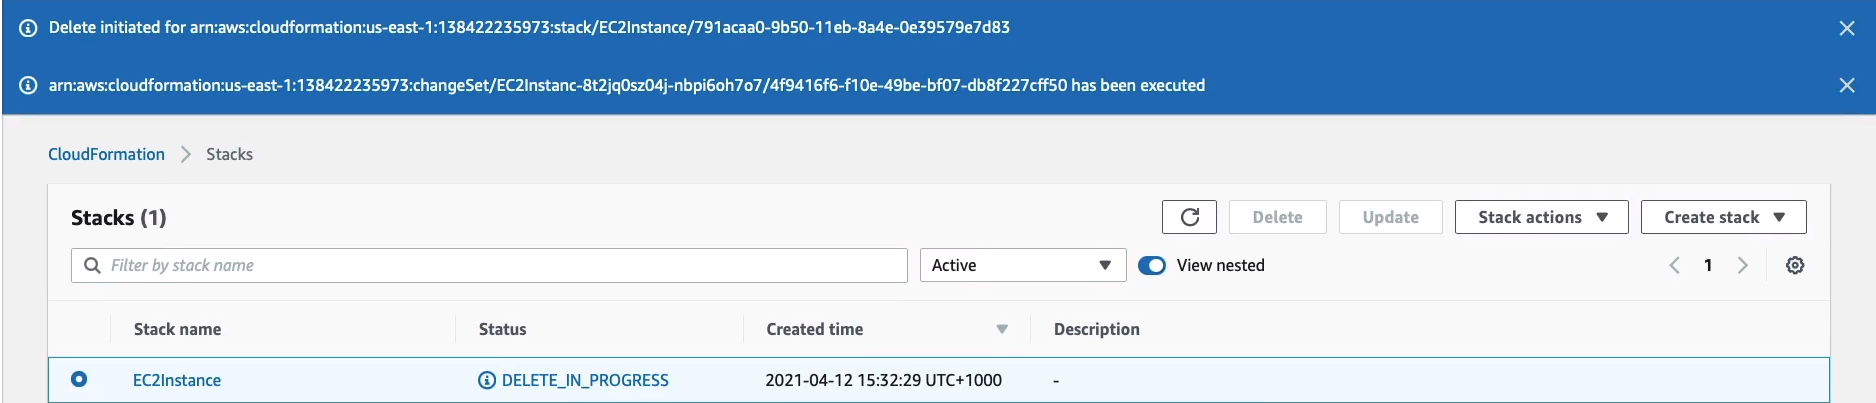
Now, it doesn’t always work that well. So with more complex templates, you’ve got to make sure you check that things have really been terminated properly. So in our instance, it’s very simple. Let’s come back to Services > Compute > EC2 and just refresh. We’ve got no running instances.

Let’s go to Services > Compute > EC2 > Network & Security > Elastic IPs, to make sure that we don’t have an elastic IP sitting in our account and there's nothing here.

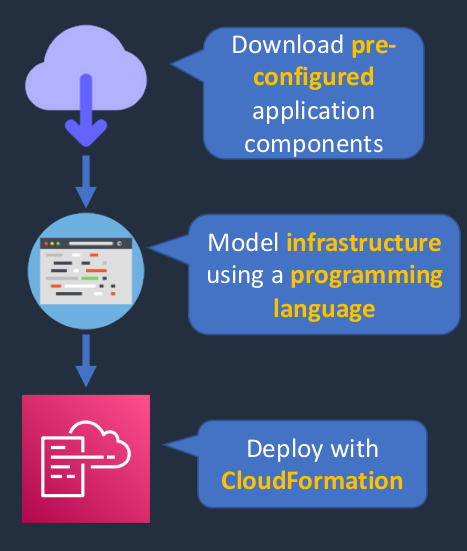
AWS Cloud Development Kit (CDK)
- Open-source software development framework to define your cloud application resources using familiar programming languages
- Preconfigures cloud resources with proven defaults using constructs
- Provisions your resources using AWS CloudFormation
- Enables you to model application infrastructure using TypeScript, Python, Java, and .NET
- Now, the CloudFormation templates are written in YAML or JSON. So maybe your developers aren’t familiar with those languages and they want to define their applications using Python and TypeScript or Java or .NET. So that’s what the Cloud Development Kit does.
- Use existing IDE, testing tools, and workflows patterns
AWS Elastic Beanstalk
The AWS Elastic Beanstalk service is a Platform as a Service solution. That means a platform is provisioned and managed for you onto which you can then deploy code for a Web application. We have a region with a VPC and then we create an Elastic Beanstalk Environment. Now, Beanstalk is really useful for developers because it means that they don’t need to manage the underlying infrastructure like EC2 instances and load balancers. The developer really just cares about their code. So they want to make sure that they spend their time writing great code, testing it, and have all that underlying infrastructure managed for them. So in this case, we have a developer, and the developer has a zip file with their code and they’re simply going to upload the zip file to Beanstalk. Beanstalk will then deploy the environment, the elastic load balancing, the auto-scaling group, the instances, and even a database as well. Now, in this case, everything within the Elastic Beanstalk environment. So within this orange box here is launched and managed by an Elastic Beanstalk. So the developer doesn’t need to worry about patching their EC2 instances. They don’t need to worry about configuring the auto-scaling group or the load balancer. They just define settings in an Elastic Beanstalk and upload their code and it does the rest for them. Beanstalk can be used to launch and manage EC2 instances and also docker containers on the Elastic Container Service.
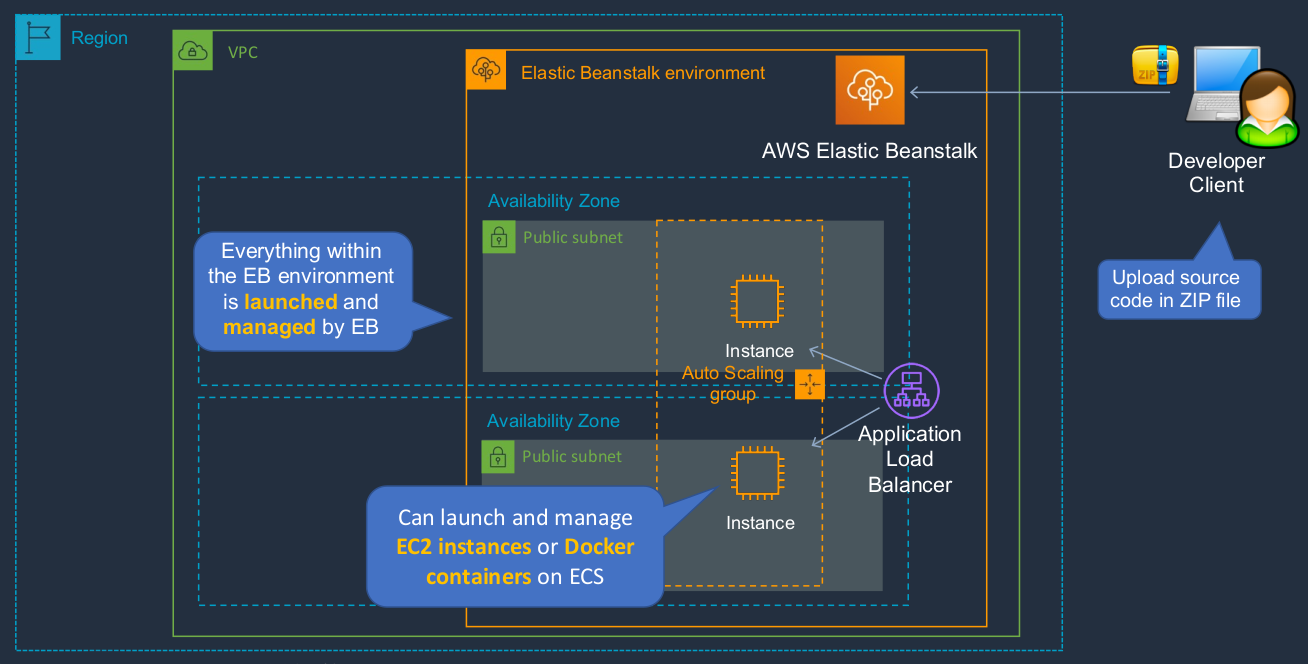
- Supports Java, .NET, PHP, Node.js, Python, Ruby, Go, and Docker web applications
- Integrates with VPC
- Integrates with IAM
- Can provision most database instances
- For example, Elastic Beanstalk can provision an RDS database for you
- Allows full control of the underlying resources
- So you’ve got a good mixture of having those underlying resources managed for you whilst also having root access so you could install your own software or configurations
- Code is deployed using a WAR file or Git repository
| CloudFormation | Elastic Beanstalk |
|---|---|
| "Template-driven provisioning | "Web apps made easy” |
| Deploys infrastructure using code | Deploys applications of EC2 (PaaS) |
| Can be used to deploy almost any AWS service | Deploys web applications based on Java, .NET, PHP, Node.js, Python, Ruby, Go, and Docker |
| Uses JSON or YAML template files | Use ZIP or WAR files (or Git) |
| Similar to Terraform | Similar to Google App Engine |
Deploy a Web Application
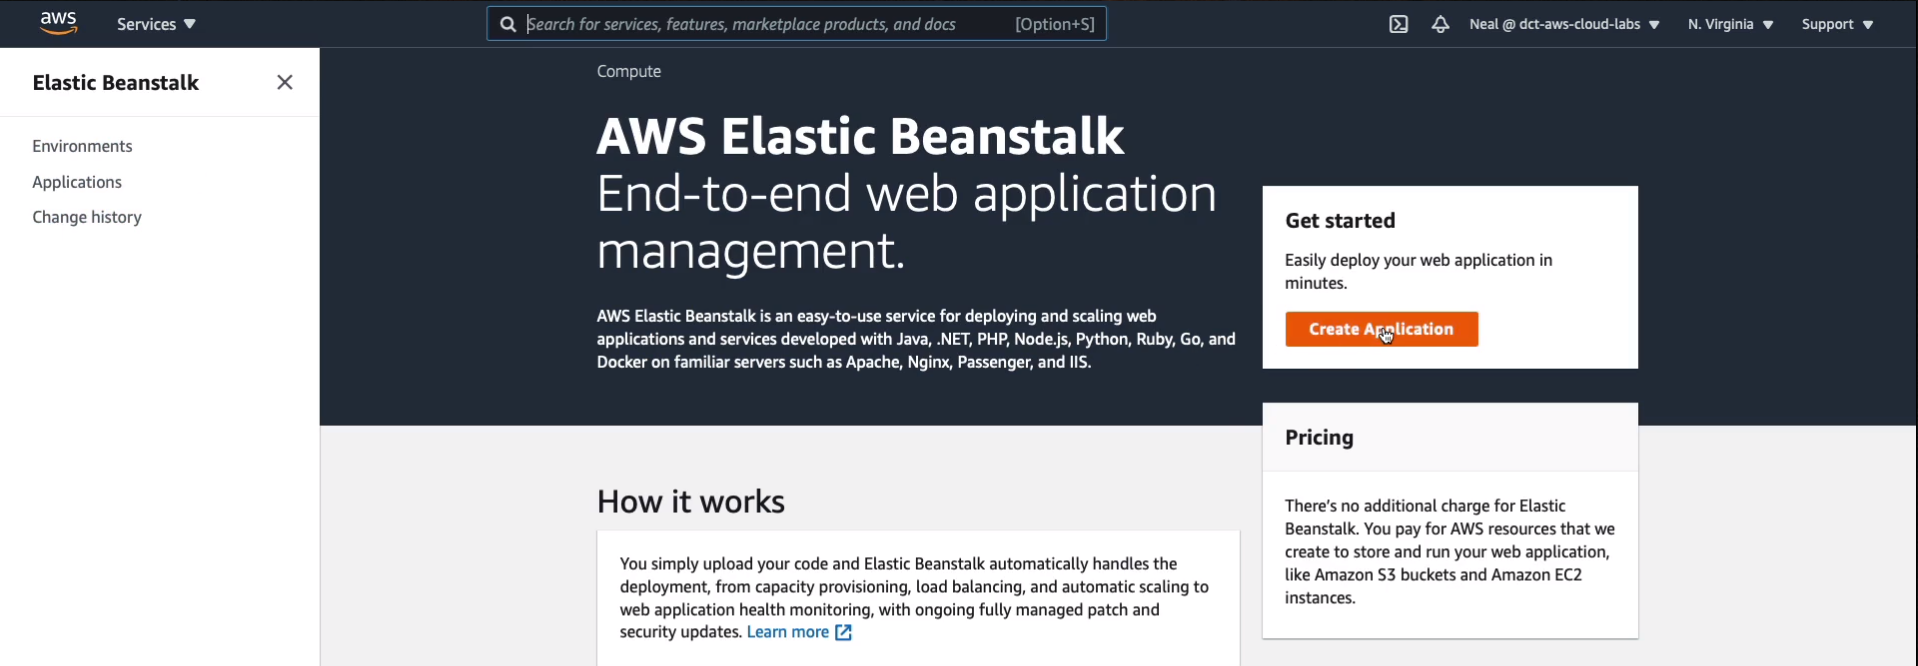
In the Management Console, I’m going to go to Services > Compute > Elastic Beanstalk. In Elastic Beanstalk, on the left, we have Environments, Applications, and Change history. Now we don’t have anything yet, so we need to create our first application. So we just choose to Create Application.
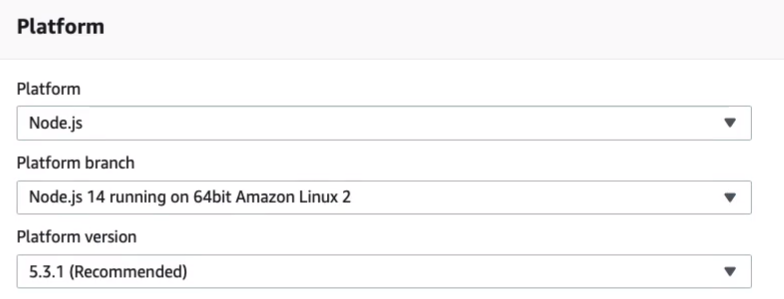
We need to give it a name. I’m just gonna call it MyWebApp. We don’t need to give it any Tags, but we do need to specify a Platform. So this is where you can see we have various different options. We can run .NET Core on Linux or Windows, Docker, GlassFish, Go, Java, Node.js, and so on. Now, for this, I’m just going to choose Node.js.

I’m going to leave the defaults here. It’s going to run it on Amazon Linux 2.
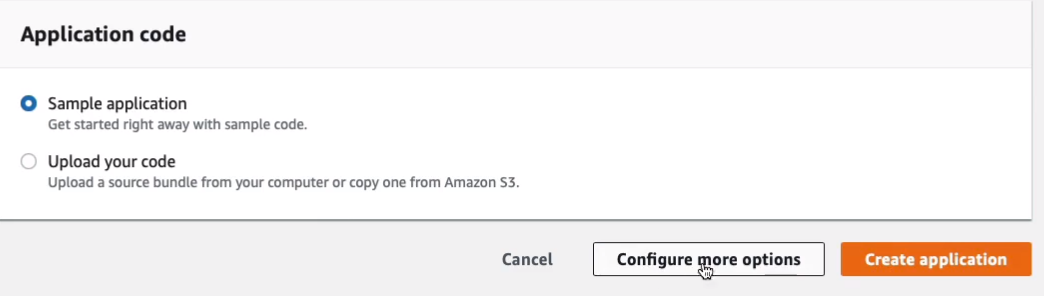
Now, we can just use a Sample application or you can choose to Upload your code. Now, we don’t have any code at this point. So what I’m going to do is just use a simple Sample application. You could have just uploaded the code for your web application here and that would be all you need to do. You can create your application and it’s going to get deployed or you can choose to Configure more options.
Once we’ve done that, we have some more configurations and at the top part, there are some Configuration presets that are very useful. So what we’re doing is using the Single Instance (Free Tier eligible). It’s just going to deploy a single EC2 instance running our Web application. Now, you could use Spot instances or you could enable High availability. When I do that, it actually changed some of the configurations in the boxes underneath. So now, we have the load balancing and auto-scaling as well.
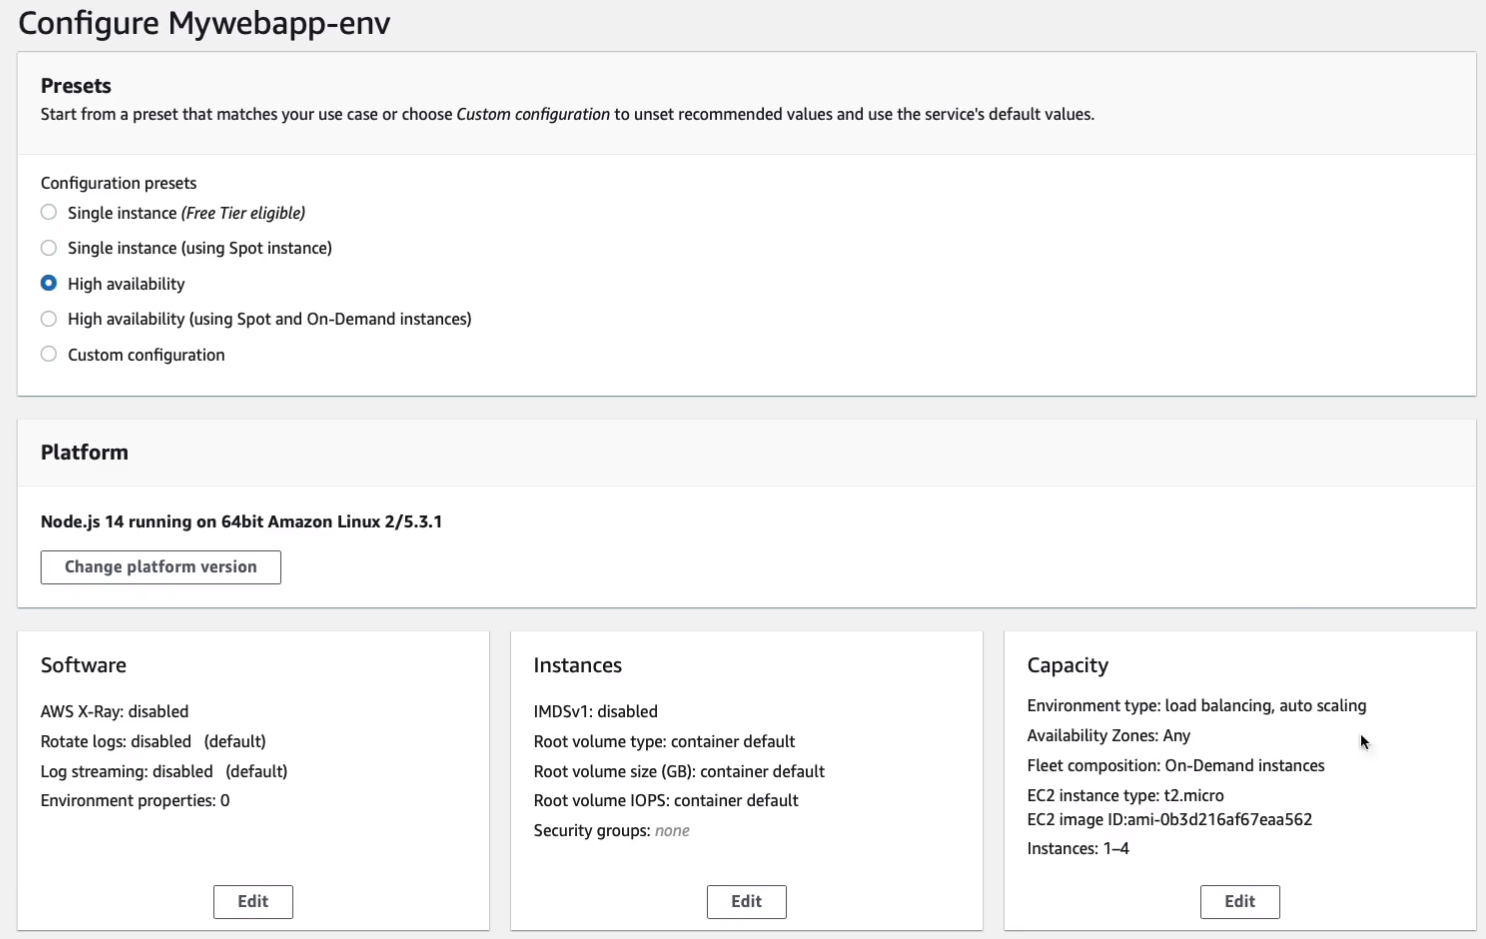
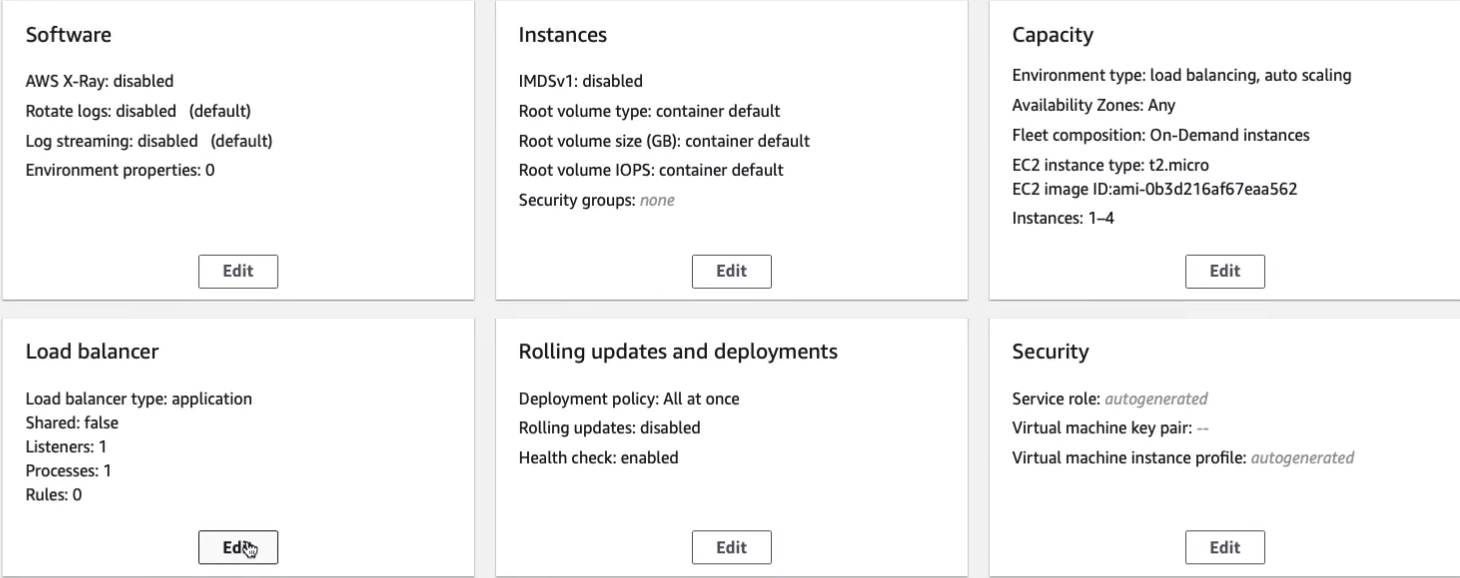
You see, now that I’ve chosen High Availability, the load balancer has a listener and a process and that therefore has a configuration set up to create a load balancer. You can go in and Edit this if you want to and change any of those settings.
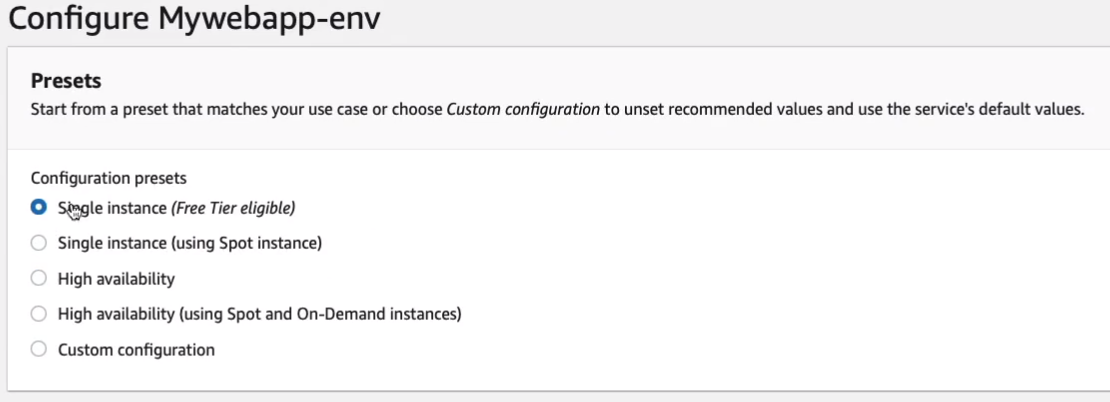
So there’s a quite a lot of options there. Now, I’m just going to go back to the Single instance and it’s going to change all of these presets for me just simply click on Create app.
Now, Beanstalk can take several minutes to create. So you might want to just sort of watch what’s happening here or you can actually go and have a look at what’s happening behind the scenes.
So let’s go and have a look at Services > Management & Governance > CloudFormation. Now, the reason I’m showing you this is because Beanstalk uses CloudFormation. CloudFormation is actually deploying this stack. So it’s creating a stack for Elastic Beanstalk.

So we can watch in CloudFormation and see our stack being created. Let’s go to Events and we can see what’s going on. We can watch the details here.
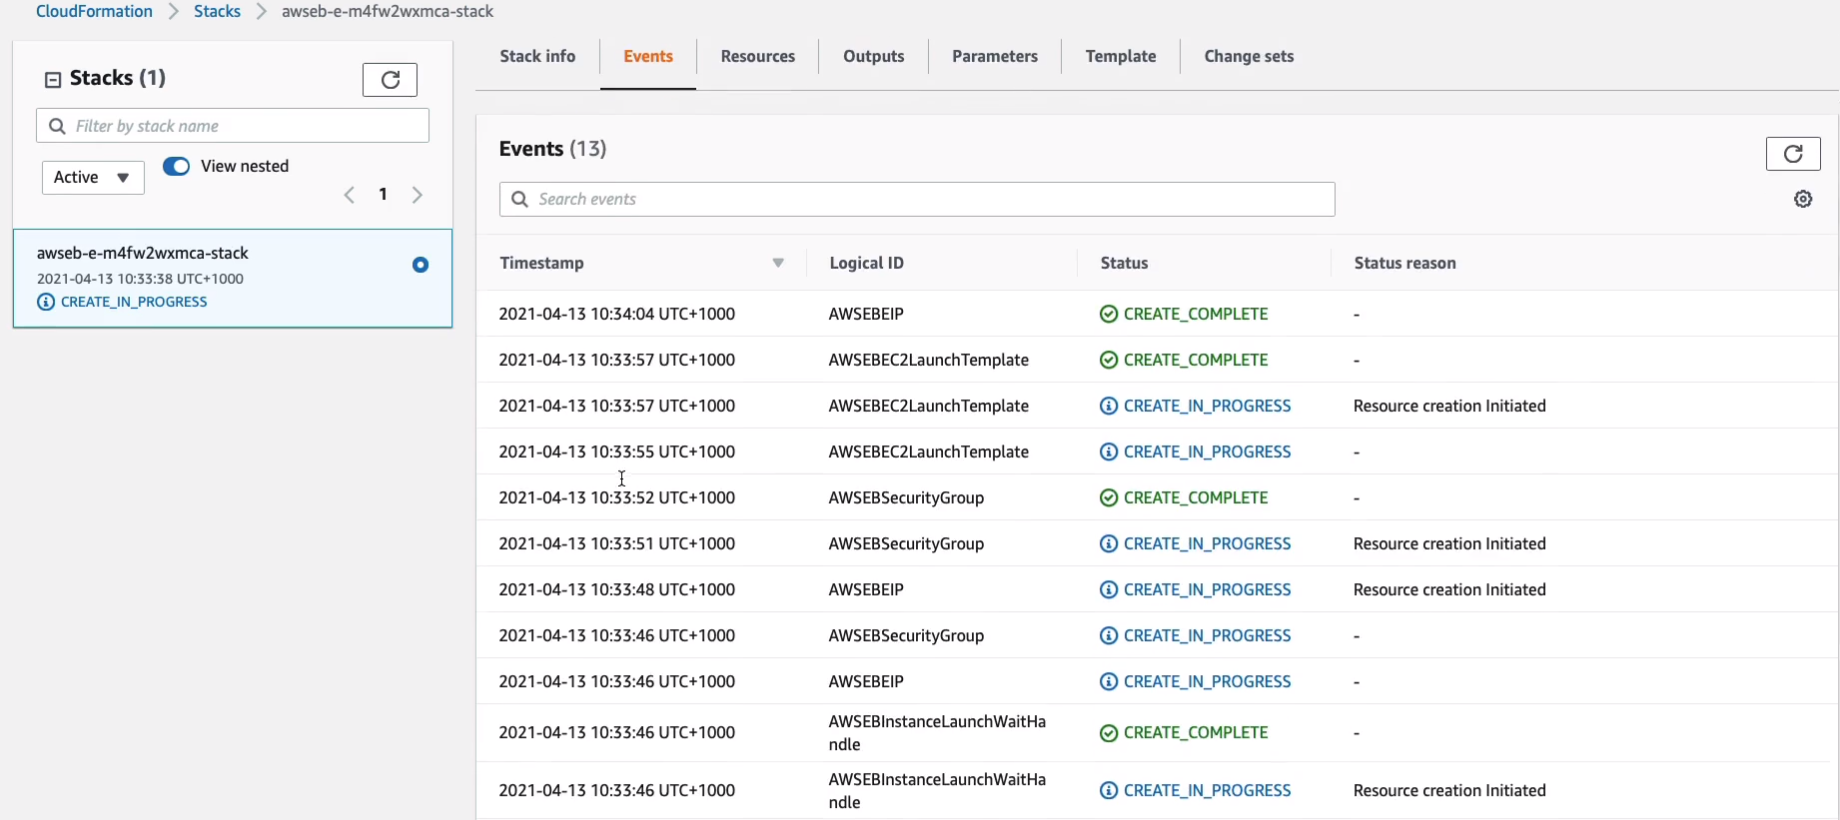
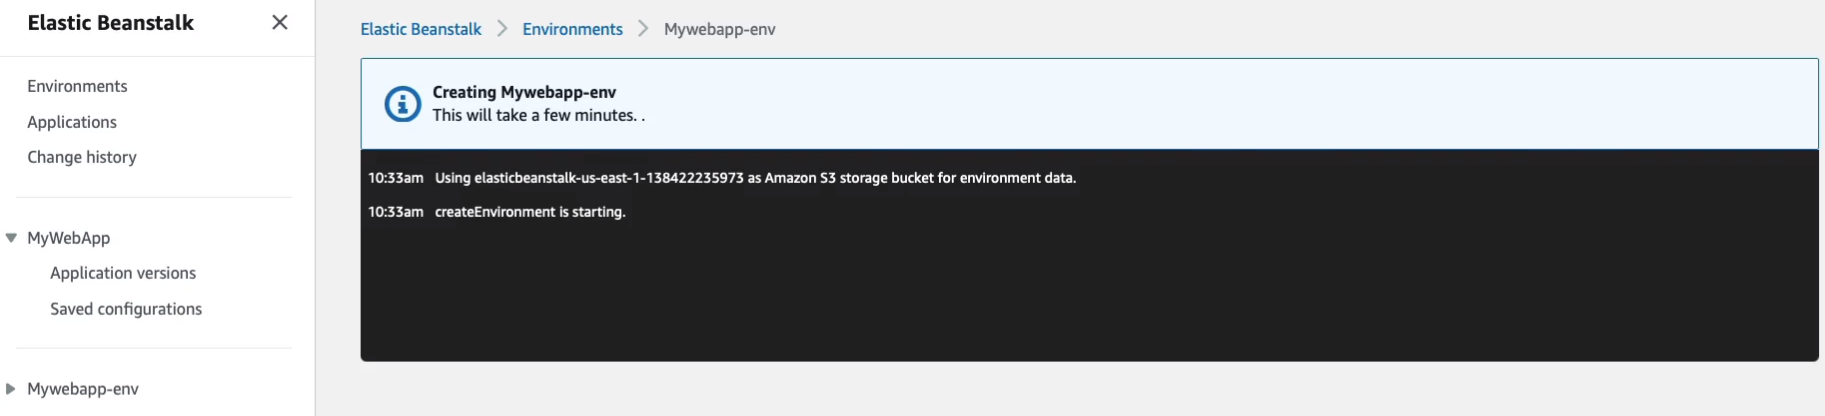
We can also head across to Services > Compute > EC2 if we like as well because it’s going to be creating our EC2 instance. We can see we have an instance in the Pending state and we can tell that this is being created by Elastic Beanstalk. We called it Mywebapp-env.

Let’s go back to our create environment and I’m just going to give this several minutes to complete. That took a few minutes and now it’s complete and this is what we see. So we can see that we now have a healthy Elastic Beanstalk environment and we can tell it’s running Node.js and we can also Upload and deploy new versions of our code if we wanted to make an update.
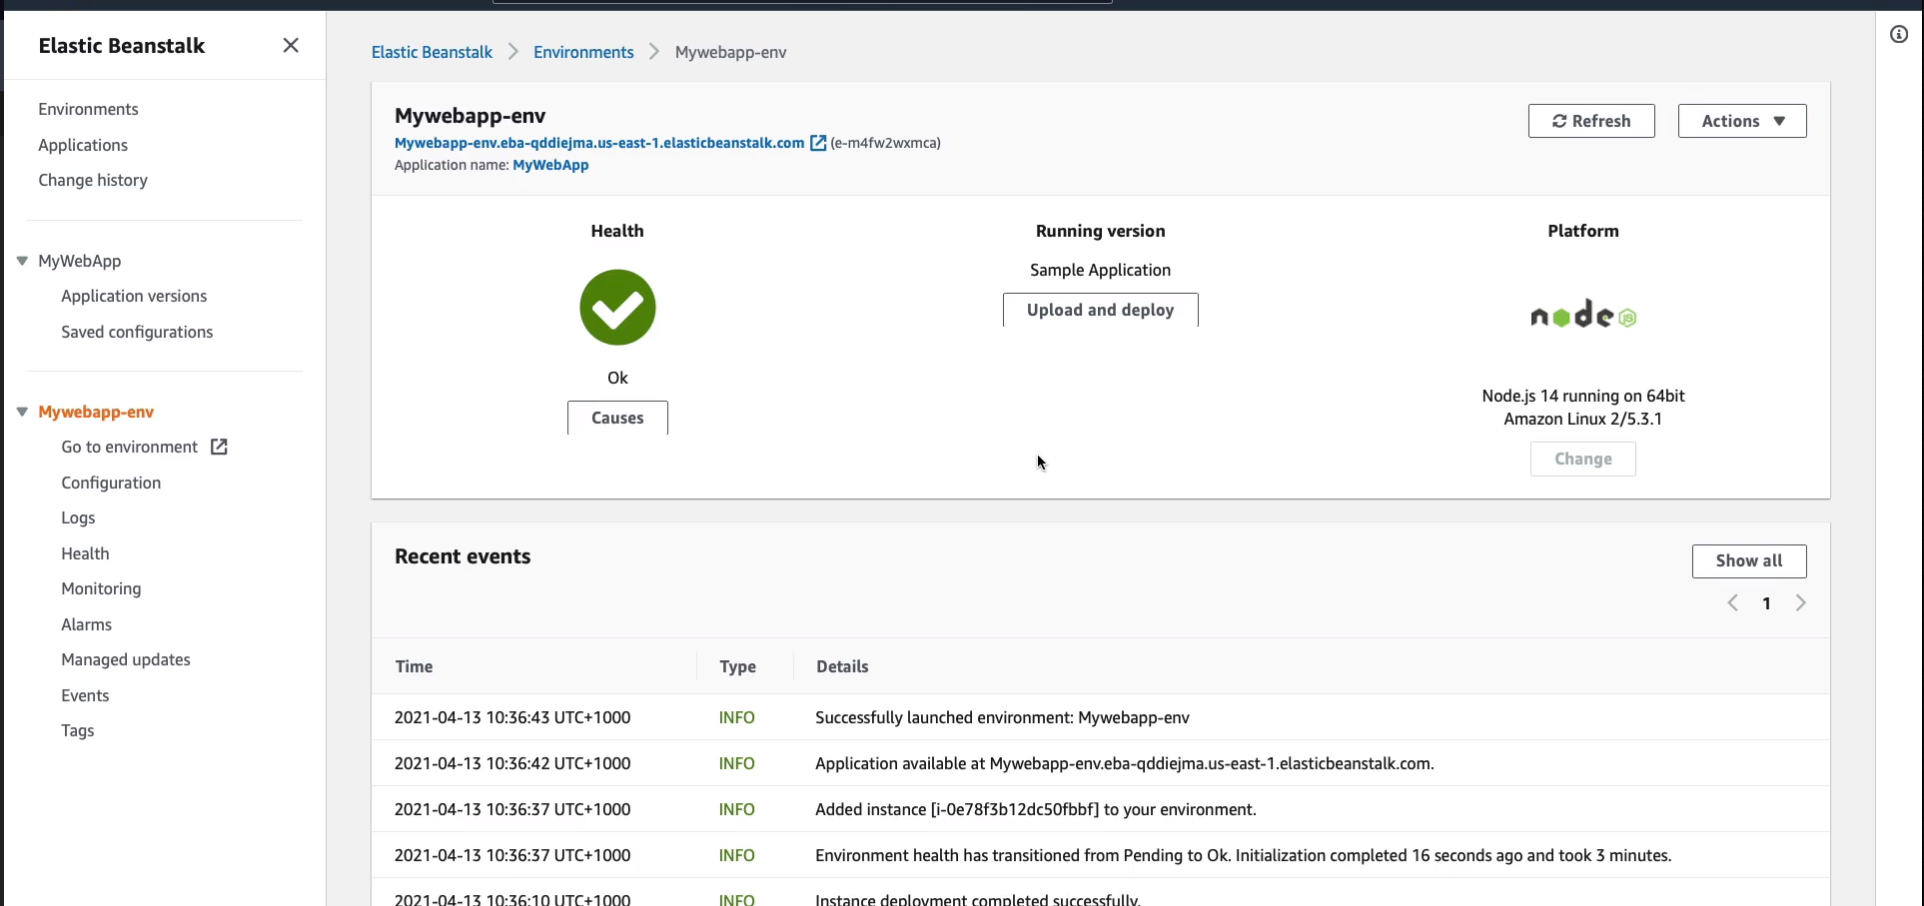
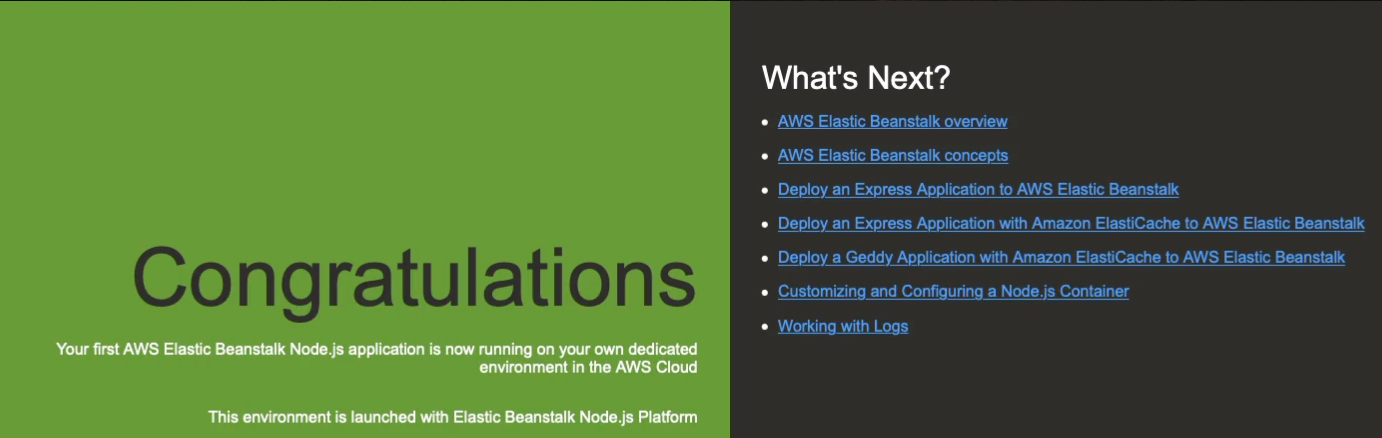
At this point, you can also click on this link and it will take you to a Web page, which is the actual Web application.
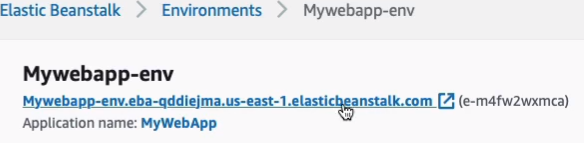
In this case, it’s the sample Node.js application.
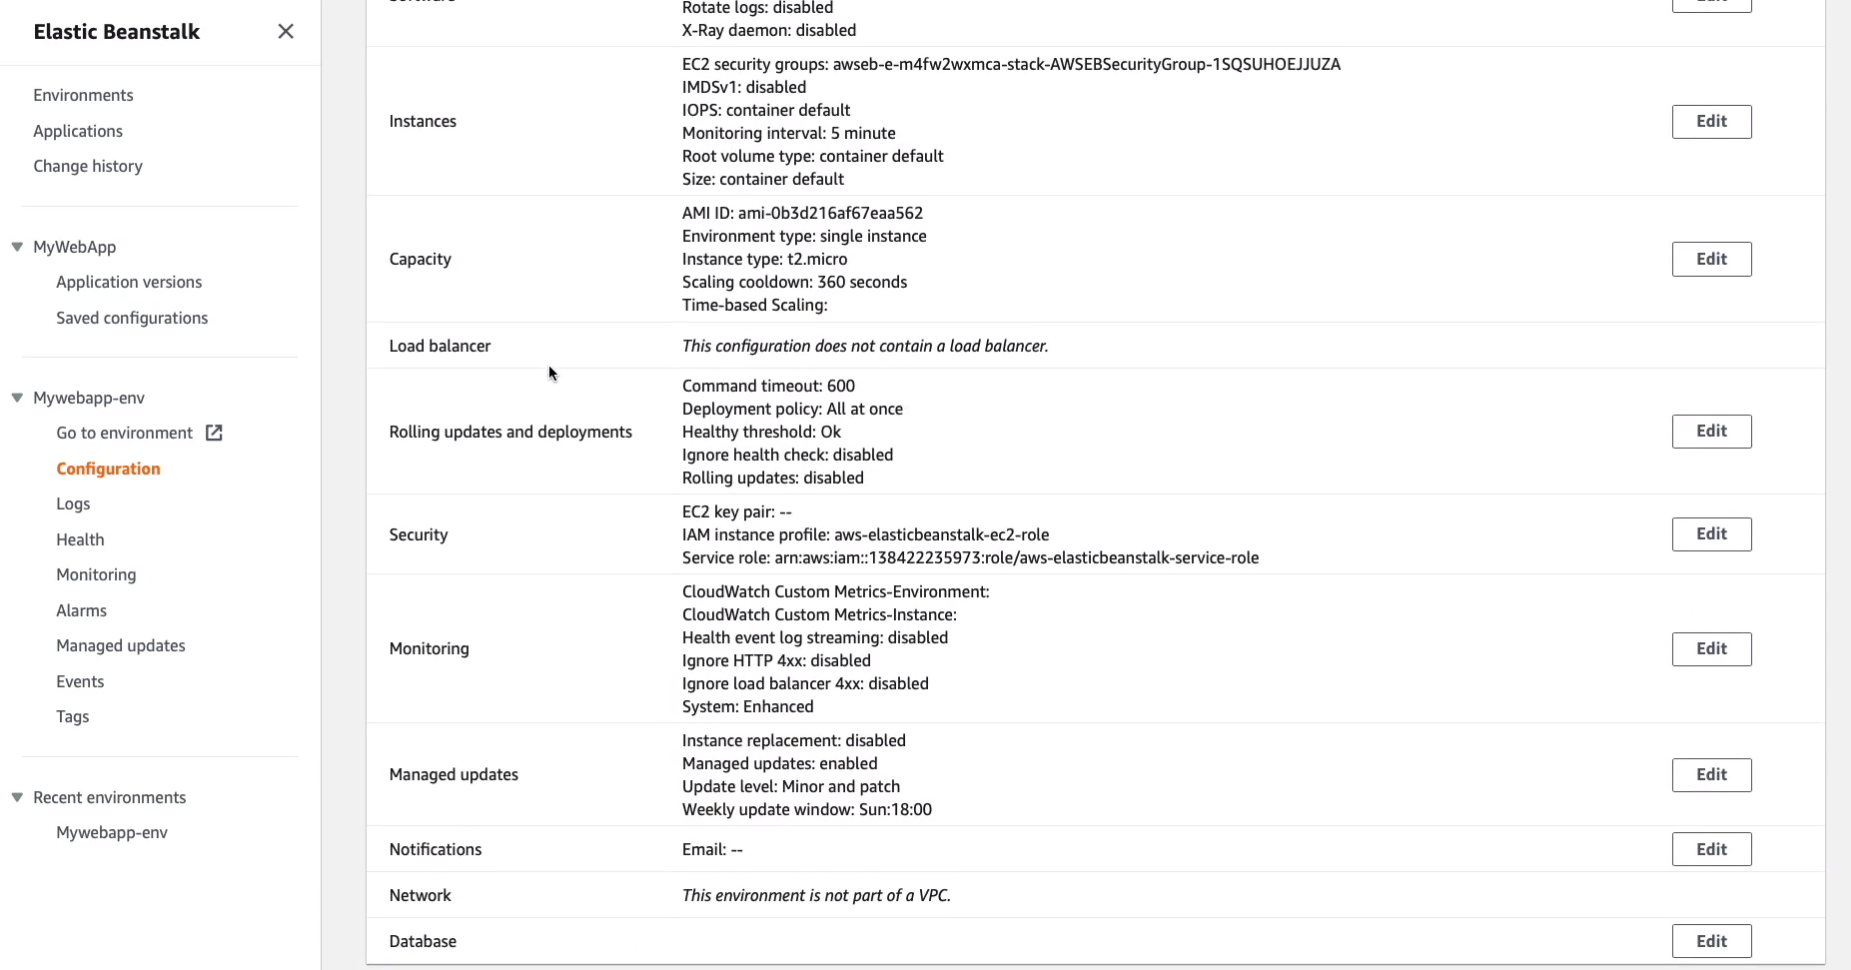
Back in the console, we have our environment on the left-hand side and so we can actually configure our environment here and we can look at logs and monitoring and so on. So this is the configuration. You can make edits here and it will push those changes out for you.
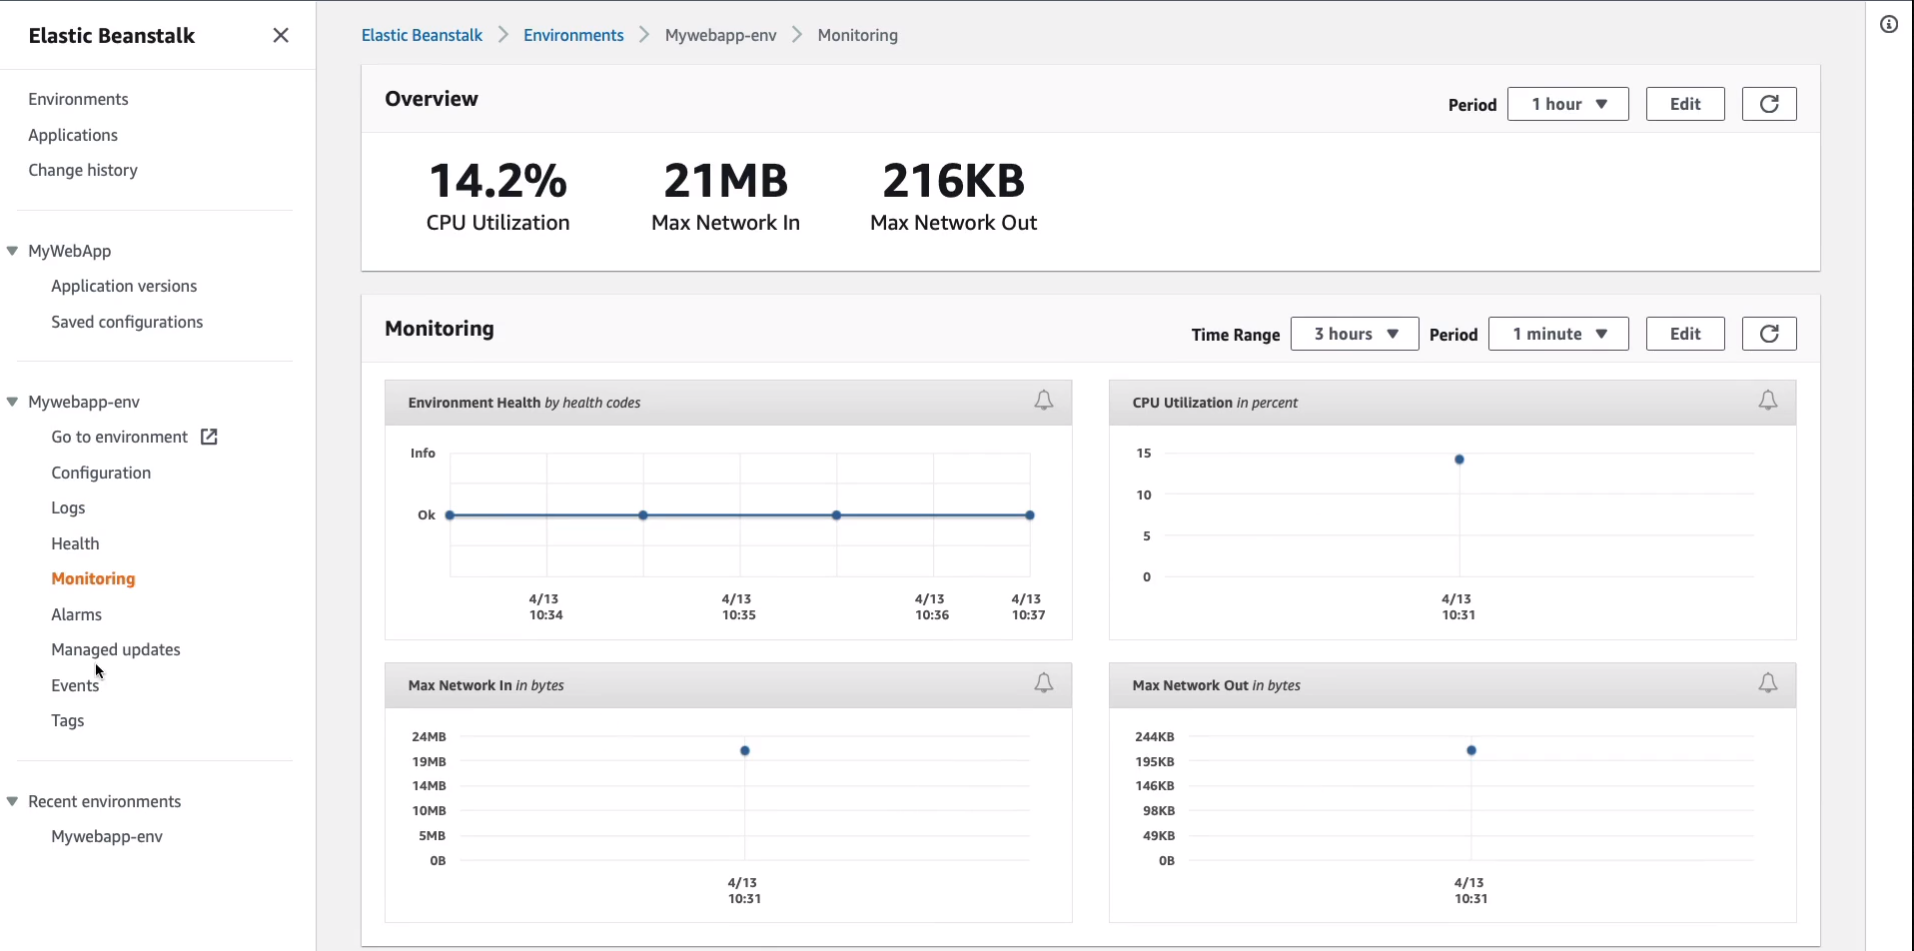
Under Monitoring, you can have a look and see what’s going on. We can see the CPU utilization and the networking information.
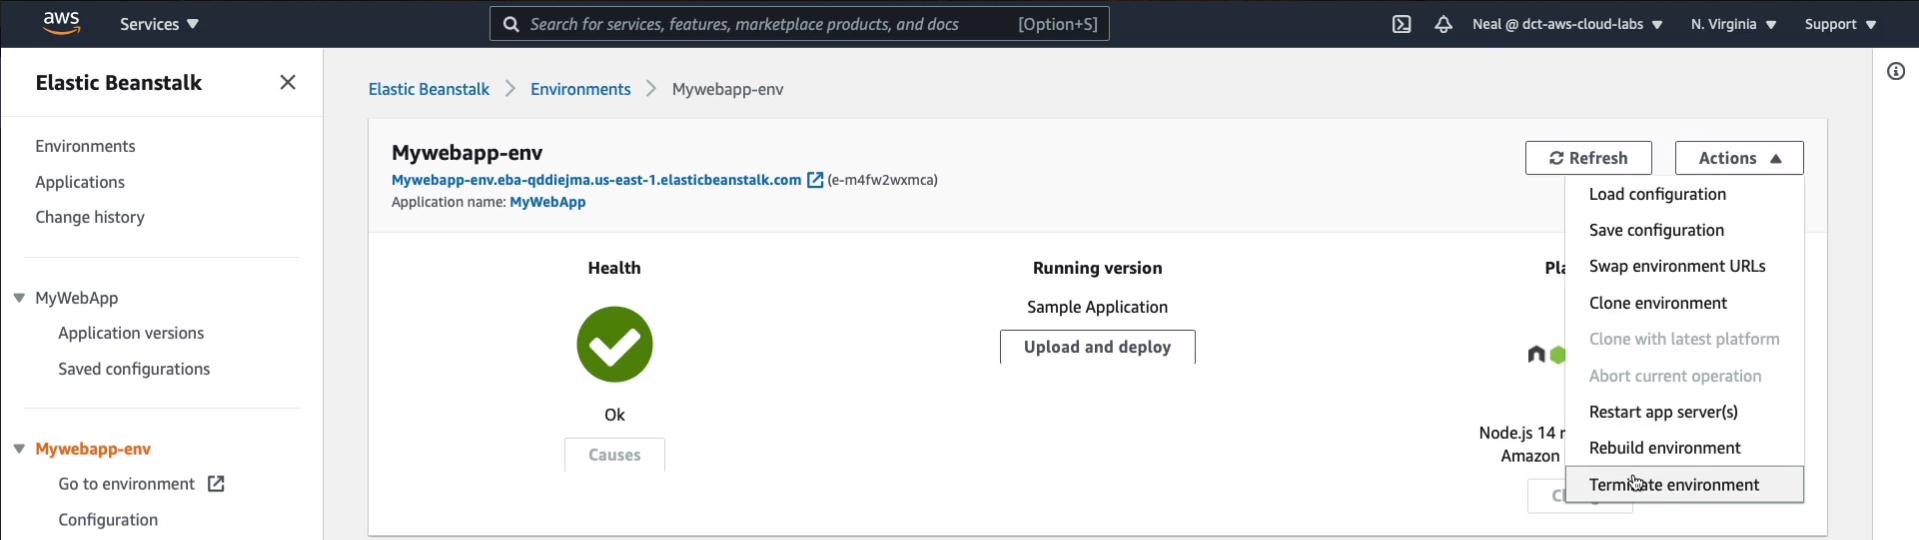
So Beanstalk is a service that’s giving us a method of just concentrating on our code and then we can configure things through here on the left-side, which otherwise we would need to do for different services or through actual direct integration with EC2 or with our instance itself. So it takes away a lot of that administration and management overhead. So back at the top level, Mywebapp-env. I’m going to click on Actions and Terminate environment.
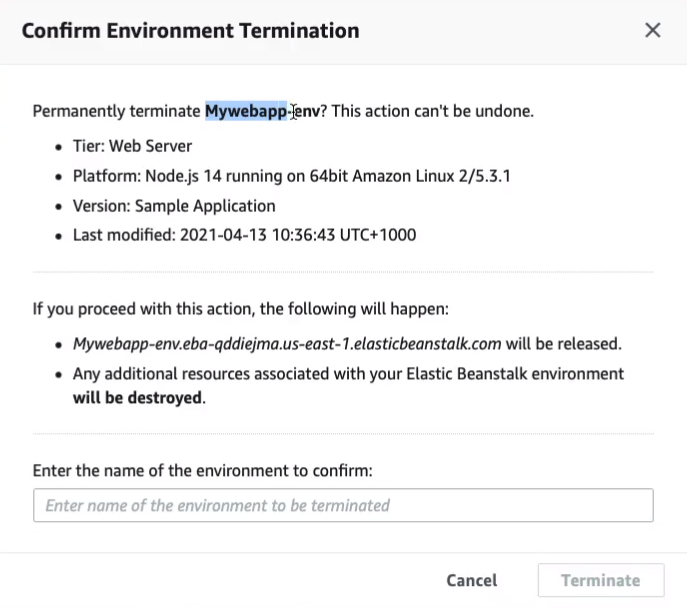
Copy the name of the environment, paste that in, and then Terminate.
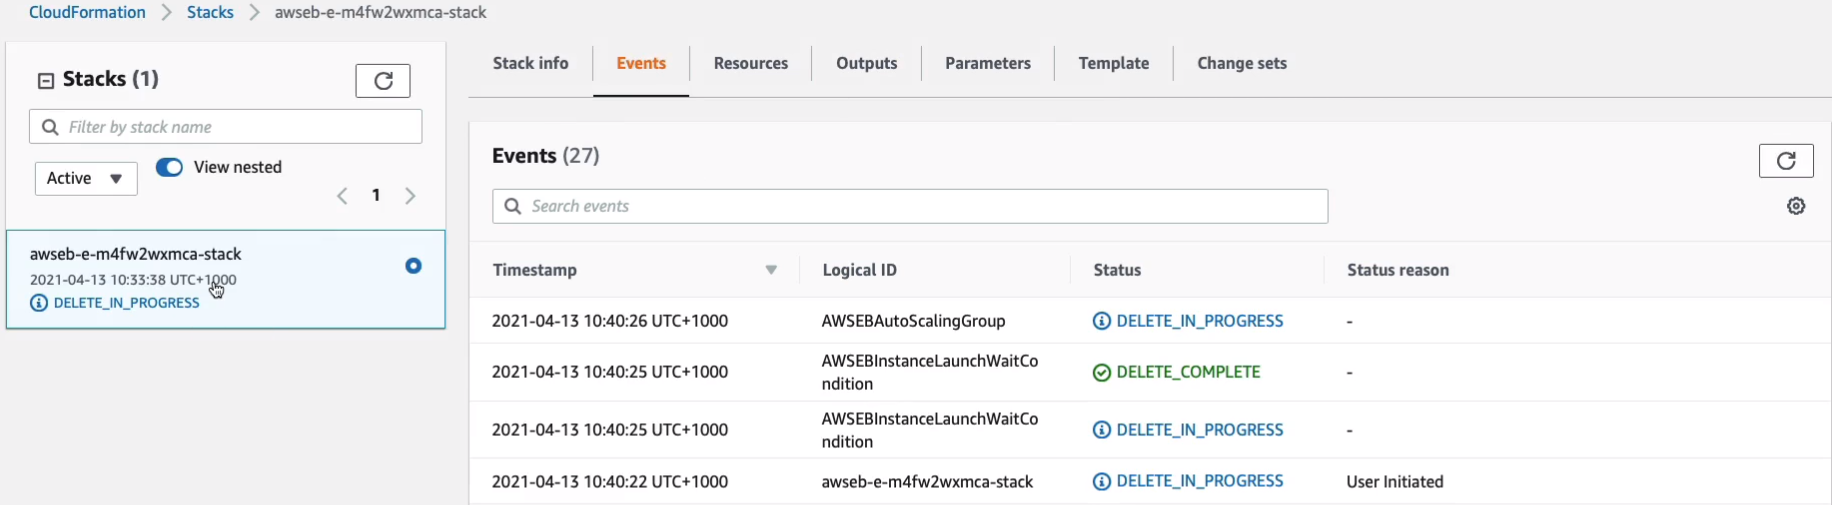
And then what that’s going to do is it’s going to communicate with CloudFormation and terminate our stack. So if we head back to CloudFormation and refresh, we should find we’ve got Delete in progress and so all our resources should now be terminated for us.
AWS Developer Tools (Code*)
The developer tools are used in continuous integration and continuous delivery.
Continuous Integration
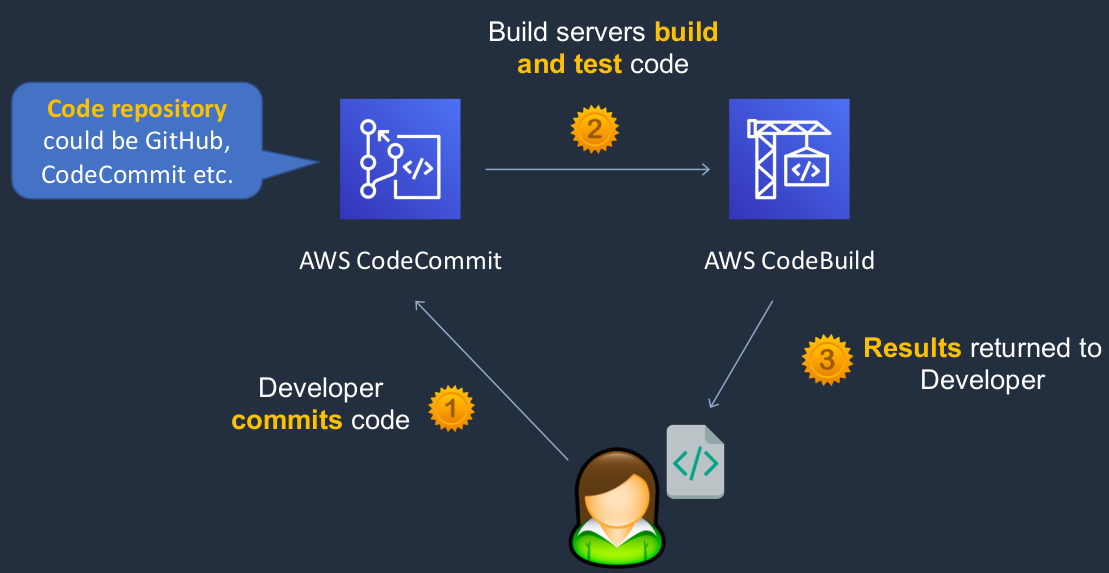
Now, this is really useful to understand if you’re working in any cloud environment where developers are developing applications that are built for the cloud because they’re very likely to use this kind of software development process. So we have a Developer and we have a service called CodeCommit. Now, CodeCommit is similar to Github, if you what that is. It’s a place where you can put your code so you can commit your code to AWS CodeCommit and you can then collaborate with other workers, other developers who are also writing code and it kind of manages it in one central place for you. So this is a code repository, similar to Github. So the developer uploads their code and commits it to CodeCommit. We then have a service called CodeBuild. What CodeBuild does is actually build and test the code. So it takes the raw code from CodeCommit and it’s then able to build it into a way that it can be run and tested. It can then return the results to the developer and now the cycle continues again. So the developer has some updates to make, makes the updates, commits them to CodeCommit, and then pushes to CodeBuild automatically, which then builds and tests and returns some results.
Continuous Integration and Continuous Delivery
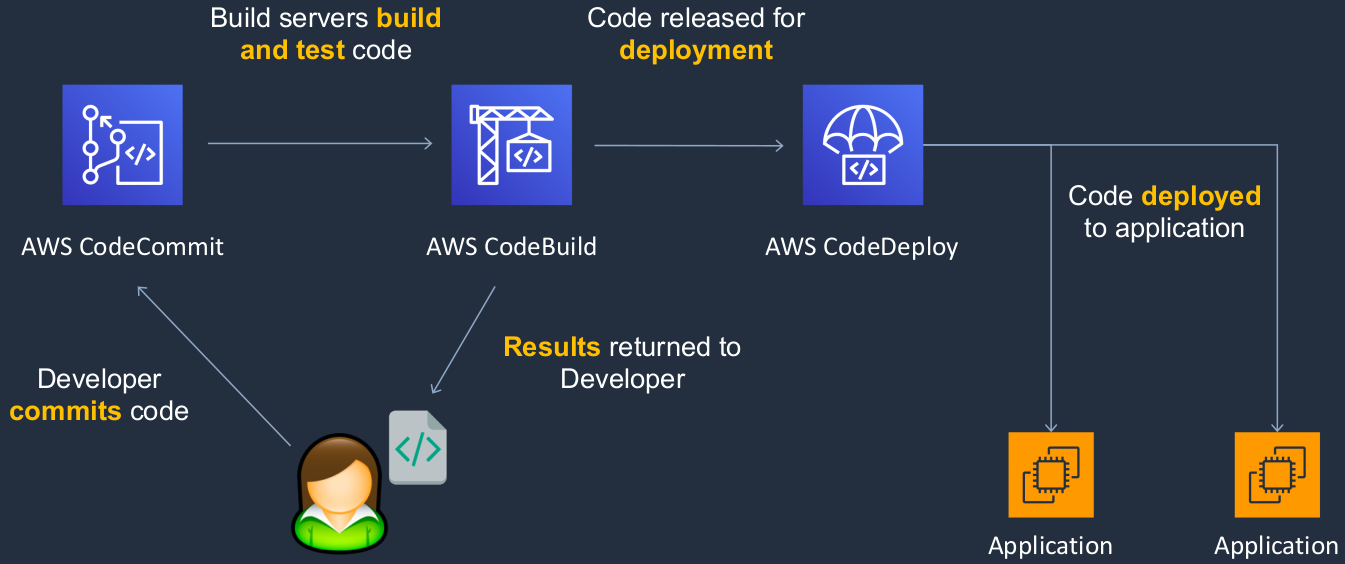
Well, we have the same process in the beginning. So the developer is committing code, having the code built and tested, getting some results, and going through that cycle of uploading new updates to the code. But after the code has been successfully tested, we want to deploy it. So then we have the service called AWS CodeDeploy. And CodeDeploy can then release the code and actually deploy it to your applications. So now we have continuous integration and delivery because we’re actually delivering and deploying that code into our applications.
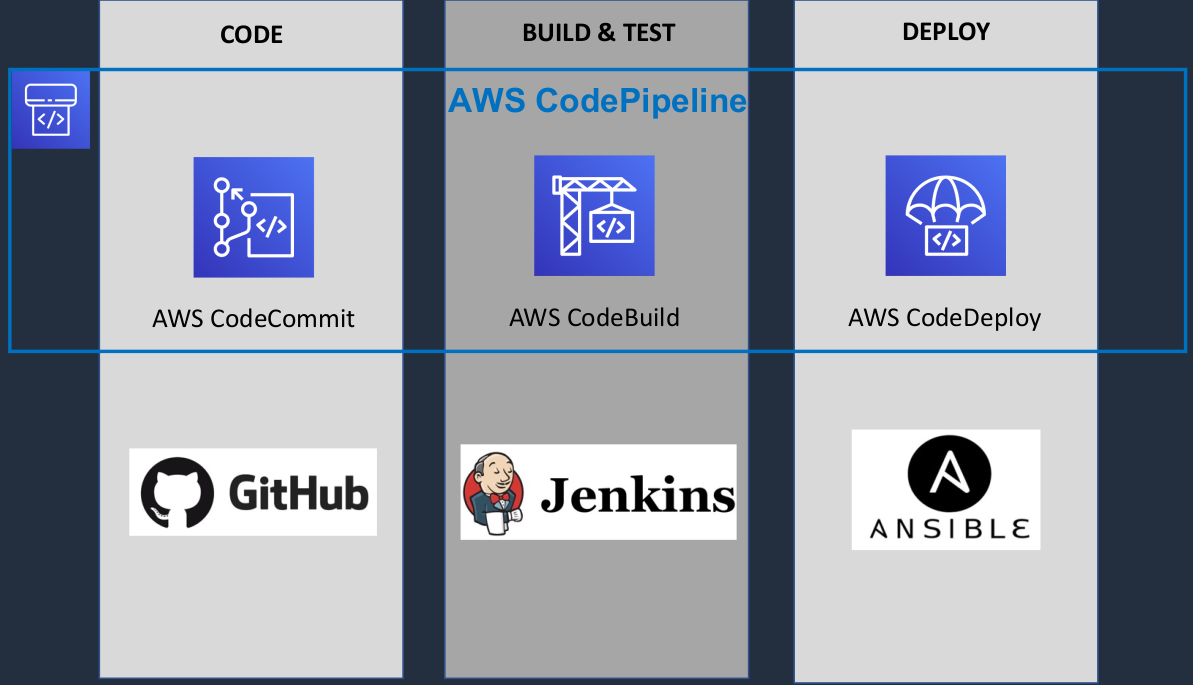
There are three core phases here. We’re developing our code, building and testing it, and deploying it. We have CodeCommit, CodeBuild, and CodeDeploy. Now, what are similar services that you might have heard of if you work in a development environment? Well, Github is very similar to CodeCommit. Jenkins is similar to CodeBuild, and Ansible is similar to CodeDeploy. Now, we also have a service called AWS CodePipeline. What this does is it connects these AWS developer tools together and it forms a pipeline so they can automate the process of moving that code from CodeCommit, into CodeBuild, and then through to CodeDeploy and it gives you some great features for ways that you can work with that code sending notifications, getting approvals and so on as part of that pipeline.
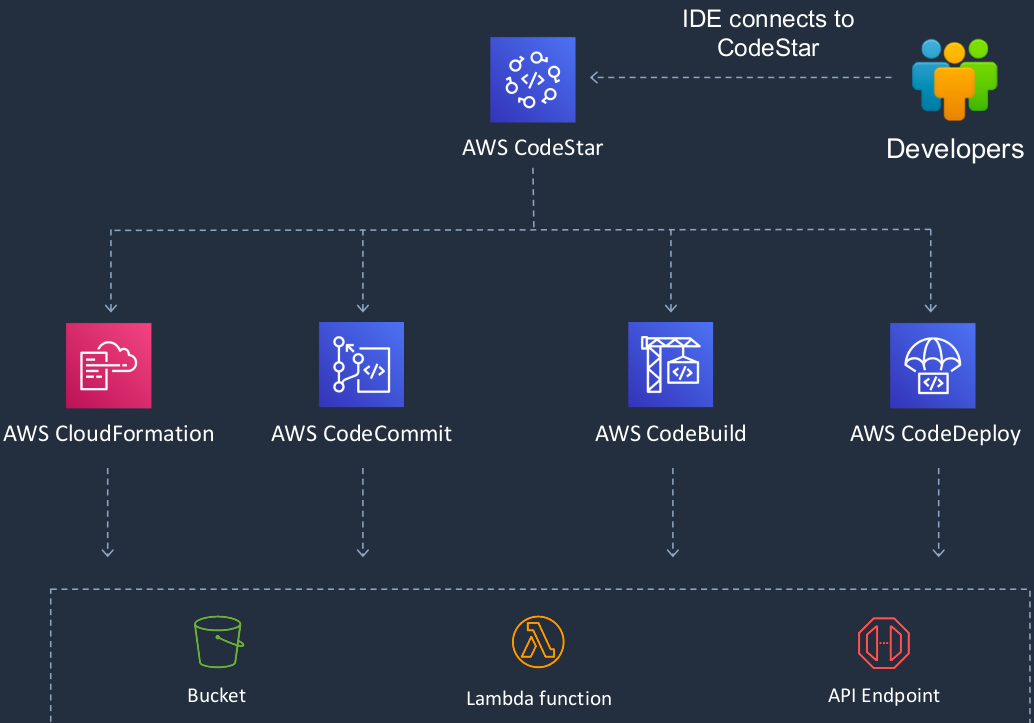
AWS CodeStar
In this case, developers use an Integrated Development Environment, an IDE, and that’s basically the software they use for writing code. They can connect their IDE to CodeStar. CodeStar can then work with many different AWS developer tools and other services like CloudFormation and it uses those to then build applications and it automates this entire process for you. So it’s an even simpler sort of front-end for developing your code, connecting it into AWS, and then having AWS automate this entire lifecycle of building and deploying the code.
AWS CodeStar
Under Services > Developer Tools > CodeStar. In CodeStar, we’re going to create a project.

Now you’ll see that we have to create a service role here. So let’s click on Create service role.
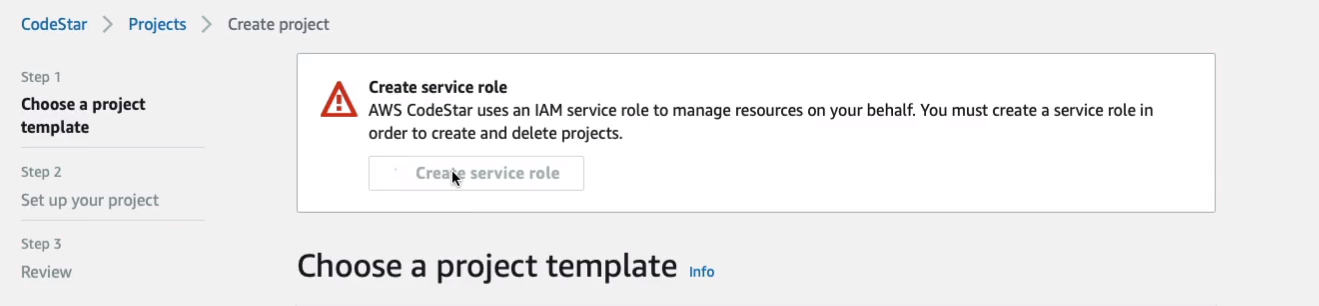
And it’s done for us and that just gives it the privileges it needs.

Now we can see that there are a number of different templates available to us. For example, we can choose the Node.js web application here and it’s going to run with AWS Lambda. So I’m going to choose that one and click on Next.
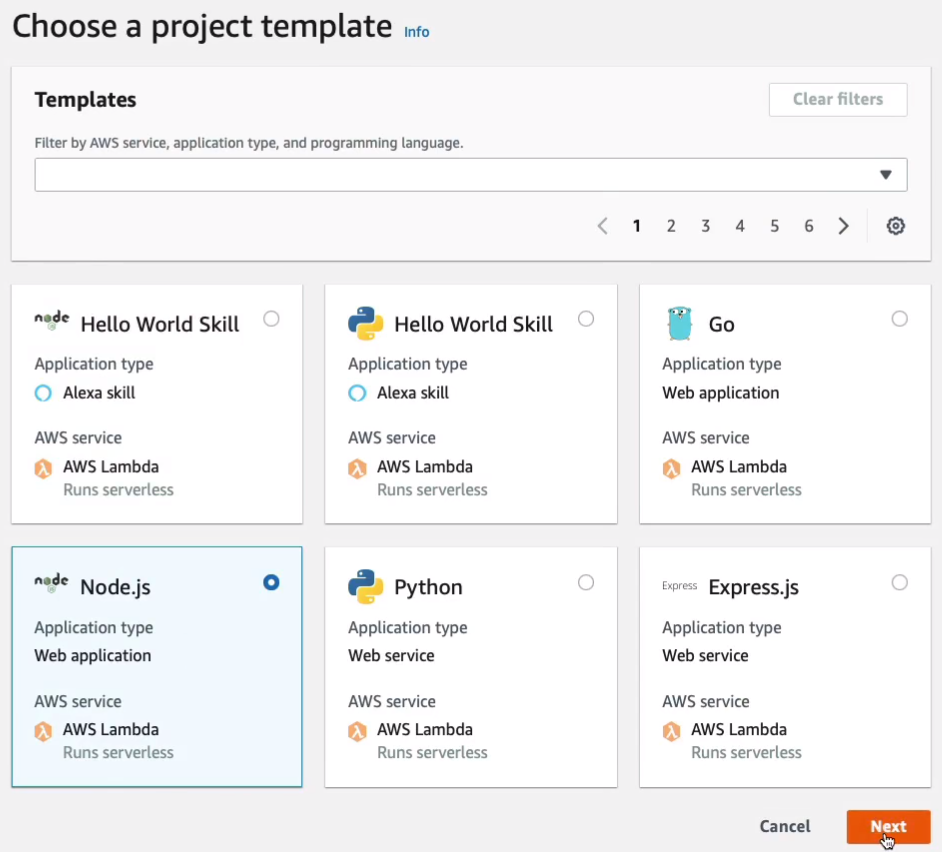
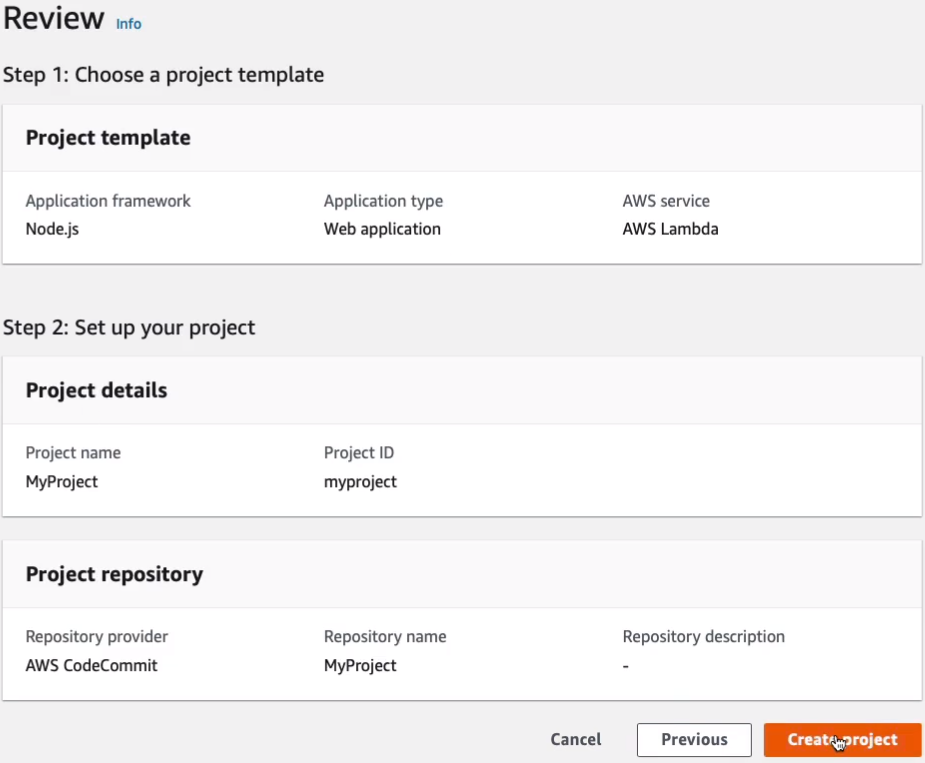
I’m just going to call it MyProject. You can then choose whether you want to use a CodeCommit or Github repository. We’ll leave it on AWS CodeCommit and click Next.

Then we simply Create project.
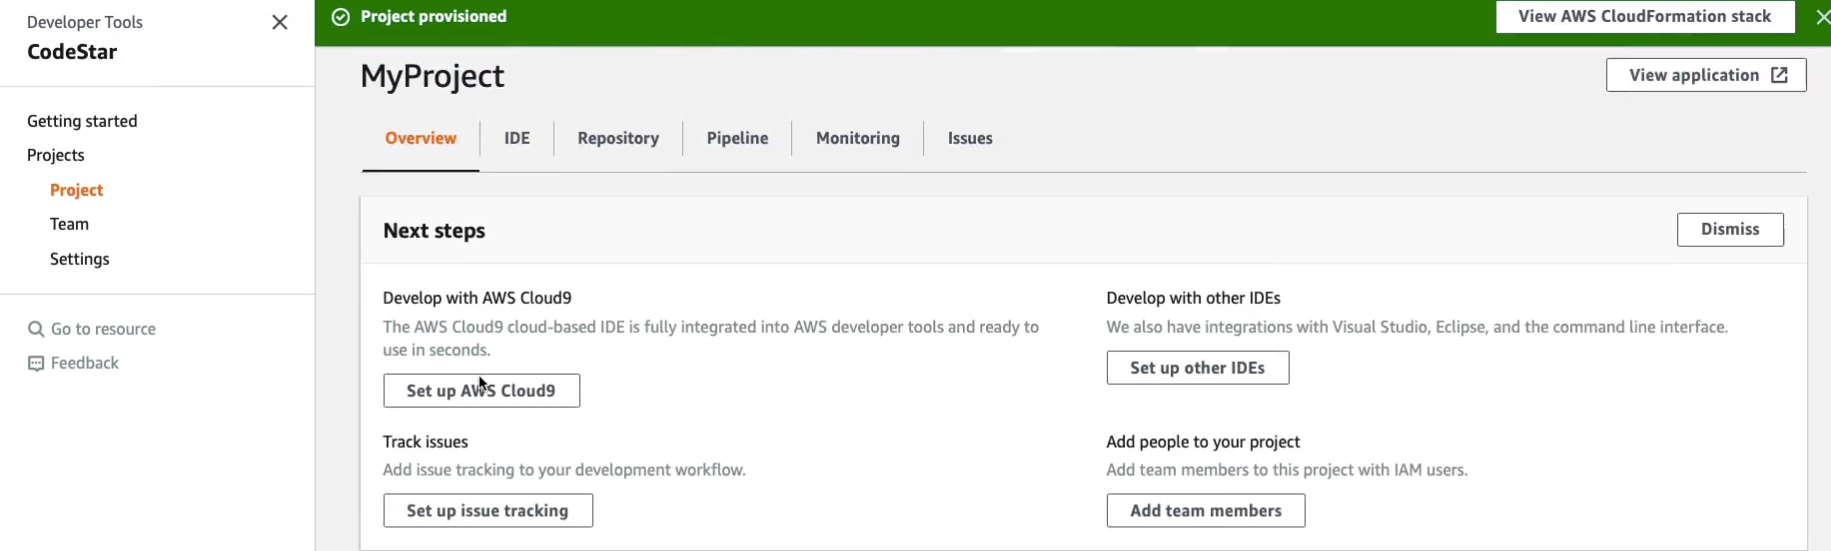
It will now take a few minutes to create our project. Up in the top right hand corner, you can see the View AWS CloudFormation stack. So let’s click on that and it will take us into CloudFormation.
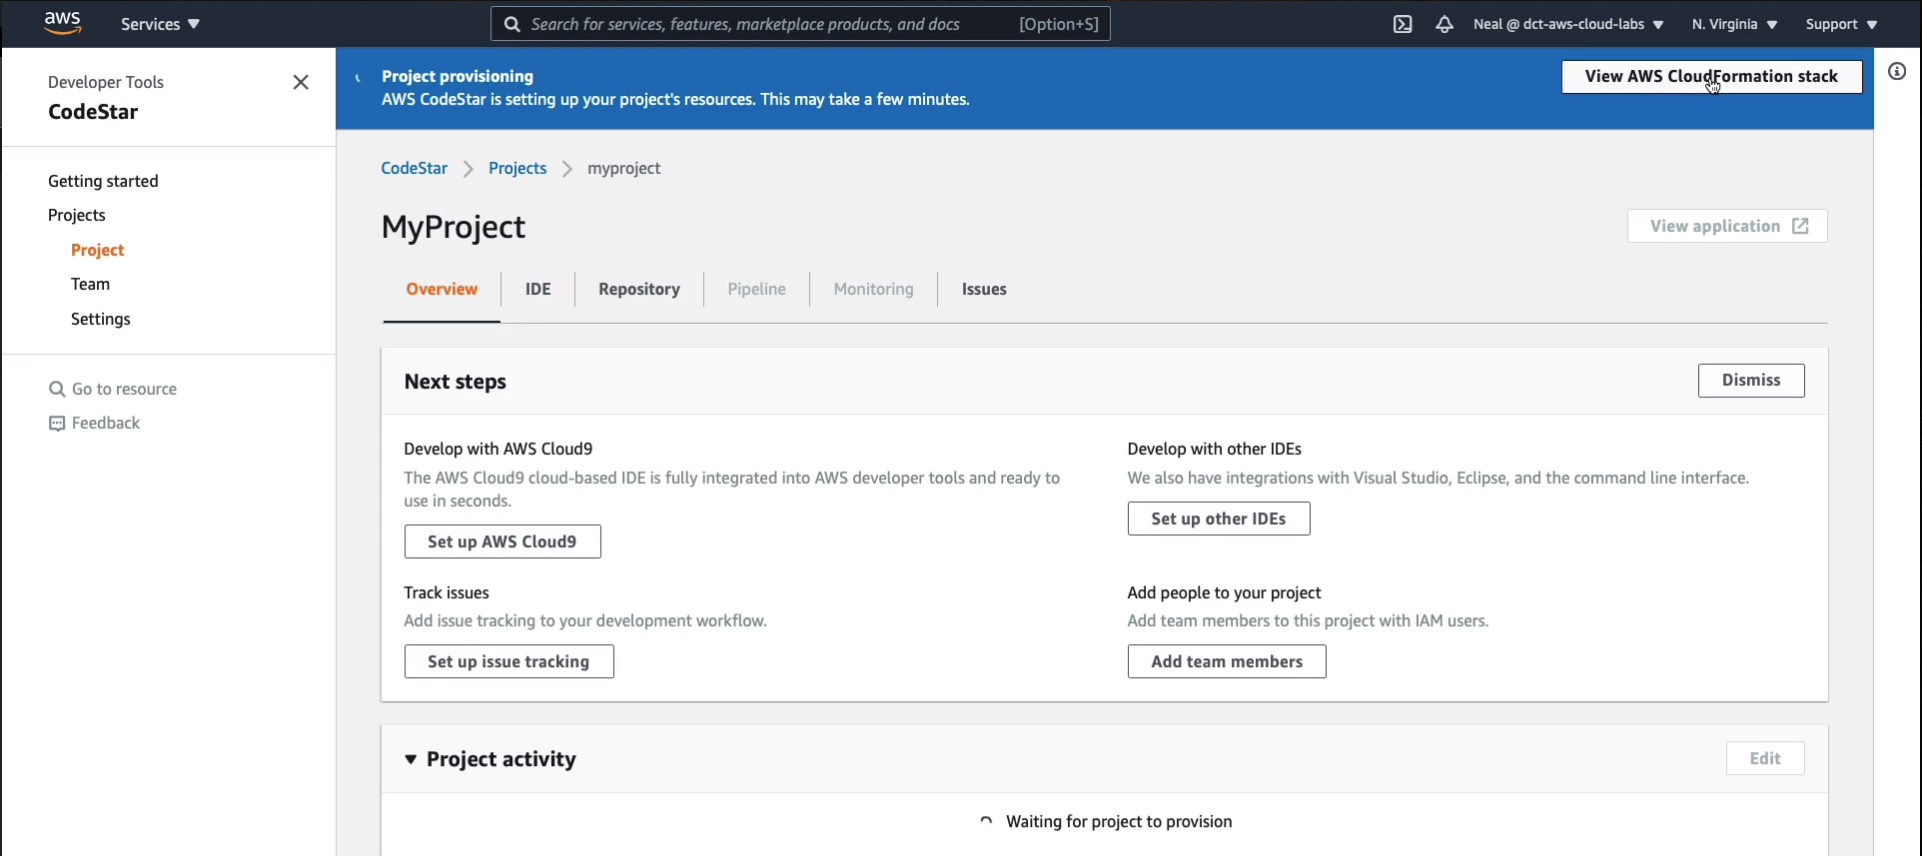
We’ll see that there’s a Create in progress for a stack.
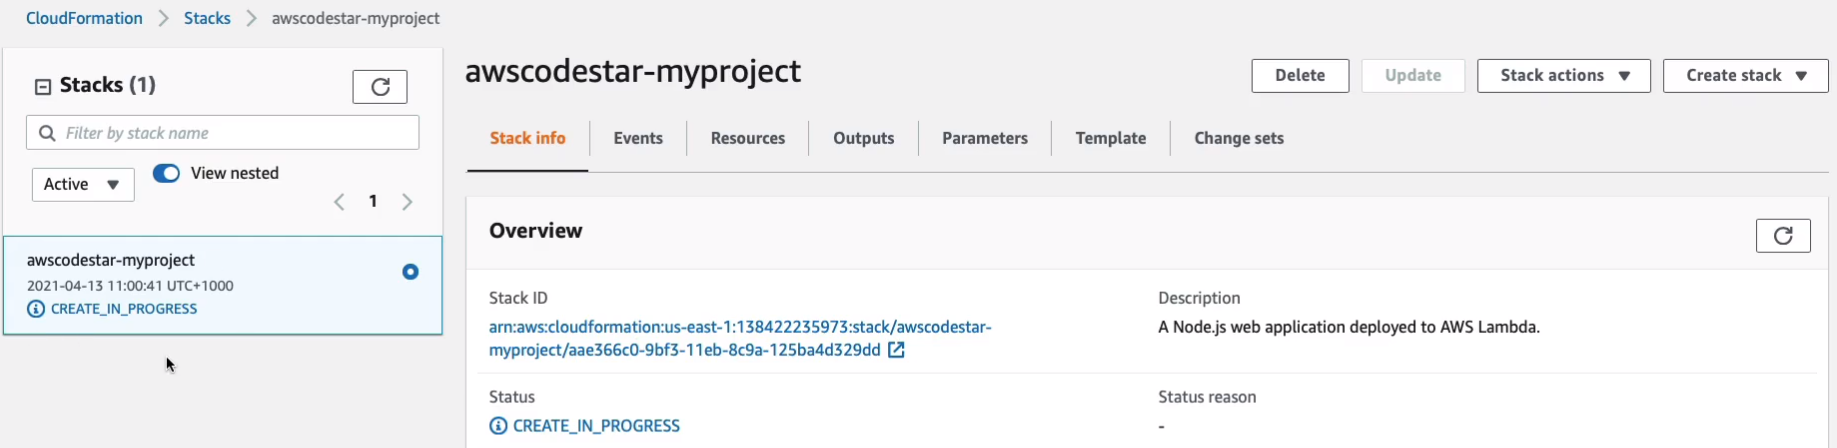
If we go to Events, we’ll see what it’s creating and it’s creating quite a lot of different resources here. We’ve got an S3 bucket, CodeCommit, and CodeDeploy.
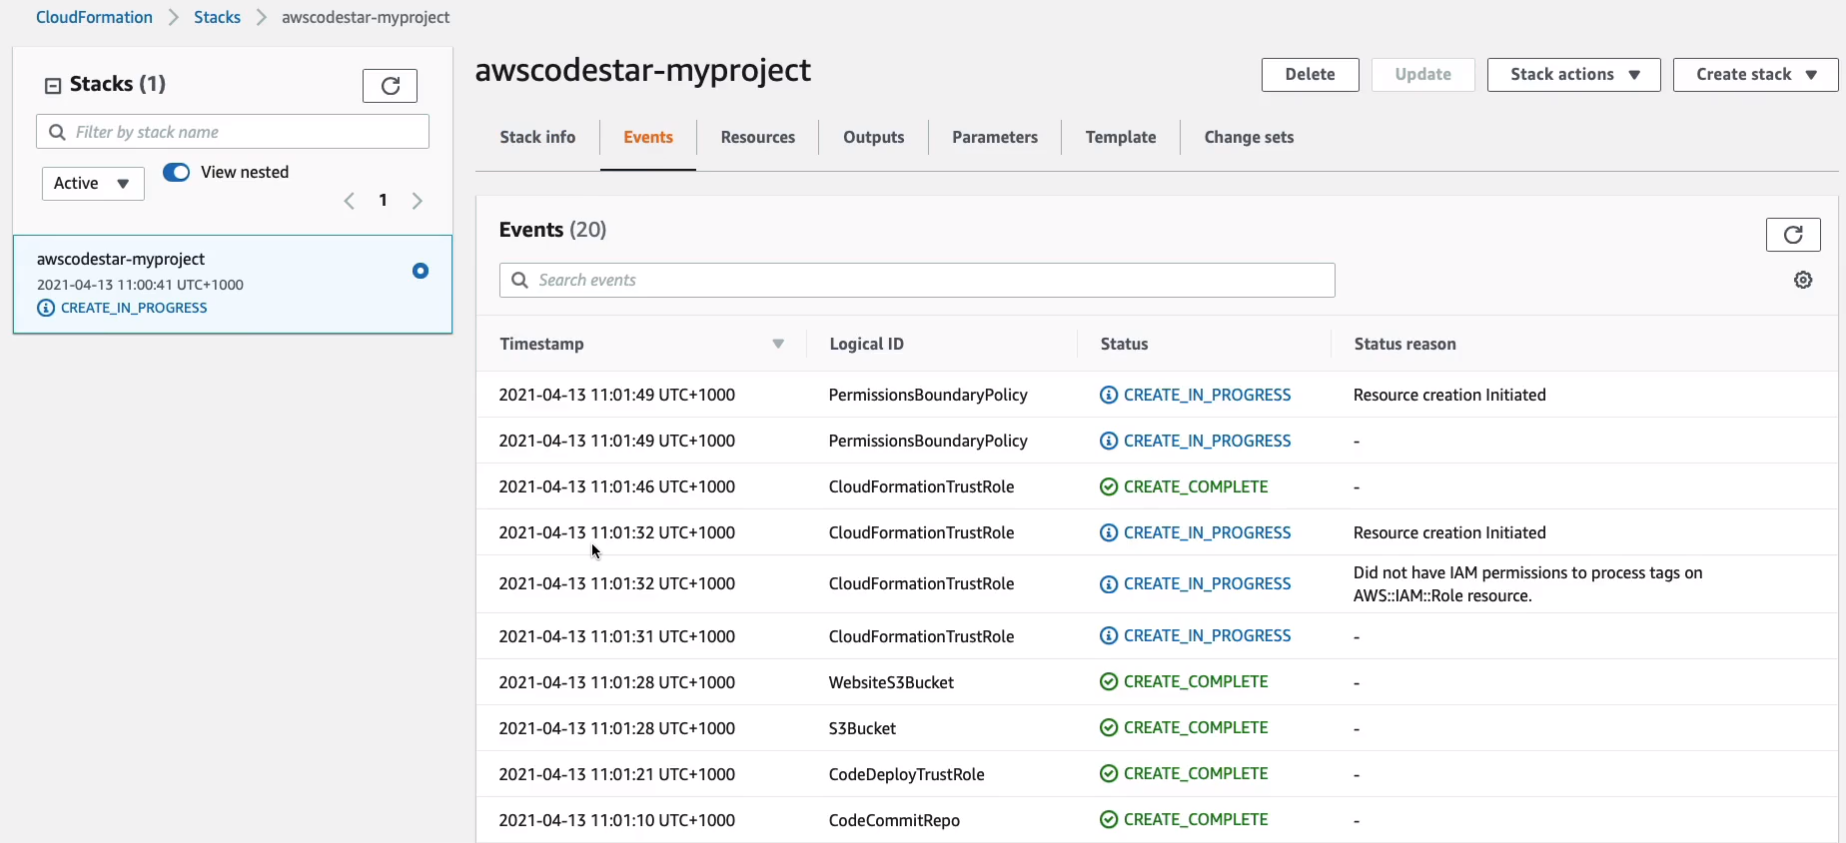
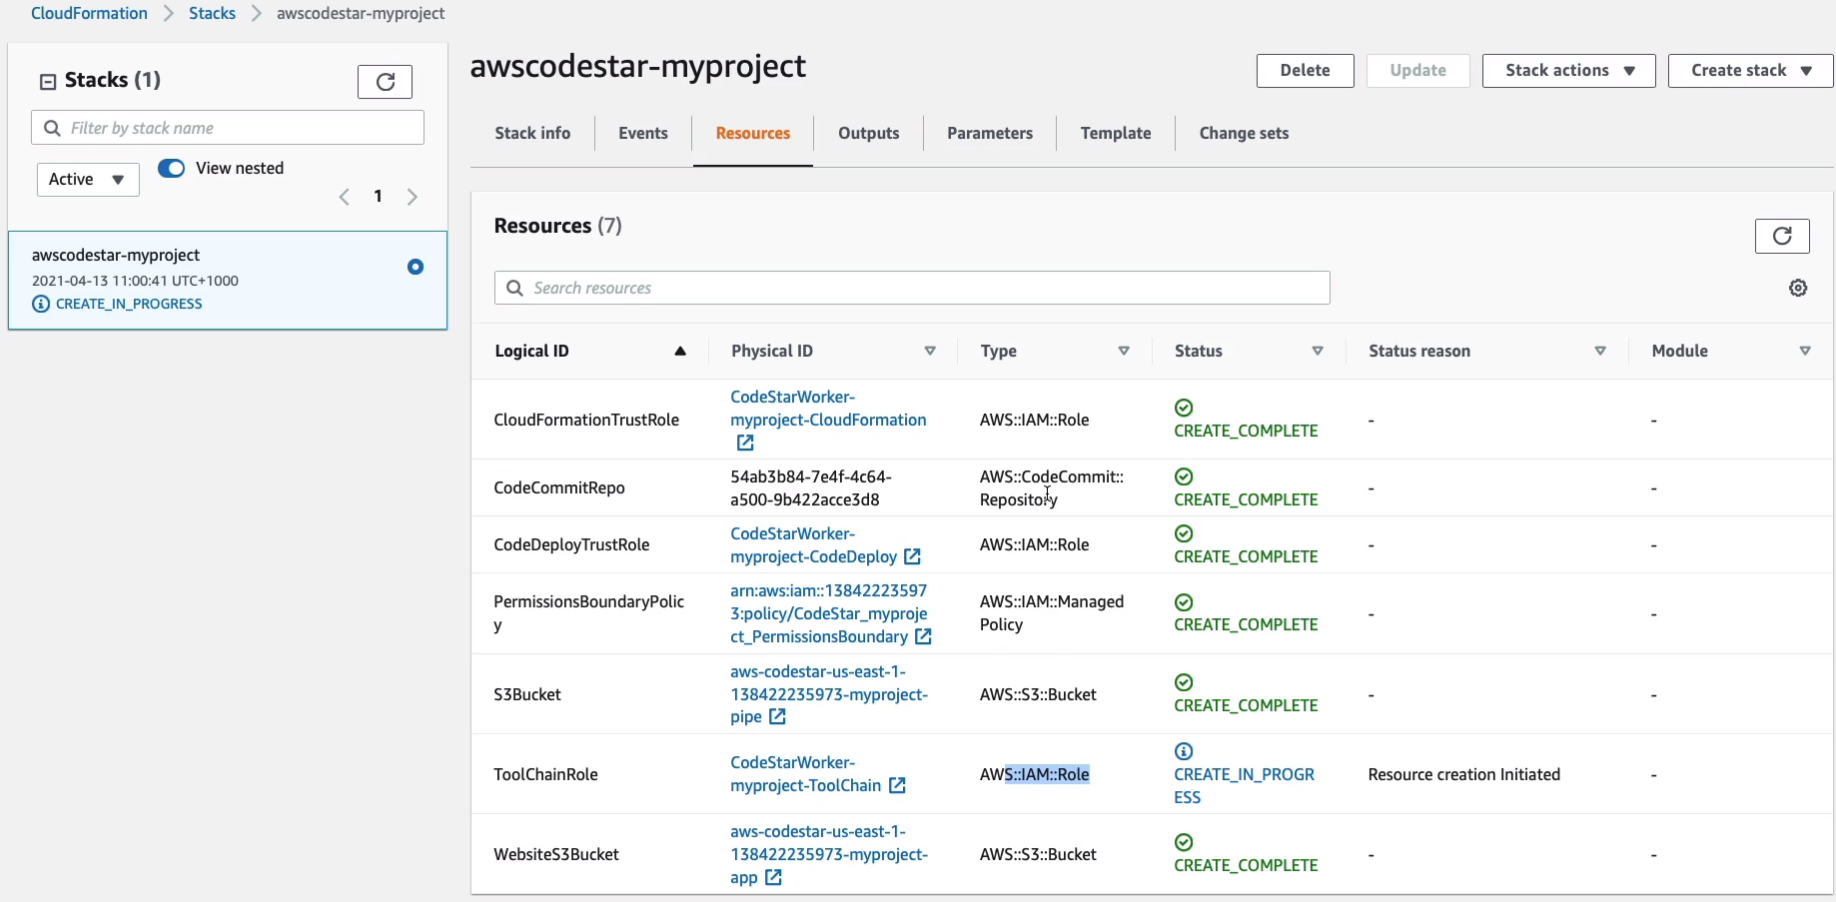
And if we just scroll back up to the top and look at Resources, what you’ll see is as they’re created, there’s going to be some more resources coming in here. We’ve got an S3 bucket, an IAM Role, a Managed Policy, and a CodeCommit repository.
Now, back in the project (Services > Developer Tools > CodeStar > Projects > myproject) we’ll then just have to wait until we can see our application. Now, another thing you can do here on the Team is if you want to collaborate with team members on this project, you can then go and add their user profiles.
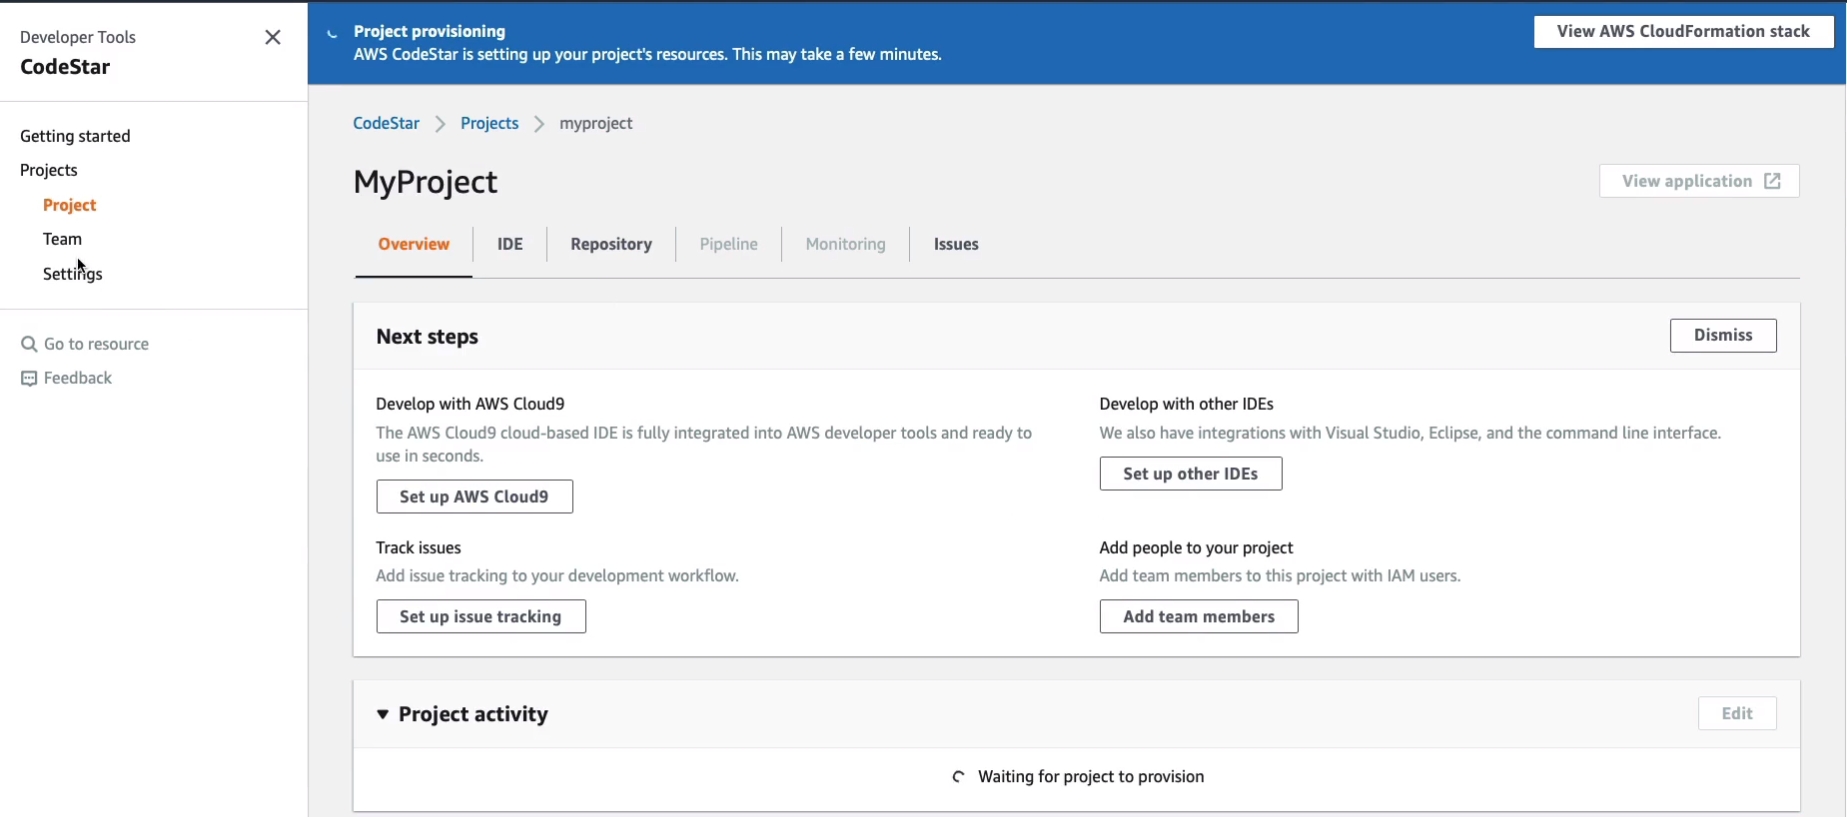
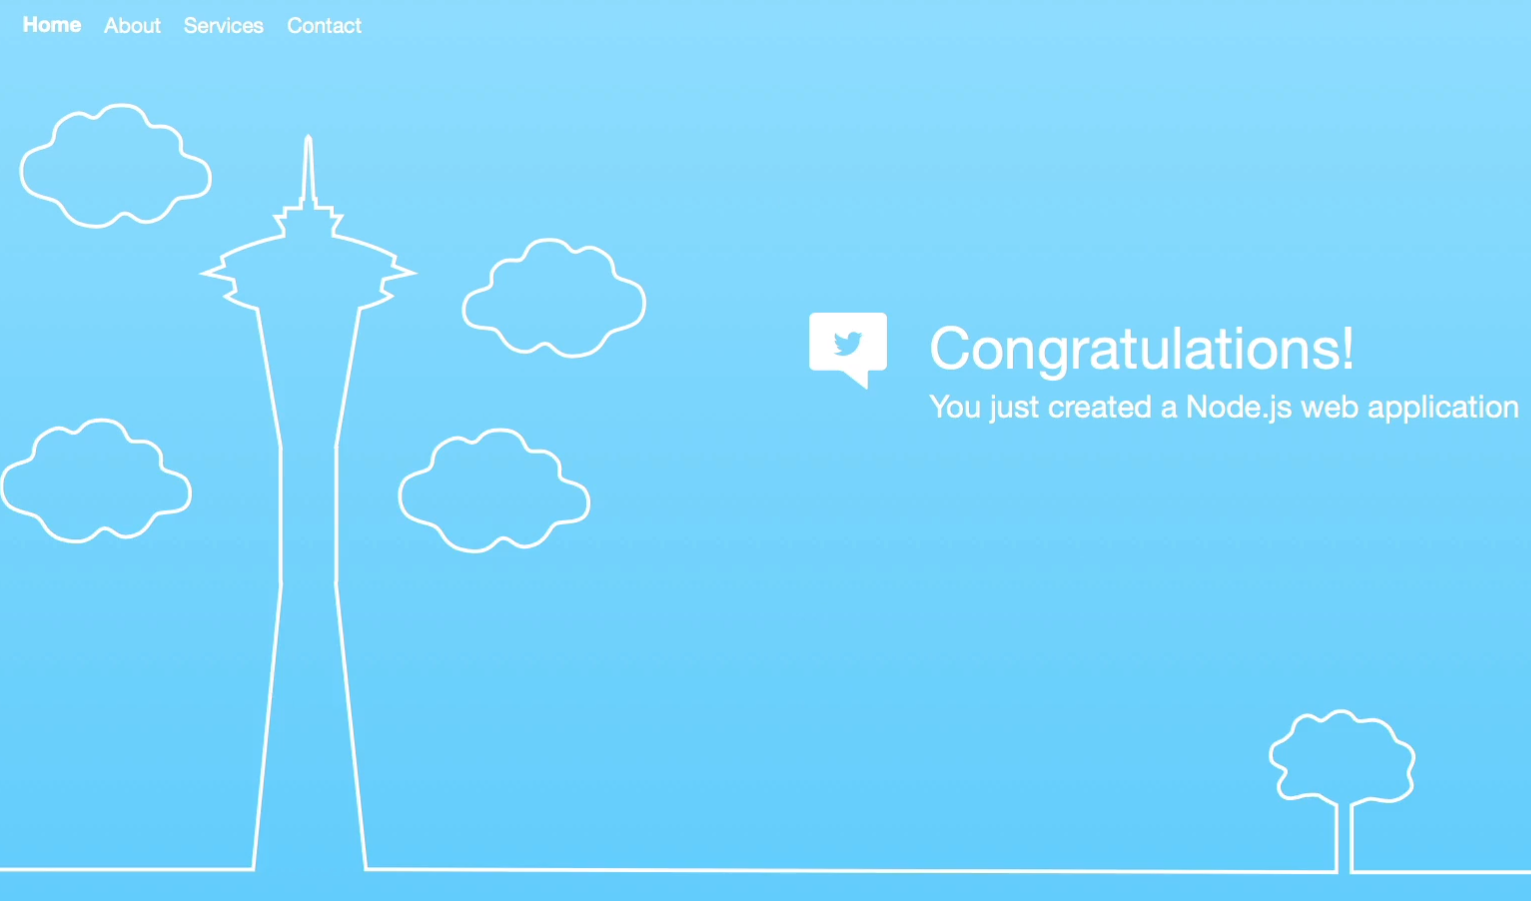
It did take a little while, but I also had to refresh my page. So sometimes it doesn’t actually update in real-time. Now, if we click on the View application, we should see the front-end.

So this is a simple application running on Node.js.
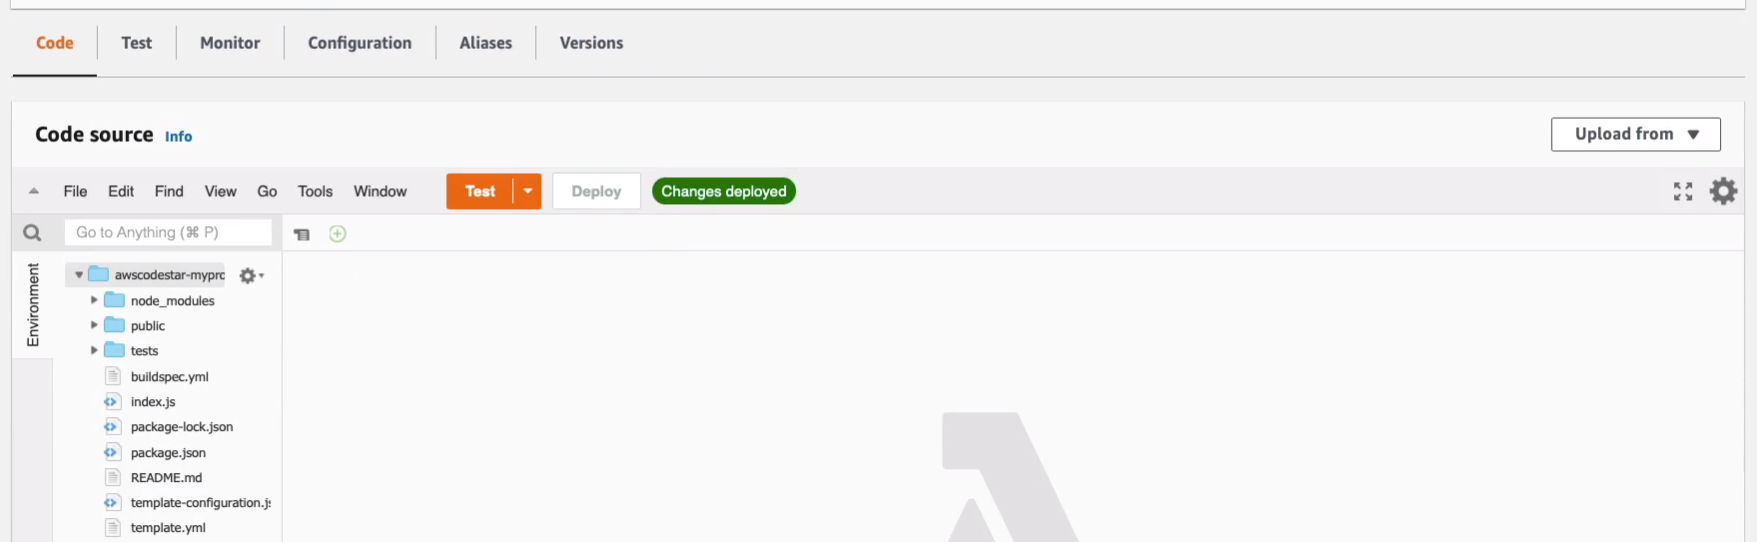
Let’s have a look behind the scenes at what’s being created. Back in CodeStar, if we just scroll down a little way, we can see the resources. We’ve got an AWS Lambda function.

We can see here the Lambda function and the code that’s been updated.
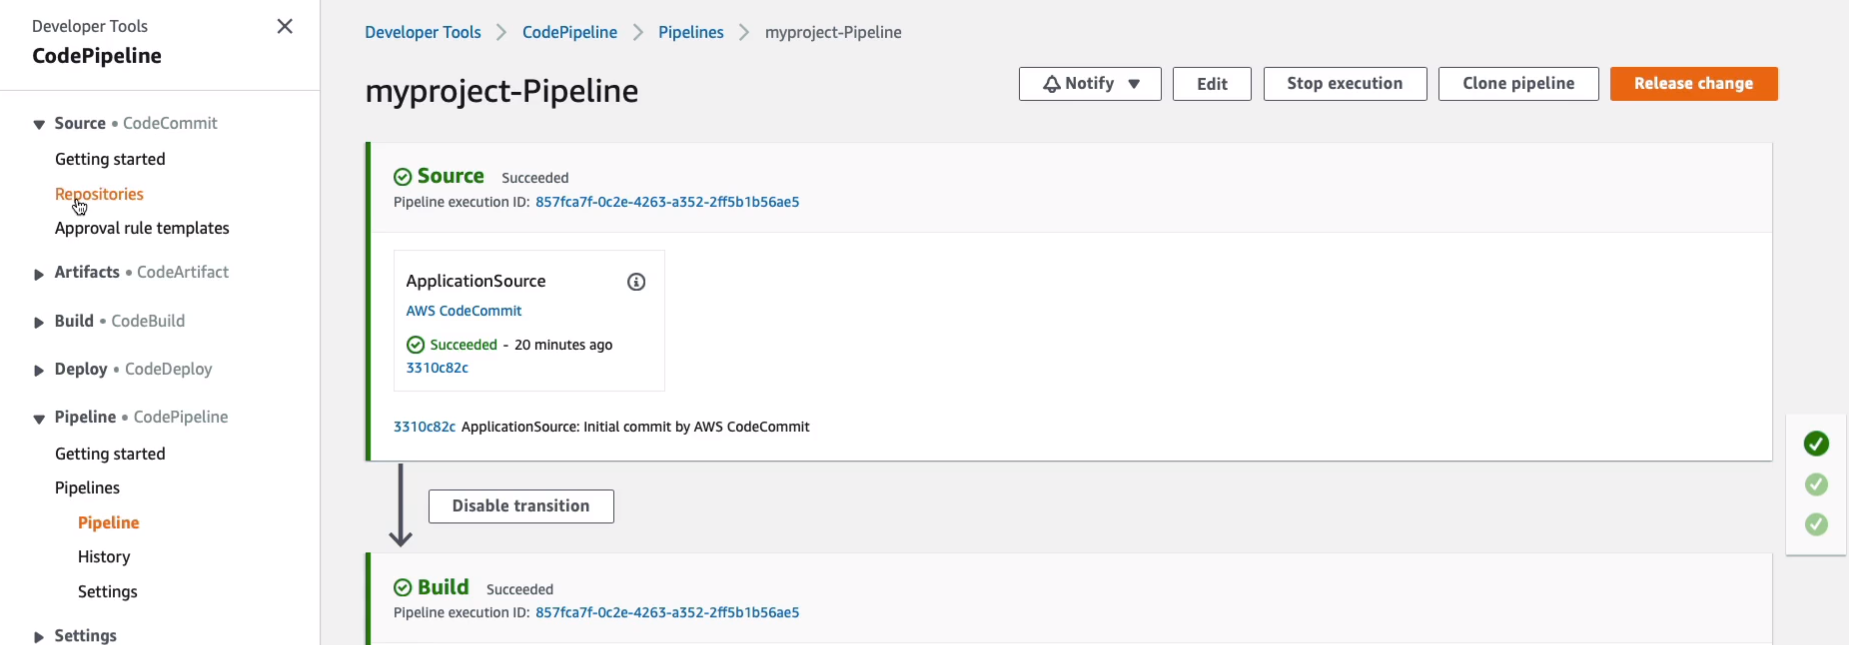
Now, go back to CodeStar, we can also see the IAM roles that have been created and we’ve got a CodePipeline. So let’s click on CodePipeline, and this takes us to the project.
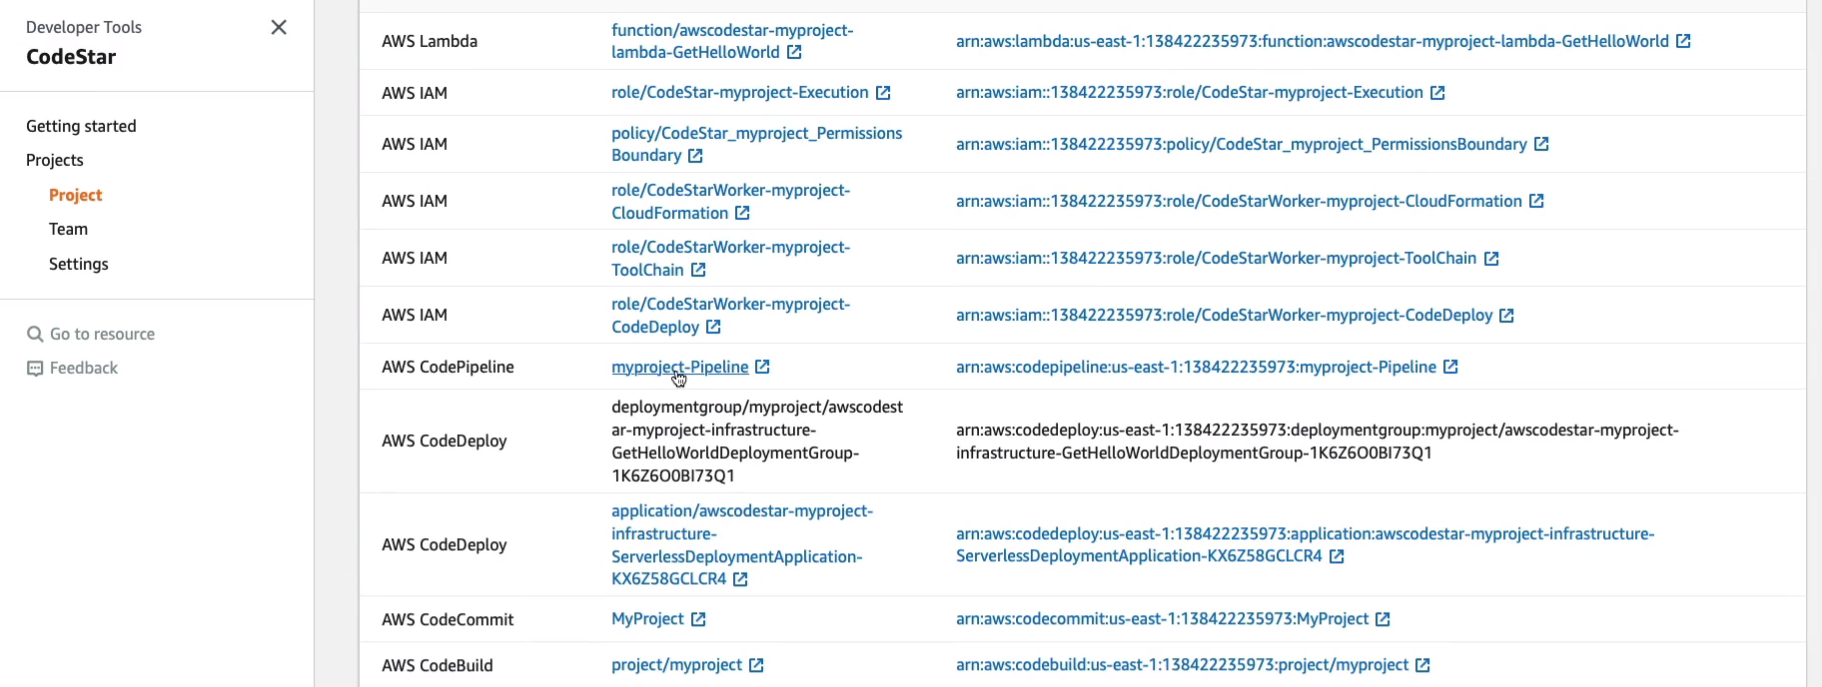
You can see in our CodePipeline, we have the various AWS developer tools, CodeCommit, CodeArtifact, CodeBuild, CodeDeploy, and then CodePipeline.
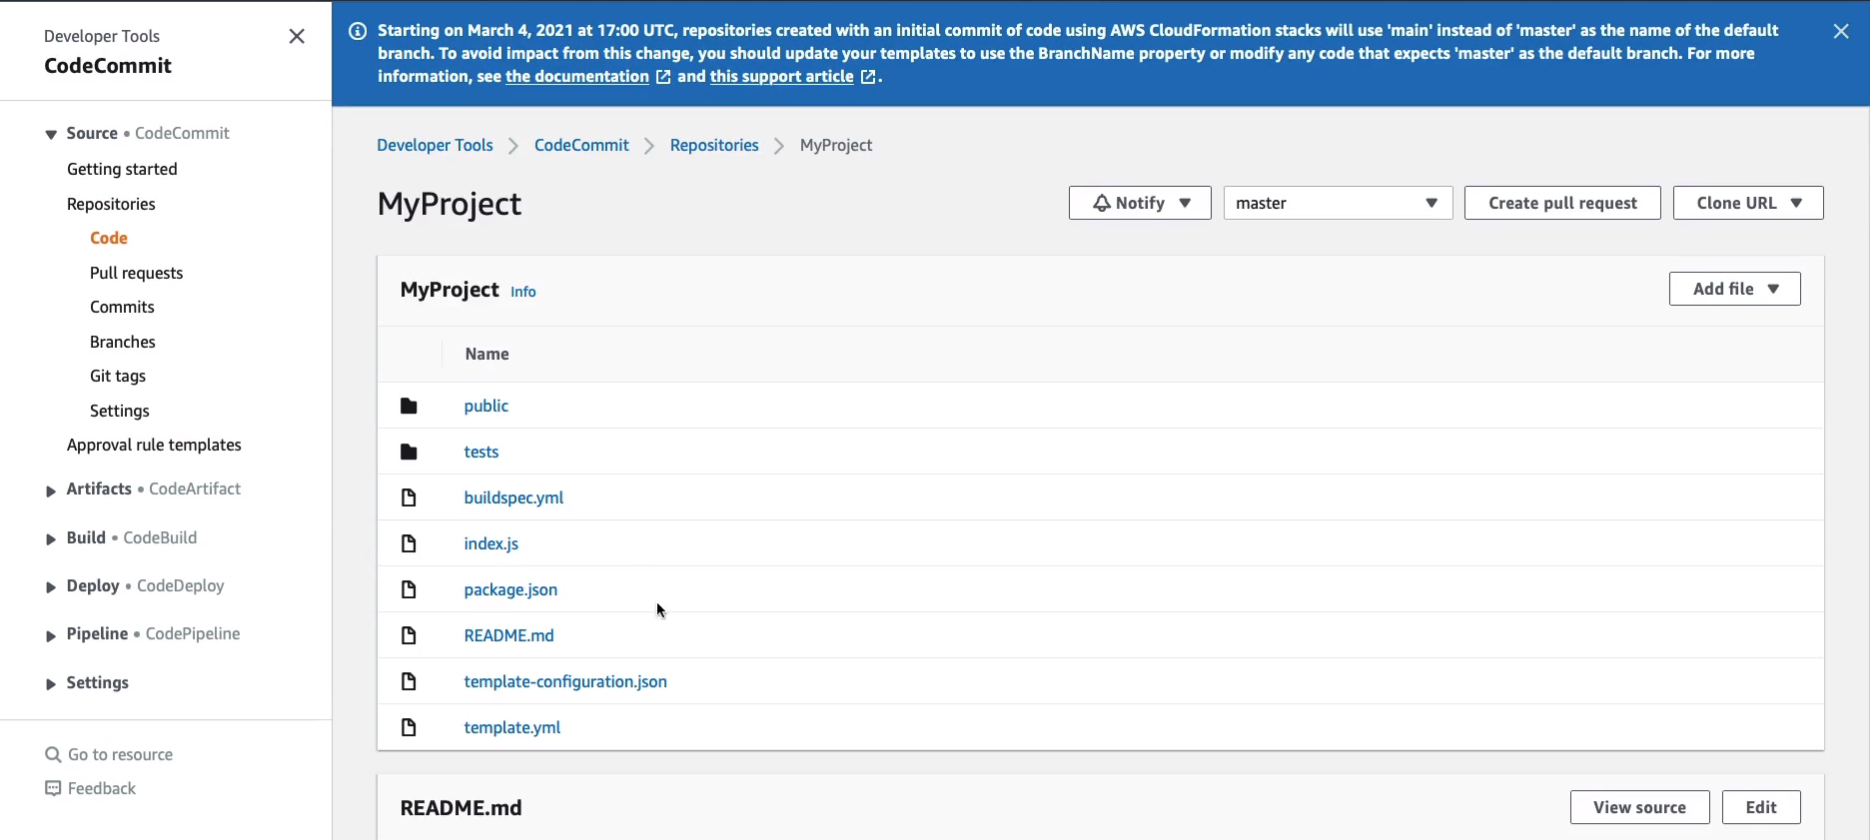
So under CodeCommit, we can see the Repository and this is where the actual code is stored and their we can see the actual CodeArtifacts themselves.
If we come down to Build, we should have a Build projects and there it is.

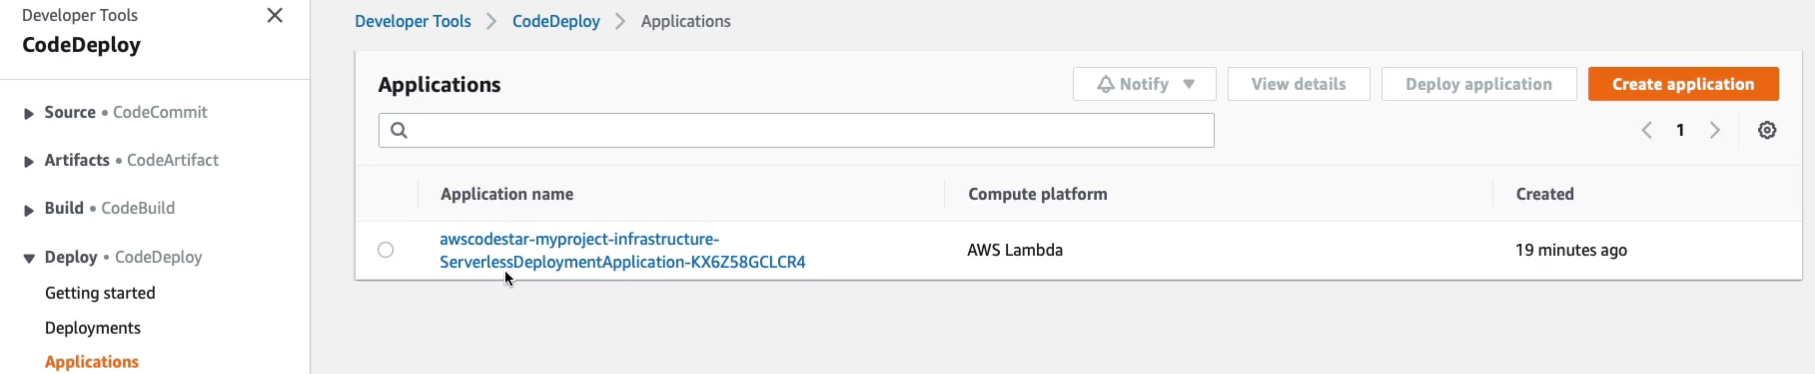
And under Deploy, we should have an application, which is where the application has been deployed and we can see it’s been deployed to AWS Lambda.
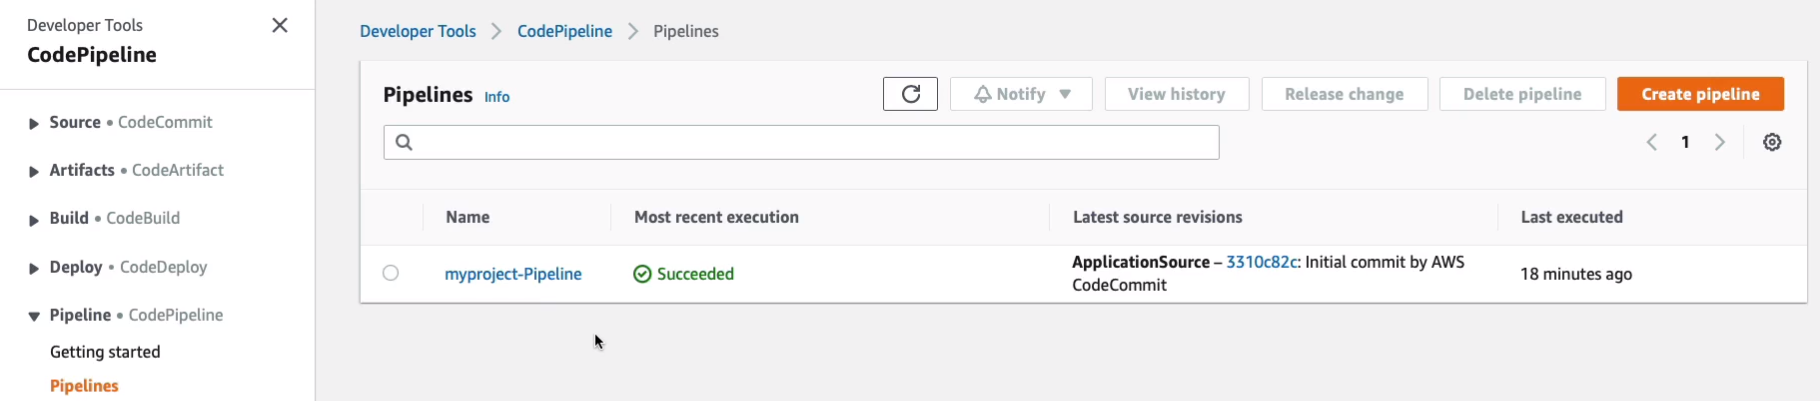
Then under Pipeline, there’s a pipeline that’s being created to piece all this together. So all of that has been automated using CodeStar and through the IDE, which in this case was Cloud9.
If we go back to Developer Tools > CodeStart, we can see that we have an integration with Cloud9 which is an AWS tool for developing your code. You could also choose other IDEs as well, like Visual Studio or Eclipse, or the Command-Line. So we then have the IDE for developing code and then through the project, it’s going to create the resources and manage them for us for actually deploying that code.
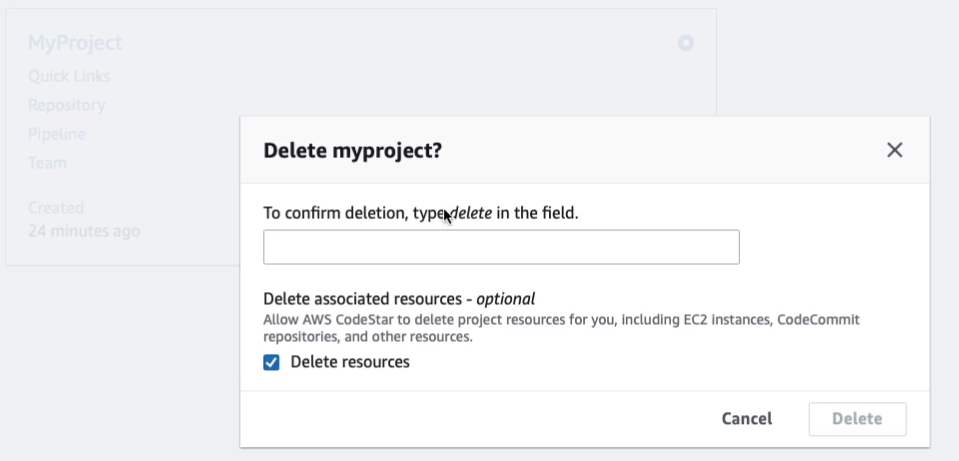
So if you go back up to the projects level and what we’re going to do is select our project and then simply Delete and it will then delete the resources that it selected for us. So it will go ahead and automate that process.
AWS X-Ray
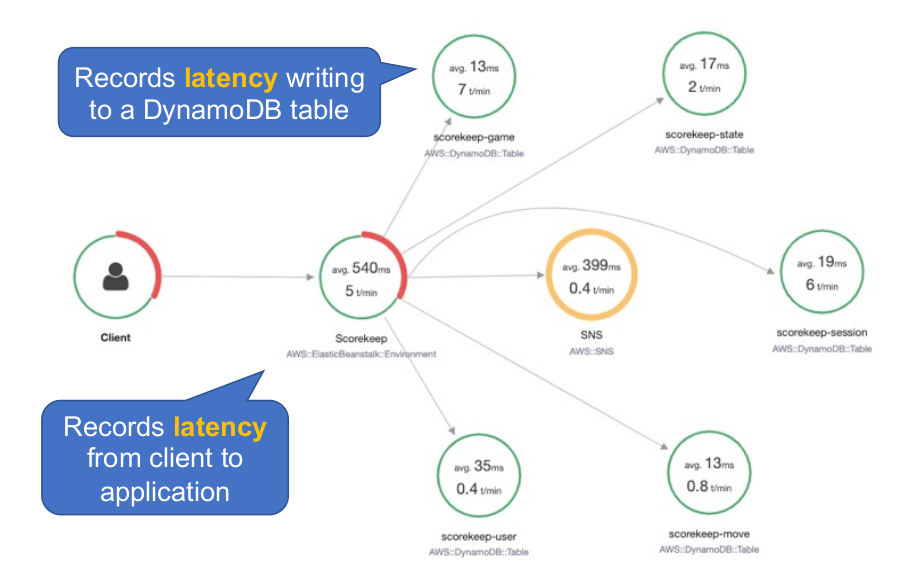
X-Ray is a service you can use to debug your distributed applications. So we have this application. It’s a Beanstalk environment with several different DynamoDB tables and SNS and what’s happing is we’re seeing some information about the latency between these different components. So, for example, what is the latency rating to the DynamoDB table from Elastic Beanstalk? We can see the latency from the client application to the front-end, the Elastic Beanstalk Web service as well. So it’s a way that we can troubleshoot and view what’s happening in our distributed application. That way we can identify if there’s some latency between one component or another one and that could be affecting overall performance.
- AWS X-Ray helps developers analyze and debug production, distributed applications, such as those built using a microservices architecture
- AWS X-Ray supports applications running on:
- Amazon EC2
- Amazon ECS
- AWS Lambda
- AWS Elastic Beanstalk
- Need to integrate the X-Ray SDK with your application and install the X-Ray agent
So remember that X-Ray is used for analyzing and debugging distributed applications. Helps you to view the performance and the latency between different components of your application.
AWS OpsWorks
- AWS OpsWorks is configuration management service that provides managed instances of Chef and Puppet
- They’re not AWS tools, they’re third party and they’re used by a lot of organizations. So it’s really useful if you’re already using Chef and Puppet because it gives you a managed implementation on AWS
- Updates include patching, updating, backup, configuration and compliance management
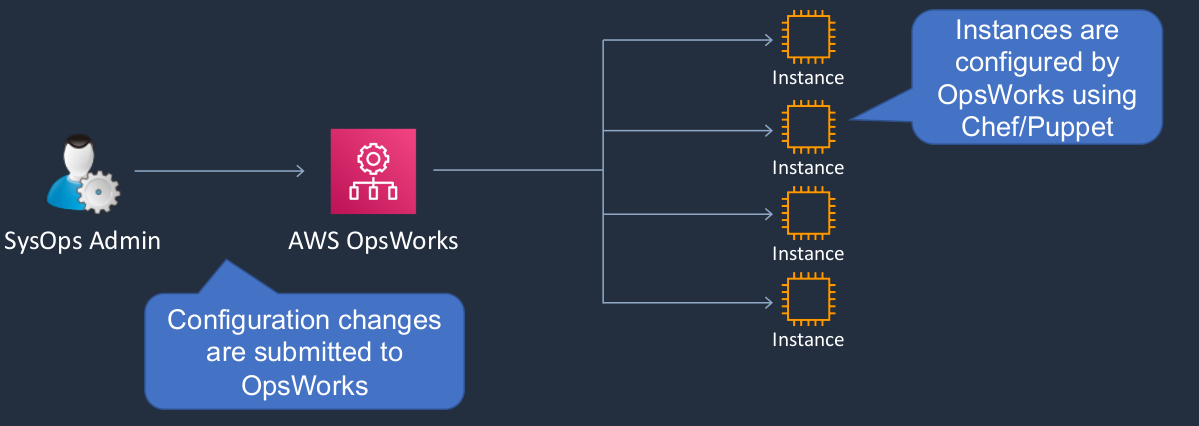
- We’ve got our SysOps administrator who is uploading some changes to AWS OpsWorks. OpsWorks will then make those changes on the resources that it manages and it then does that using Chef or Puppet. So if you’re already using Chef or Puppet in your on-premises environment, then it’s a very useful service because it means you can maintain the existing configurations that you’re using on-premises. You can move those into the cloud and you might be able to reuse that IP or just use a tool set you’re familiar with.
Exam-Cram
Amazon CloudFront
- CloudFront is a Content Delivery Network (CDN) that allows you to store (cache) your content at “edge locations” located around the world
- That gets your content like your videos or your media files closer to your users
- This allows customers to access content more quickly and provides security against DDoS attacks
- CloudFront can be used for data, videos, applications, and APIs
- CloudFront reduces latency for global users
AWS Global Accelerator
- Routes connections to application endponts (EC2 / ELB) in multiple regions
- Improves the availability and performance of applications with local or global users
- Users the AWS global network to optimize the path from users to applications, improving the performance of TCP and UDP traffic
AWS Global Accelerator vs CloudFront
- Both use the AWS Global Network and Edge locations
- CloudFront improves performance for cacheable content and dynamic content
- Global Accelerator improves performance for a wide range of applications over TCP and UDP
- Global Accelerator proxies connections to applications in one or more AWS Regions
- Global Accelerator provides failover between AWS Regions
AWS CloudFormation
- Infrastructure is provisioned consistently, with fewer mistakes (human error)
- Less time and effort than configuring resources manually
- Free to use (you’re only charged for the resources provisions)
- A template is a YAML or JSON template used to describe the end-state of the infrastructure you are either provisioning or changing
- CloudFormation creates a Stack based on the template
- Can easily rollback and delete the entire stack as well
AWS Cloud Development Kit (CDK)
- Open-source software development framework to define your cloud application resources using familiar programming languages
- Preconfigures cloud resources with proven defaults using constructs
- Provisions your resources using AWS CloudFormation
- Enables you to model application infrastructure using TypeScript, Python, Java, and .NET
- Use existing IDE, testing tools, and workflow patterns
AWS Elastic Beanstalk
- Managed service for web applications on Amazon EC2 instances and Docker containers
- Deploys an environment that can include Auto Sclaing, Elastic Load Balancing and databases
- Considered a Platform as a Service (PaaS) solution
- Allows full control of the underlying resources
- Code is deployed using a ZIP file, WAR file or Git repository
AWS X-Ray
- AWS X-Ray helps developers analyze and debug production, distributed applications, such as those built using a microservices architecture
AWS OpsWorks
- AWS OpsWorks is a configuration management service that provides managed instances of Chef and Puppet
- Updates include patching, updating, backup, configuration and compliance management