

Management and Governance
Control Tower is a service that leverages organizations and other services for creating and configuring accounts for us. AWS Systems Manager is a service we can use to manage our EC2 instances like installing software or patches on our instances.
AWS Organizations
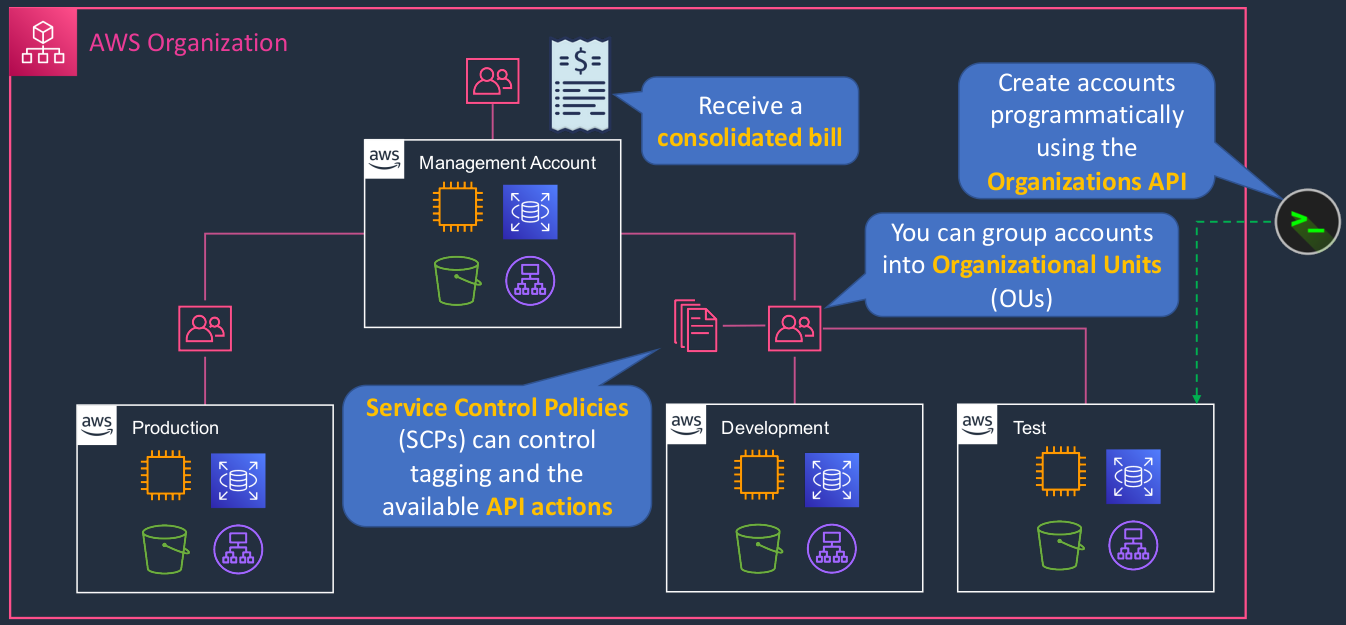
So we create something called an Organization, and that’s everything that’s within this boundary here, this pink sort of reddish boundary. Now, we start off with something called a Management Account. The management account is actually where we create this organization and it becomes the root of a hierarchy that we can create. So the management account is right at the very root of that hierarchy and we then create additional accounts or invite existing accounts into the organization. So, for example, here we have the Management account, then a Production account, and then a separate Development account. Now, most larger organizations will have multiple AWS accounts. So the reason is they want to separate out their resources. They want to separate out the control of those resources, the permissions, and they want to isolate resources that are for development purposes from production. So there are lots of good reasons why you have multiple accounts. You can then launch all your resources within each account. Now, the hierarchy is created by organizing the accounts within something that we call an Organizational Unit and we can group our accounts within them, so you can have multiple accounts in an organizational unit. We can then attach policies such as Service Control Policies to the organizational unit. A Service Control Policy will actually dictate the permissions that are allowed within that account. So any account that’s within the organizational unit where the SCP is actually applied. Now, you can use organizations to create accounts as well as invite existing accounts in and you can actually use a programmatic interface. So there’s the organization’s API, which allows you to then create your accounts programmatically as well. So now we’ve launched a test account programmatically into our organization. Now another feature of organizations is Consolidated Billing. What this means is, the management account will receive the bill for all accounts. So each account within the hierarchy does not get its own separate bill and gets charged separately. All of the billing takes place in the management account, and the bill does actually show you the usage and the costs of each individual account as well. So that’s really useful for your accounting purposes.
- AWS organizations allow you to consolidate multiple AWS accounts into an organization that you create and centrally manage
- Available in two feature sets:
- Consolidated Billing
- What that means is you only get the consolidated billing features. You don’t get the other features, such as Service Control Policies. Remember, consolidated billing is about a single bill across your accounts and that is available in both the consolidated billing feature set and all features.
- All features
- Gives you additional features, such as Service Control Policies and Tag policies.
- Consolidated Billing
- Includes root accounts and organizational units
- Policies are applied to root accounts or OUs
- Consolidated billing includes:
- Paying Account - independent and cannot access resources of the accounts. Just because you’re the account’s paying the bill doesn’t mean that the administrators in the account automatically get full access to other resources, that’s fully controllable. So you can isolate those accounts and control those accounts but still receive one bill.
- Linked Accounts - all linked accounts are independent (get linked to the paying account so that you see that one bill in the paying account).
AWS Organizations Demo
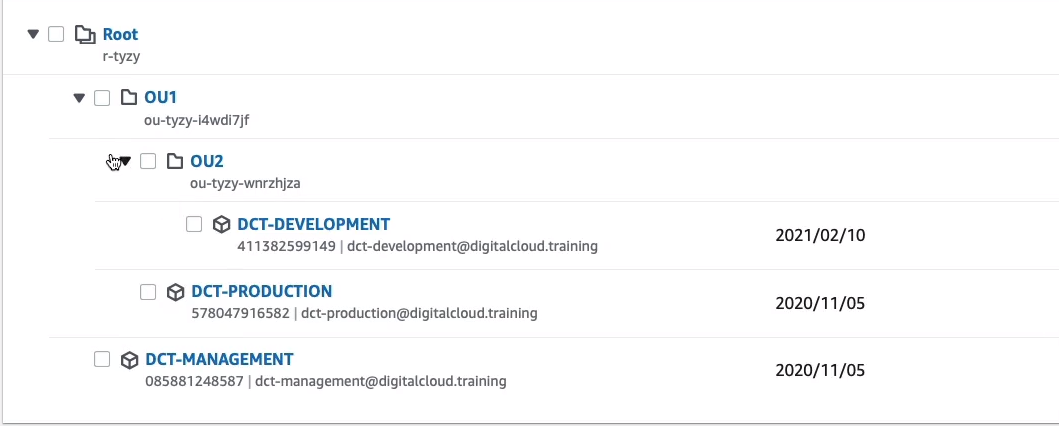
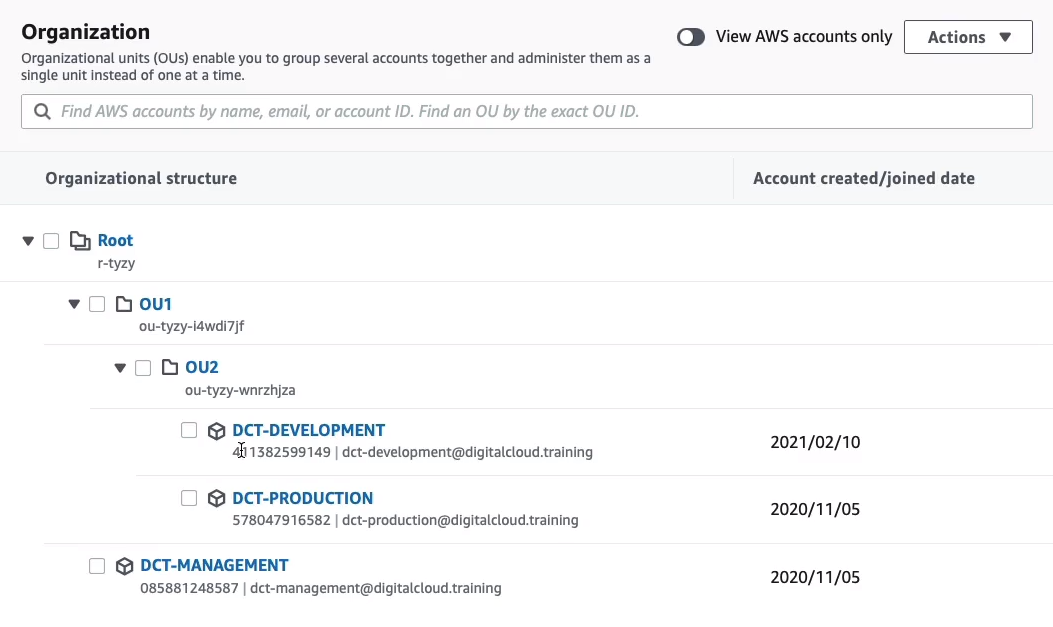
In the Management Console, Services > Management & Governance > AWS Organizations. So I already have an organization and here you can see the Root of the organization and if I expand that, you can see that I have an account called DCT-MANAGEMENT. So that is actually at the root level, that’s my management account.

I then have an Organizational Unit that I’ve simply called OU1. If I expand that, we’ll see that we have a hierarchy here, I now have OU2. But within OU1, I actually have an account as well. So I have an account here in OU1 and then I have another OU, which is OU2 and that has another account.
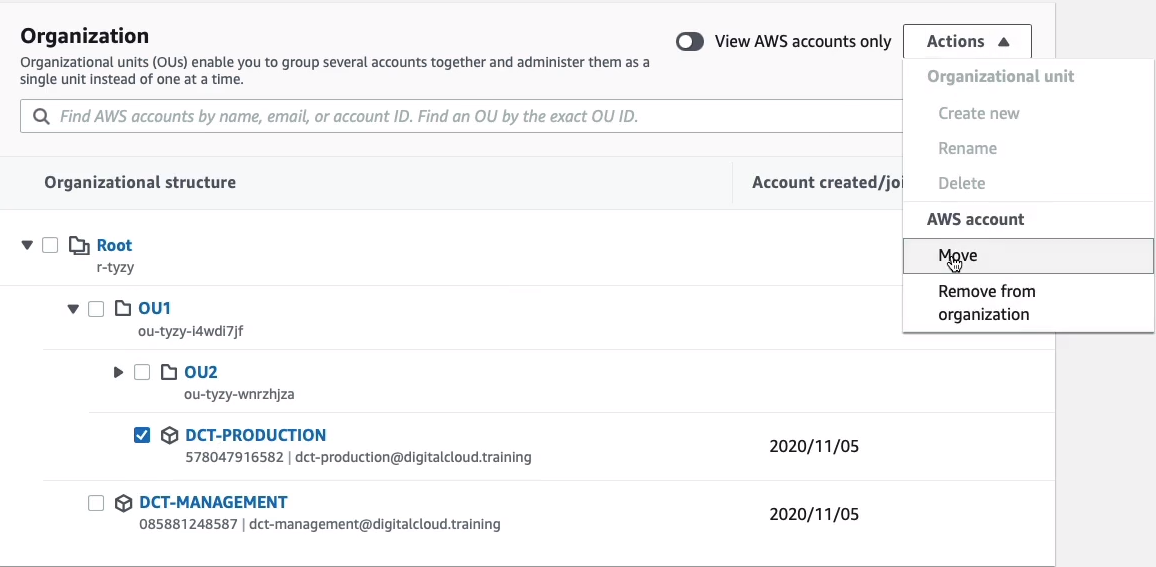
You can quite easily move accounts around. So, for example, maybe I want to move the production account into OU2 as well. Select the account and click on Actions > Move.
So then I can simply go in and choose the level of the hierarchy where I want to move that accounts and now it’s been moved.
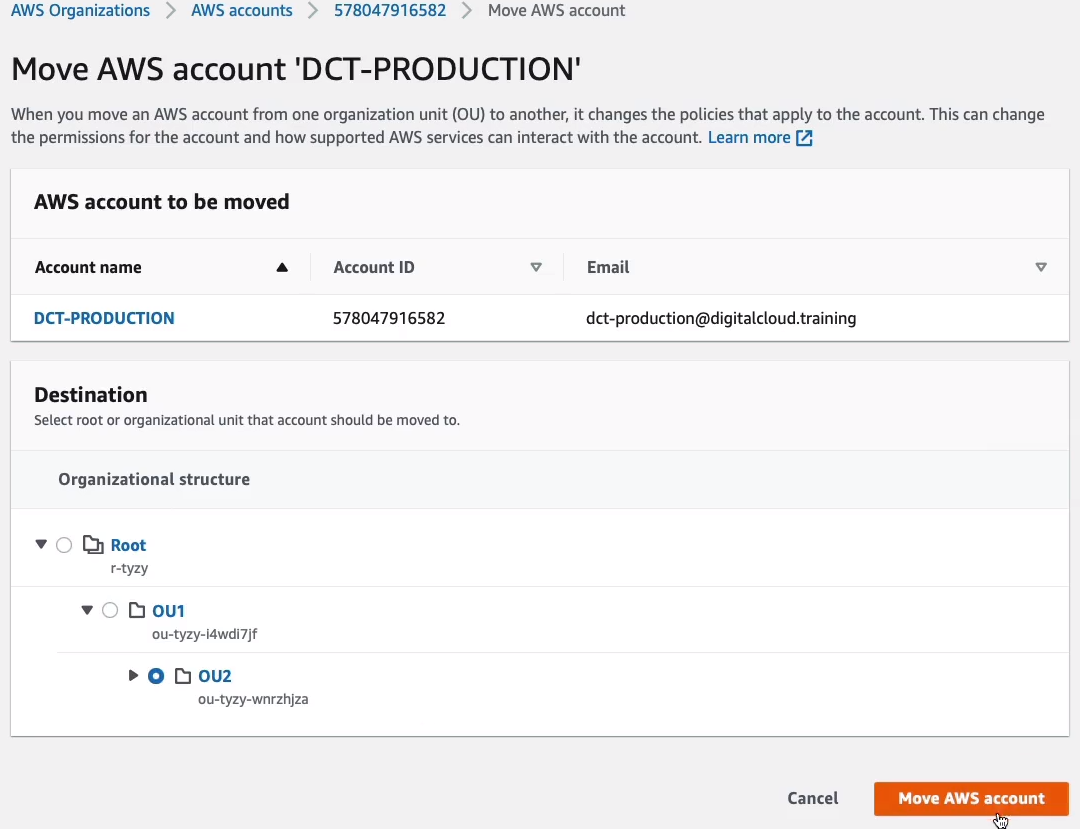
So now we only have OU2 in OU1 and then we have our two accounts. So in organizations, you add in existing accounts by inviting them or creating accounts and then organize them into these hierarchies.
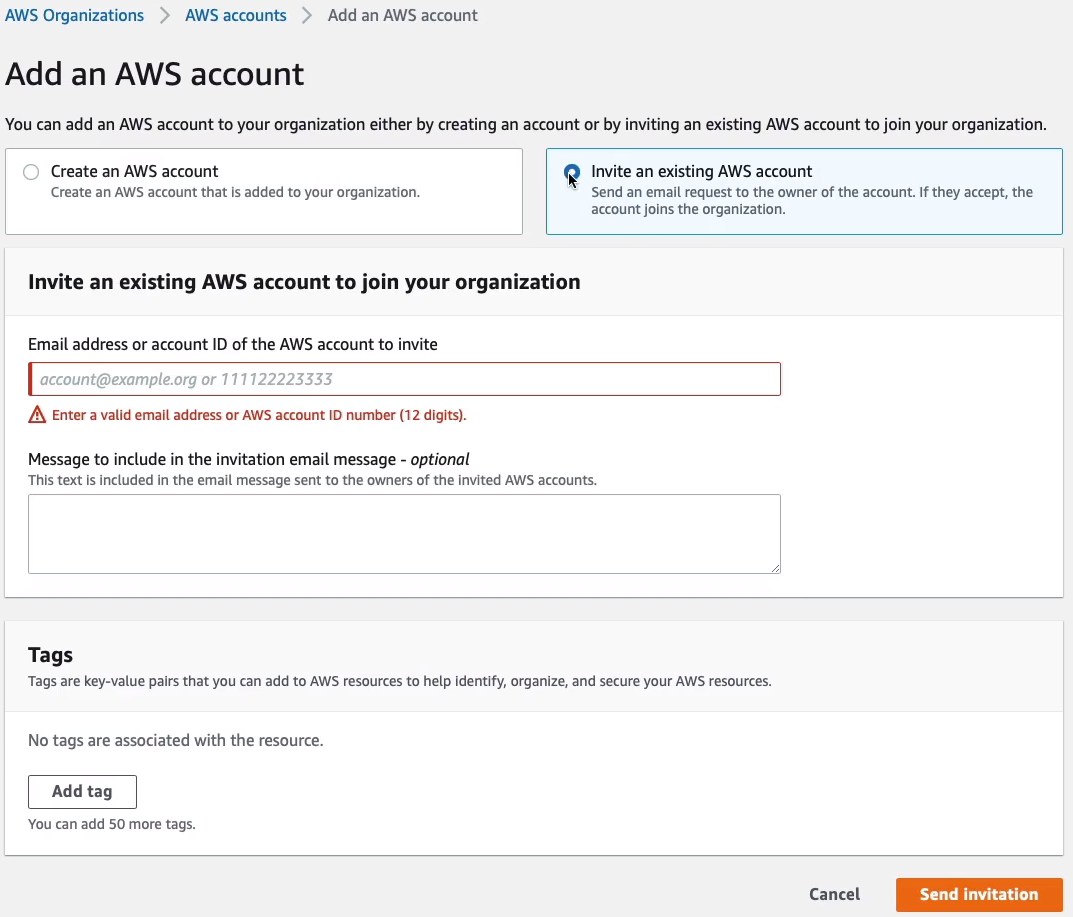
So if you want to add an additional account, you can simply click the Add an AWS account button and give it a name and an email address, and i’s going to create across account roles so that you do have access to that account and that can be modified if you want to. Or you can actually invite an existing account and in that case, you have to have the email address or account ID of the existing account you want to invite in.

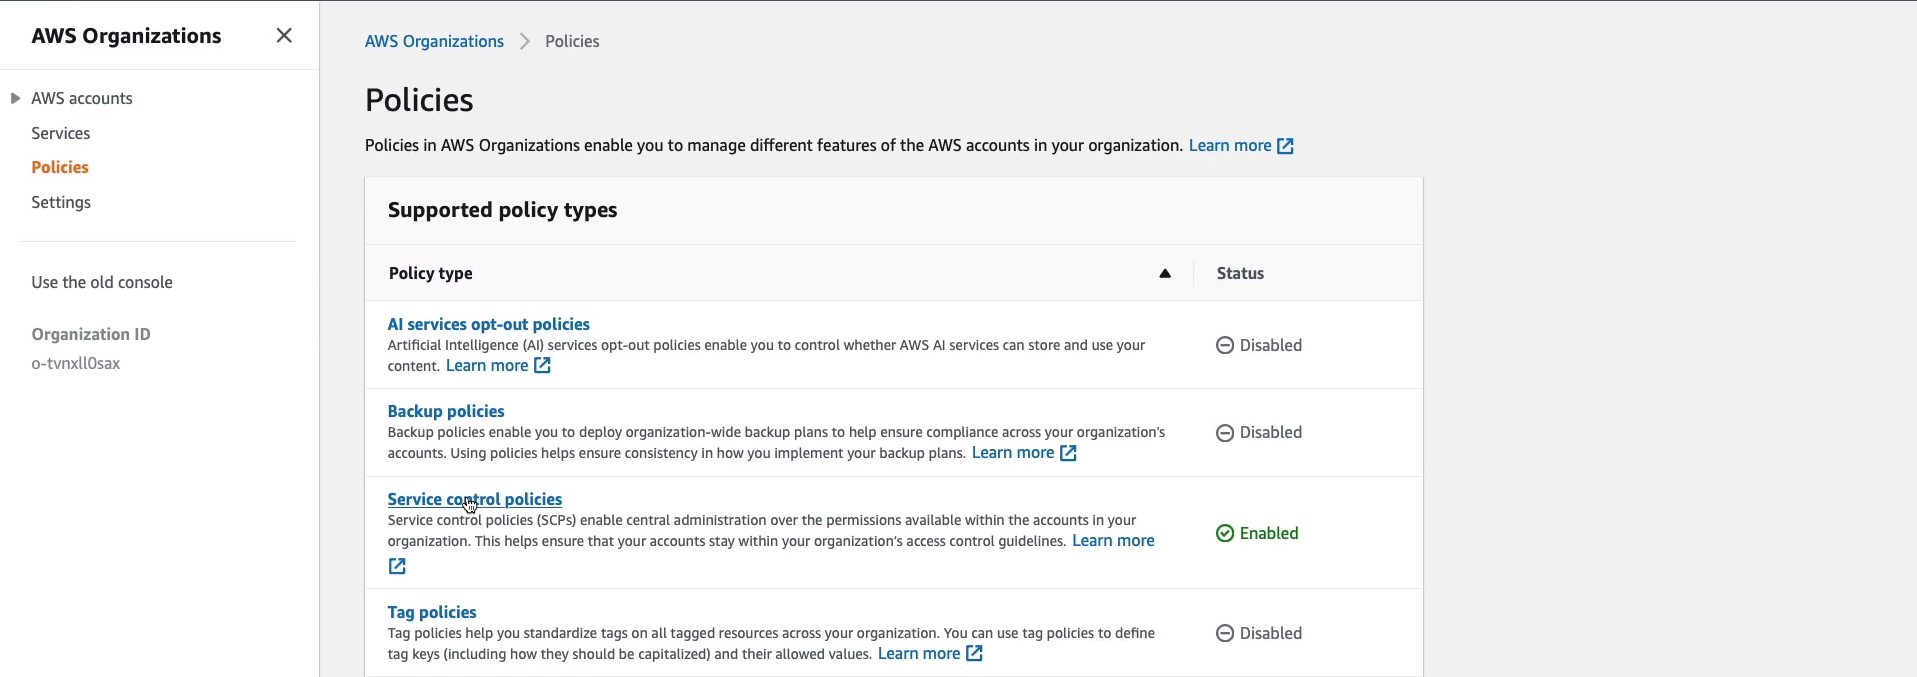
Now, the other thing we have is Service Control Policies. On the left-hand side here, we can click on Policies and then click on Service Control Policies.
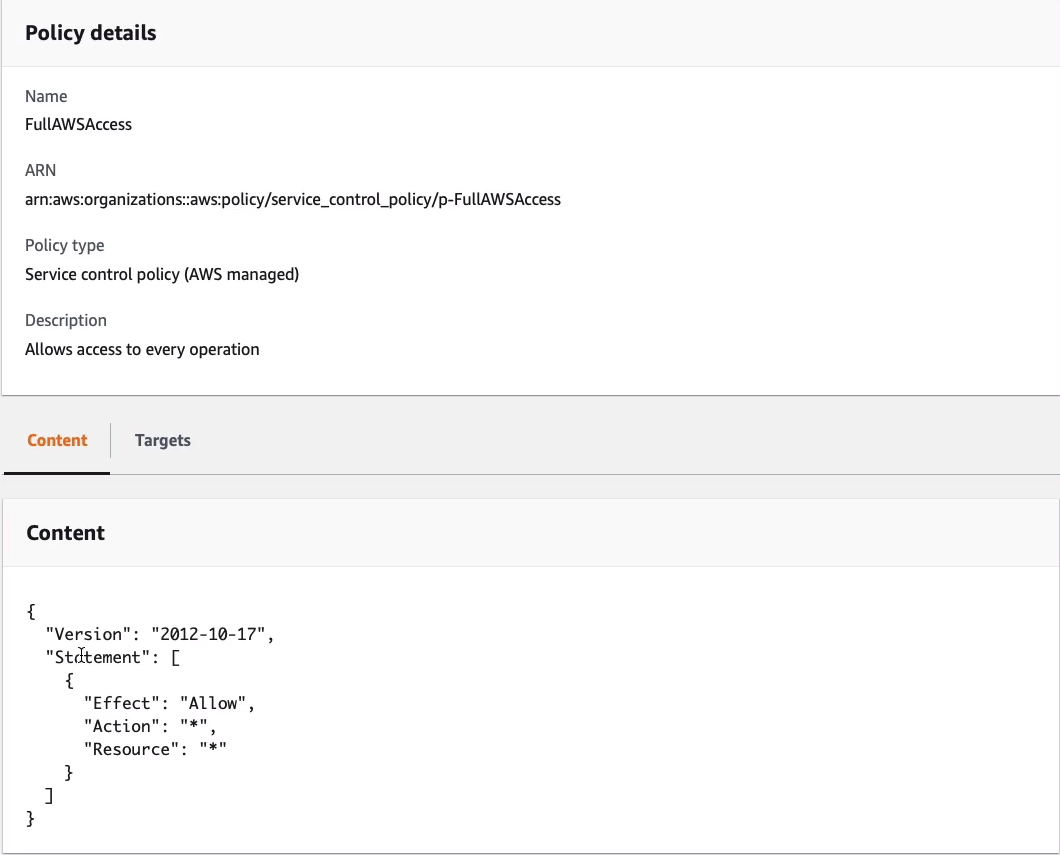
We can see there are two policies. The first is the FullAWSAccess policy.
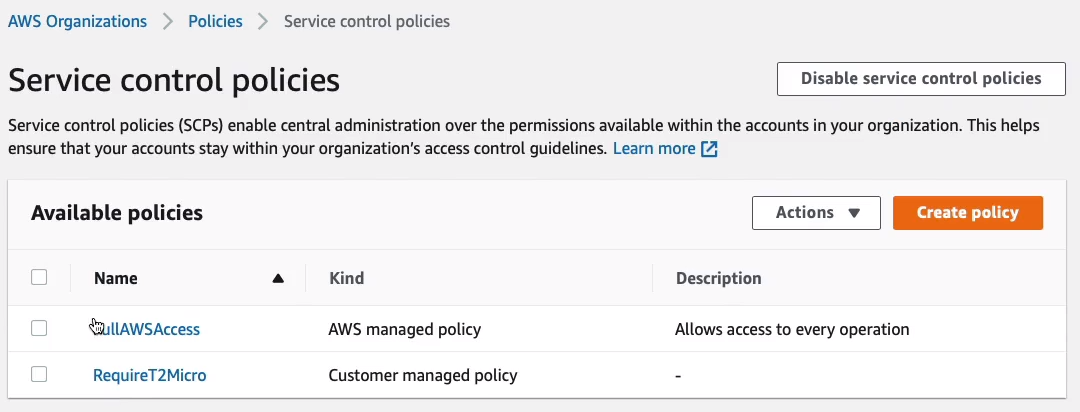
This policy is linked at the root level and then inherited by all of the other accounts in OUs and this basically allows everything. So this just means that we’re not restricting any permissions within the organizational units or within the accounts anywhere.
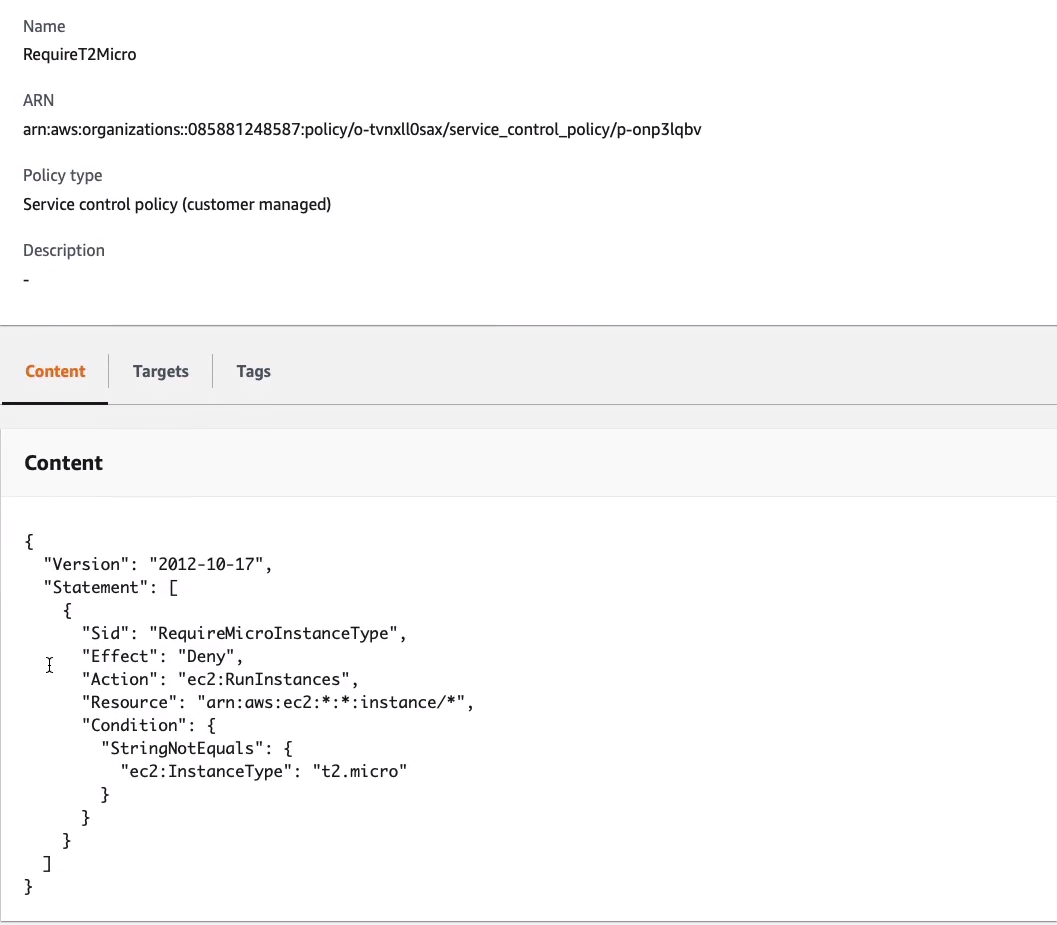
Now, going back up a level, I then have one called RequireT2Micro. What this one does is it means that you cannot launch an instance unless it’s a t2.micro. So we’re denying it. So we already have an allow that allows everything and then we put in a deny which takes precedence. And this one denies the ec2:RunInstance API action unless, and we have a condition where, the string does not equal ec2:InstanceType t2.micro. So in other words, deny if it isn’t t2.micro and allow if it is.
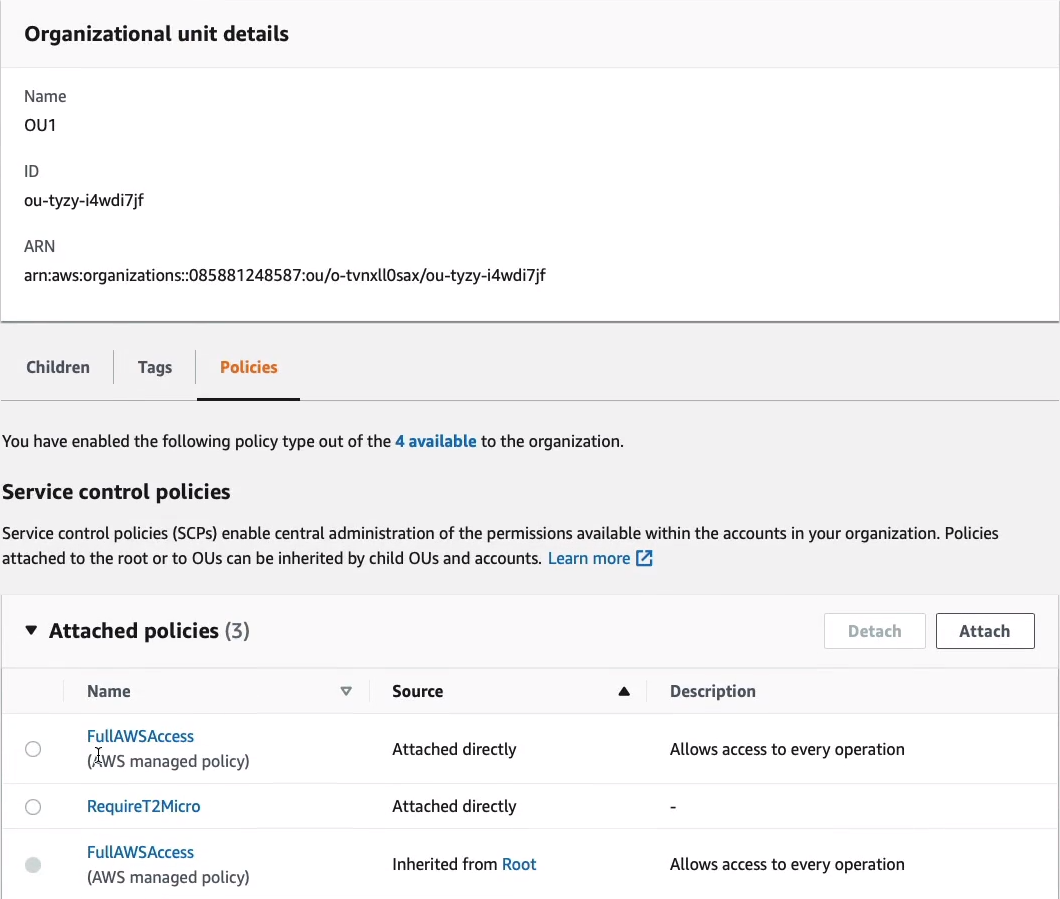
So coming back to our accounts, what we then do with our policies is apply them. So for exam[le, I can go into my Organizational Unit 1 (OU1), click on Policies and I’ll see that it has the FullAWSAccess. This is inherited, you can see it here as well, and then we have the RequireT2Micro which has been attached directly. So that means any accounts within this organizational unit will only be able to launch t2.micro instance types.
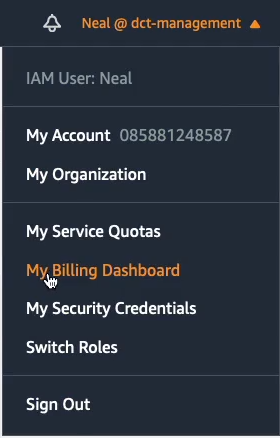
To go to Consolidated Billing, go to your My Billing Dashboard.
Let’s go into a service called Cost Explorer and here I want to see my Monthly spend by linked account.
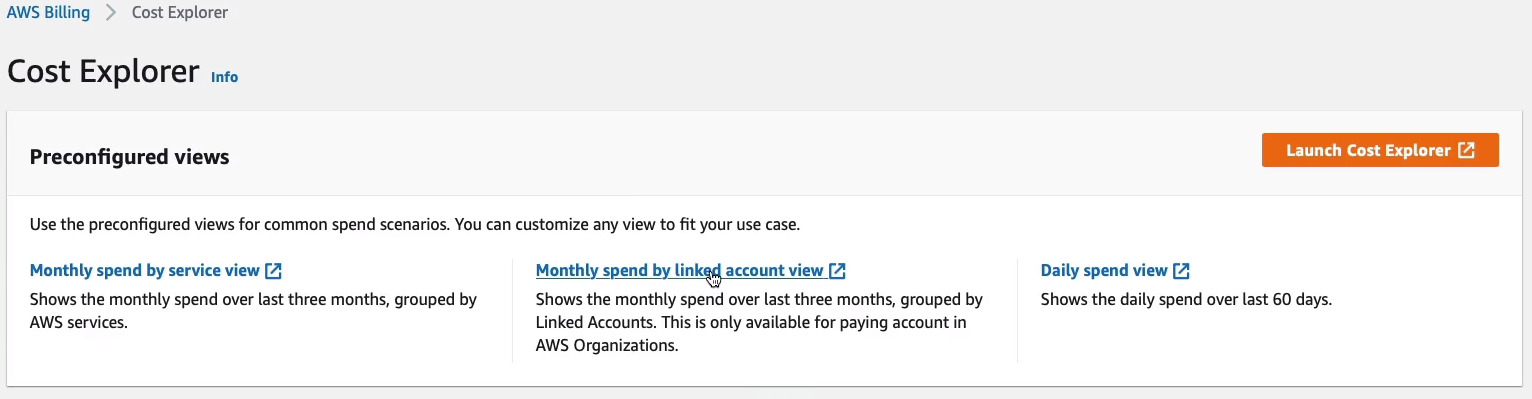
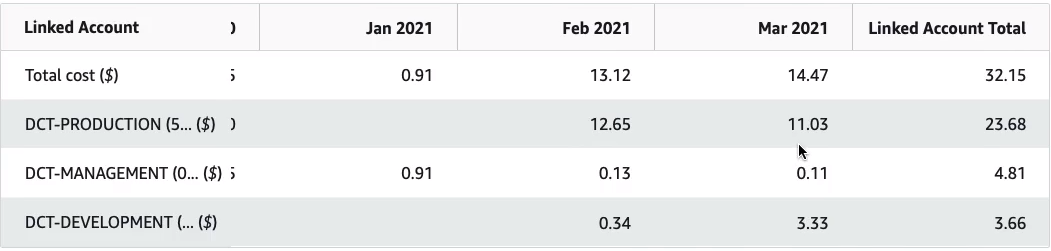
In Cost Explorer, we can now see the three different accounts in the organization.

If I scroll forward to the most recent months, we can see that we have all three accounts in operation and you can see the actual costs for each of those accounts per month.
You can then use these filters. So, for example, I could potentially go to, let’s say, North Virginia, which is probably where I had most of my resources running. So we’ve got quite a bit of cost there. So we can choose by Region. We can filter various ways, so we can filter by Service.
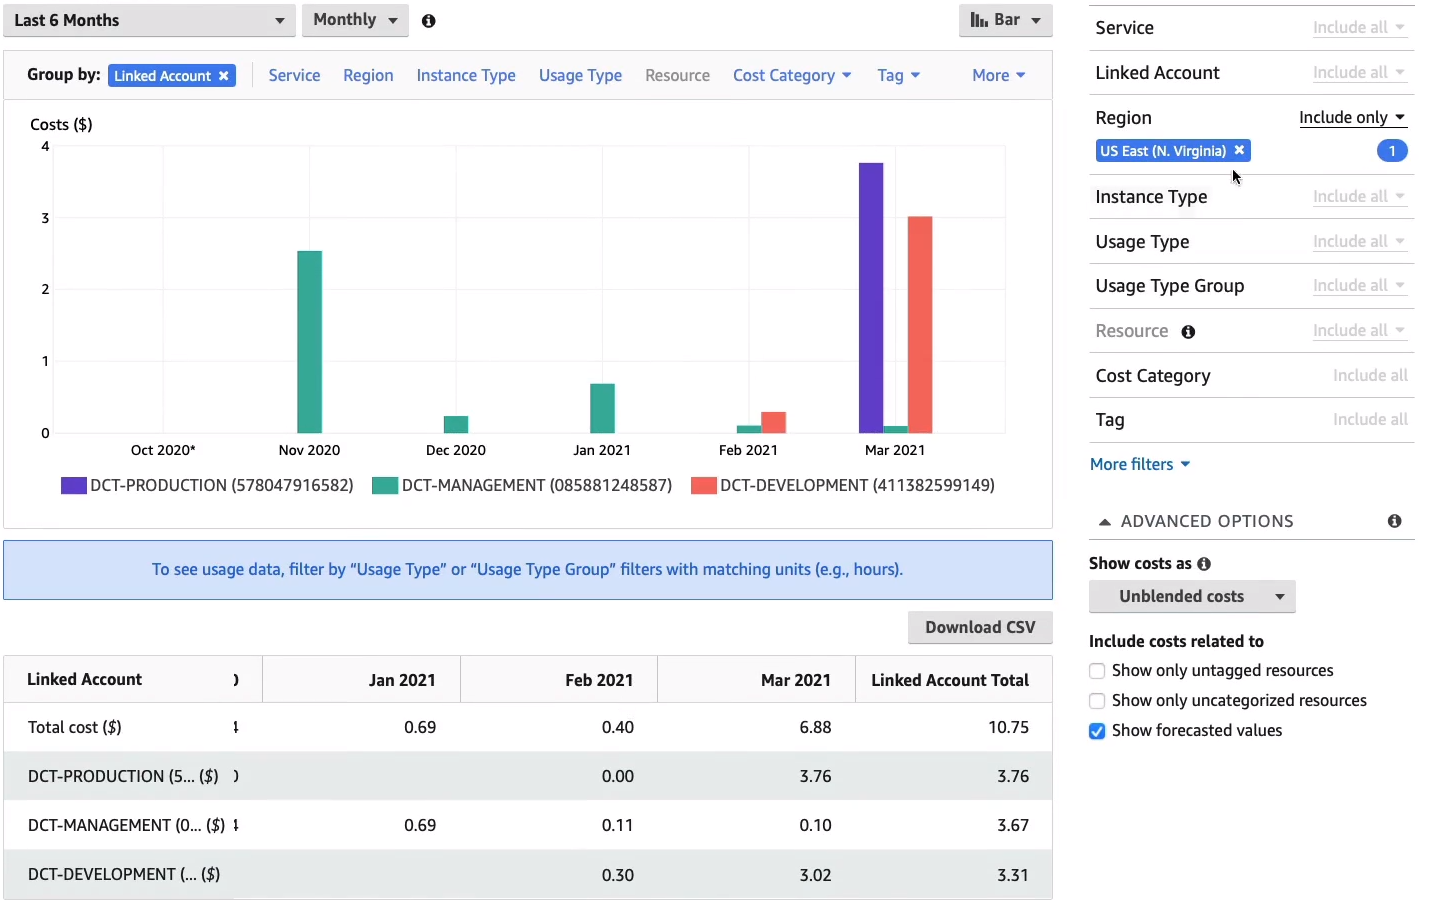
Now it tells me where my money is going. I can see the costs attributed to different services.

So it’s important to understand Consolidated Billing. It gives you that single bill. Says it’s getting paid by one credit card but then at the same time, you’re able to break out by accounts and filter by all these different parameters here as well. Now, Consolidated billing has another advantage, which is that you get to take advantage of some of the Tier discounts that are available when you use certain quantities of services and apply across different organizations.
AWS Control Tower
- Simplifies the process of creating multi-account environments
- Sets up governance, compliance, and security guardrails for you
- Integrates with other services and features to set up the environment for you including:
- AWS Organizations, Service Control Policies, Organizational Units, AWS Config, AWS CloudTrail, Amazon S3, Amazon SNS, AWS CloudFormation, AWS Service Catalog, AWS Single Sign-On (SSO)
It will automate organizations for you as well as the Service Control Policy application and creating the Organizational Units and then all these other different compliance and security and storage and notification services as well.
Examples of guardrails AWS Control Tower can configure for you include:
- Disallowing public write access to Amazon Simple Storage Service (Amazon S3) buckets
- Disallowing access as a root user without multi-factor authentication
- Enabling encryption for Amazon EBS volumes attached to Amazon EC2 instances
AWS Systems Manager
AWS System Manager is a very powerful service that is comprised of several different components.
- Manages many AWS resources including Amazon EC2, Amazon S3, Amazon RDS, etc.
- Systems Manager Components:
- Automation
- Run Command
- Inventory
- Patch Manager
- Session Manager
- Parameter Store
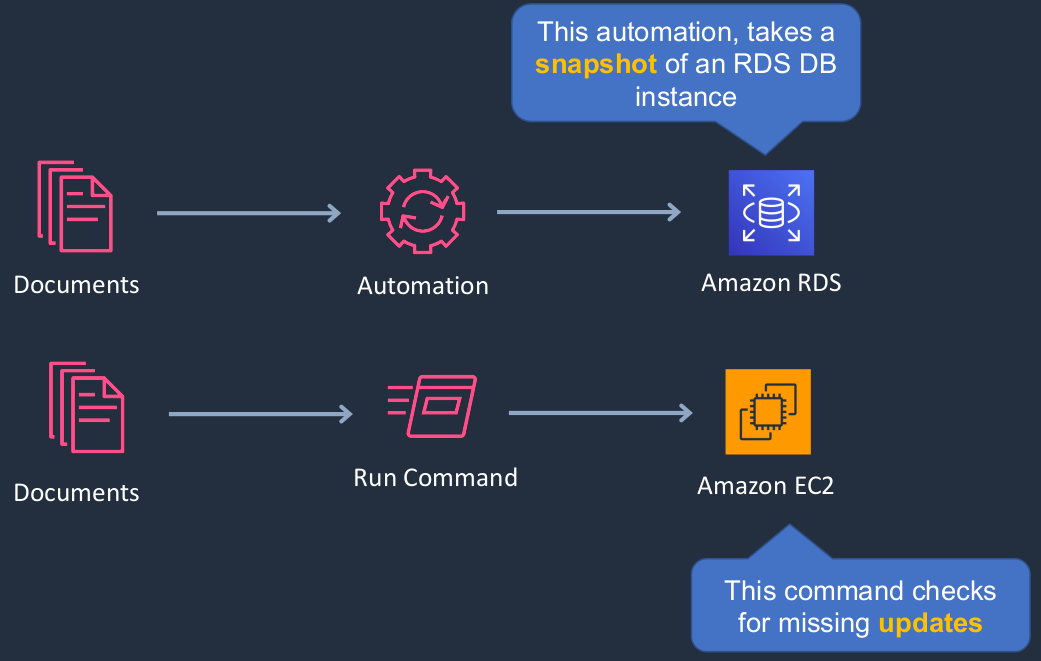
We have something called a Document in Systems Manager and we can pass these documents through to the Automation feature and the automation feature can then do things like force a snapshot to be taken of an RDS database. So the actions are actually defined in the documents passed through to automation, and then it will Session automate them based on some kind of parameters or schedules that you configure. Again, we use documents with Run commands and the run command can do things like check for missing updates on EC2 instances. So it’s very similar to the automation suite, but it has slightly different commands that it runs versus automation.
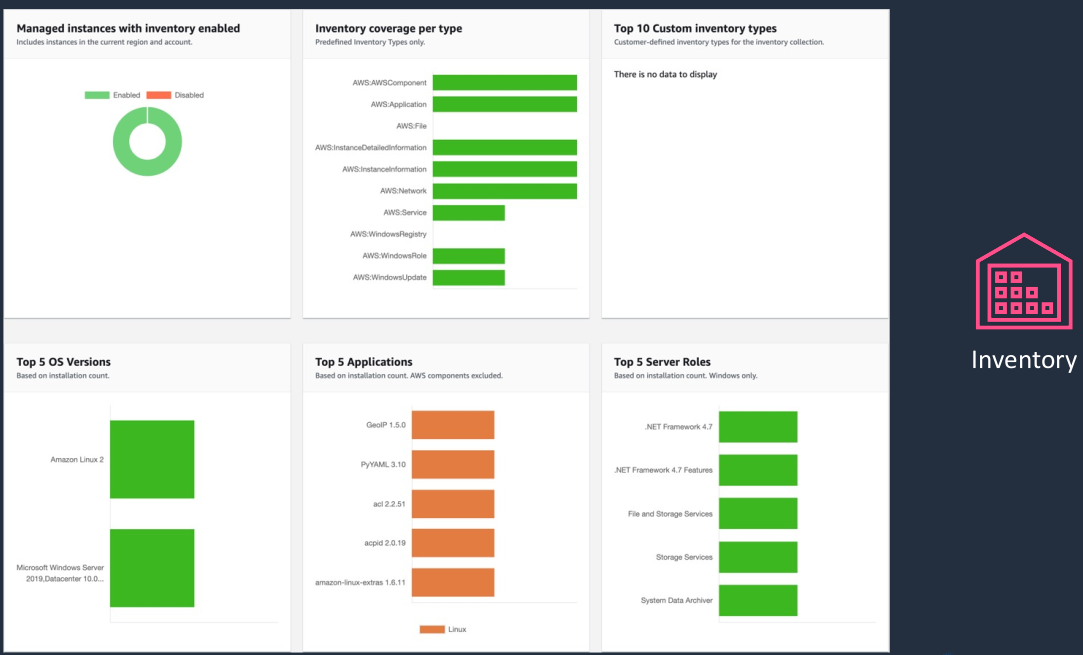
We then have Inventory where all of the managed systems in the Systems Manager report information about themselves. So we can see things like the operating system version, information about the server roles that are installed, the applications that are installed, and so on. Once we’ve gathered that inventory, we can then use that to understand more about our systems like what are their patch levels? How many of a certain type of operating system do we have or is there some compliance that we need to apply to application configuration?
Patch Manager
- Deploy operating system and software patches automatically across large groups of Amazon EC2 or on-premises instances
- So Systems Manager does not just manage your EC2 resources, it can also manage your servers on-premises as well and you just have to install an agent on those systems and configure them so that they can report information and be managed by the Systems Manager.
Compliance
- Scan managed instances for patch compliance and configuration inconsistencies
- We can define how we want our systems to be configured and check if they’re compliant with that configuration or not.
Session Manager
- Secure remote management of your instances at scale without logging into your servers
- It actually means that you don’t need to use the Secure Shell, the SSH protocol, or the Remote Desktop Protocol, the RPD protocol, that we often use with Windows. So instead you get a secure session into your instances without having to open the firewall rules to allow access to those other ports.
- Replaces the need for bastion hosts, SSH, or remote PowerShell
- So it means you get that command-line access. It might not replace RDP because you might want that console-based access but it certainly replaces remote PowerShell or SSH into those systems.
Parameter Store
- Parameter Store provides secure, hierarchical storage for configuration data management and secrets management
- Now, this means you can store information such as secrets, passwords, or configuration, information about your services or applications in a hierarchical format within parameter store, and then make API calls and get access to that information.
Manage EC2 Instances
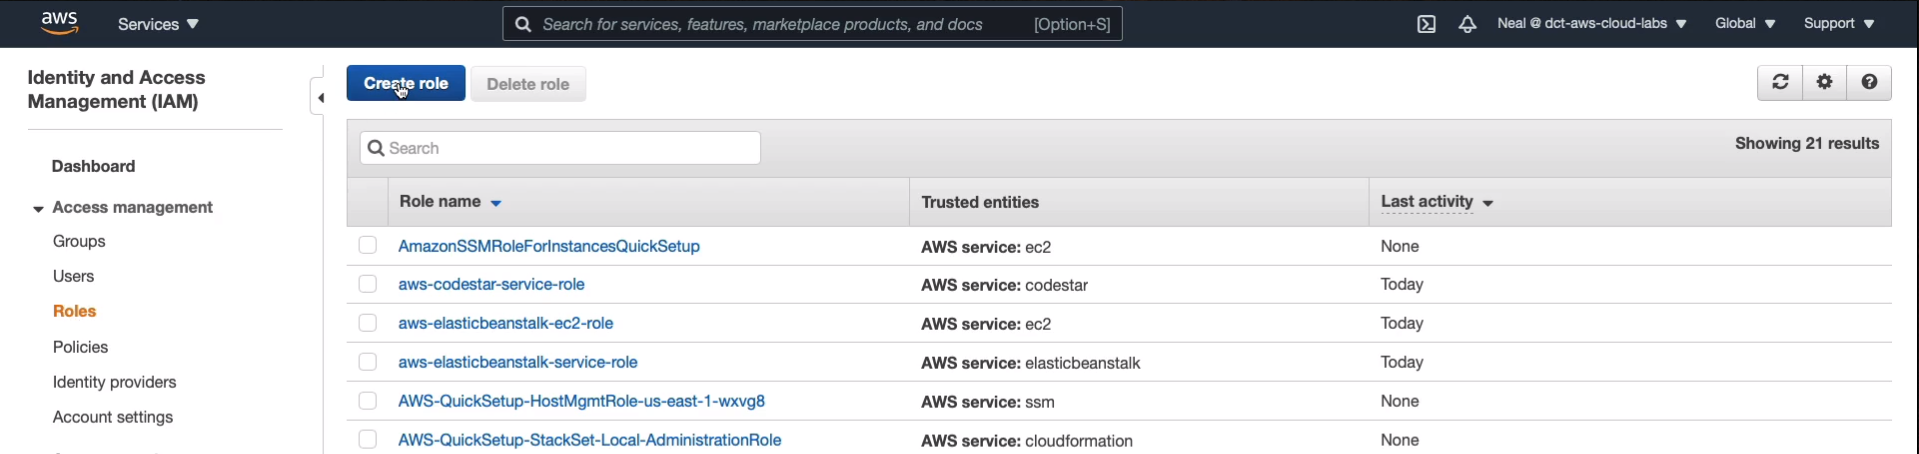
We’re going to go into the Management Console > Security, Identity, & Compliance > IAM. The first thing I want to do is create an IAM Role.

Now, the reason for that is there are two things we need to be able to manage our instances with the Systems Manager. The first one is the Agent and that’s going to be already installed on the AMI we use and then there’s a Role and the role will give the EC2 instance the permissions it needs to talk to Systems Manager. So I’m going to Create role.
It’s going to be for EC2 so that EC2 can actually call Systems Manager. Click on Next: Permissions.

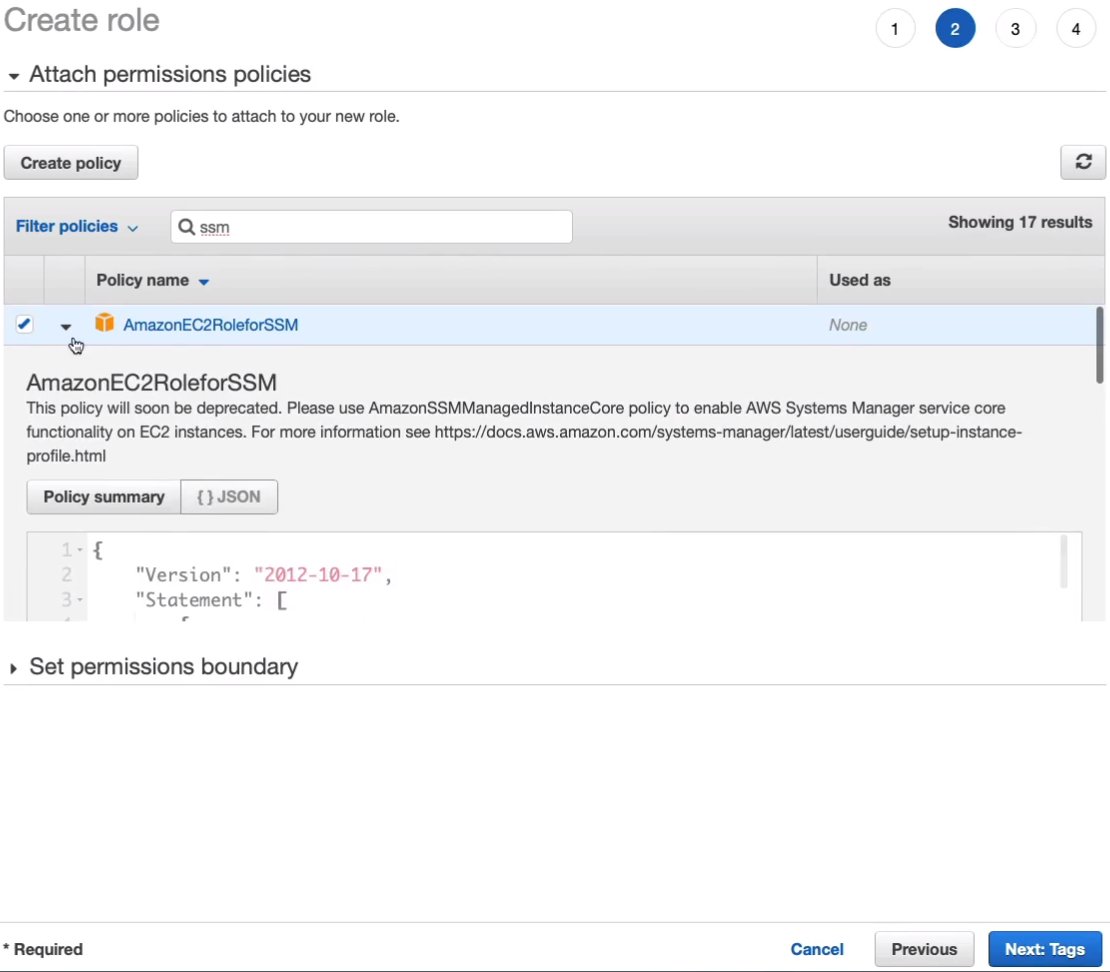
For Policy, if we just search for SSM, we’ll find the AmazonEC2RoleforSSM and SSM comes from an older name for Systems Manager. So we can select this policy and if you want to look at the policy, you’ll see that it has lots of permissions to Systems Manager. So with the policy selected, I’m going to click on Next: Tags.
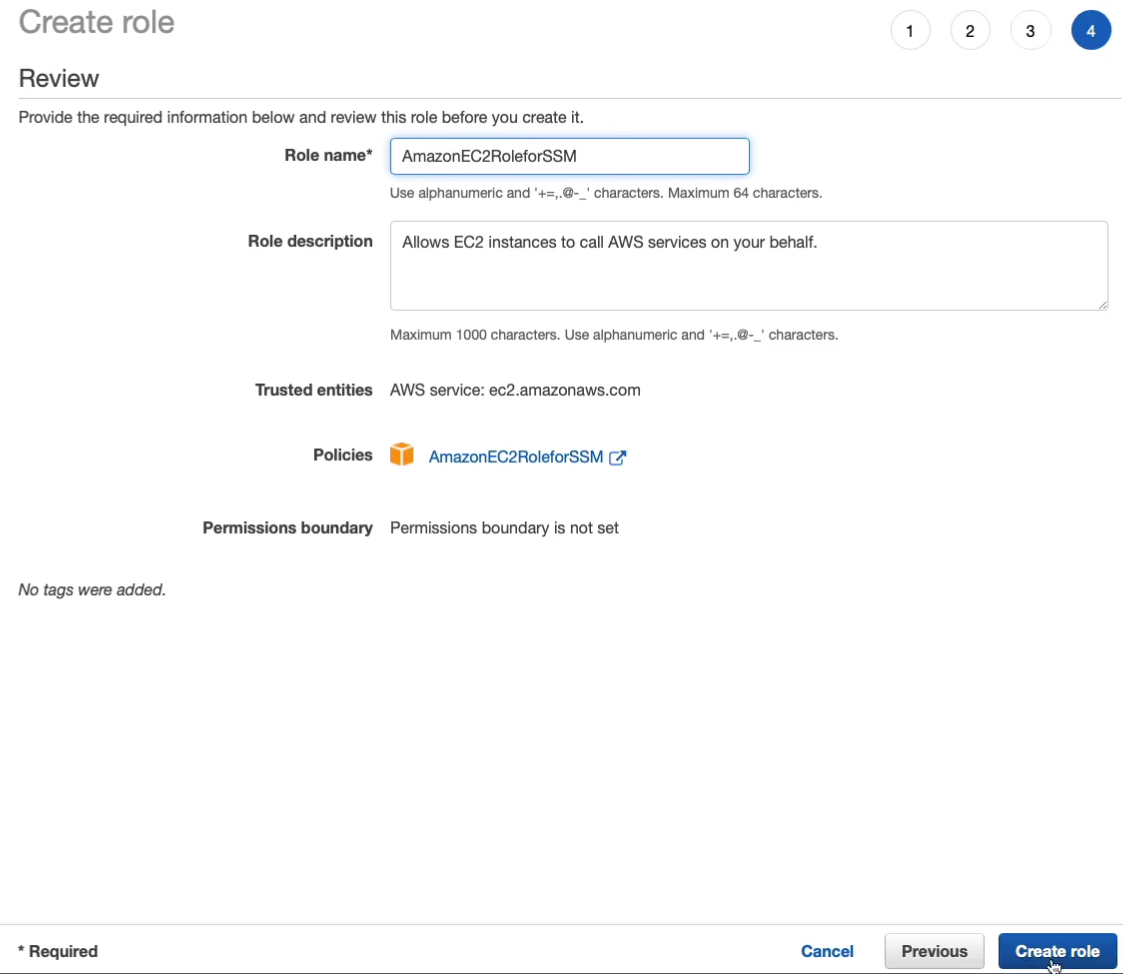
Click on Next: Review and I’m actually going to call it the same name as the policy. So that’s AmazonEC2RoleforSSM and let’s Create role.
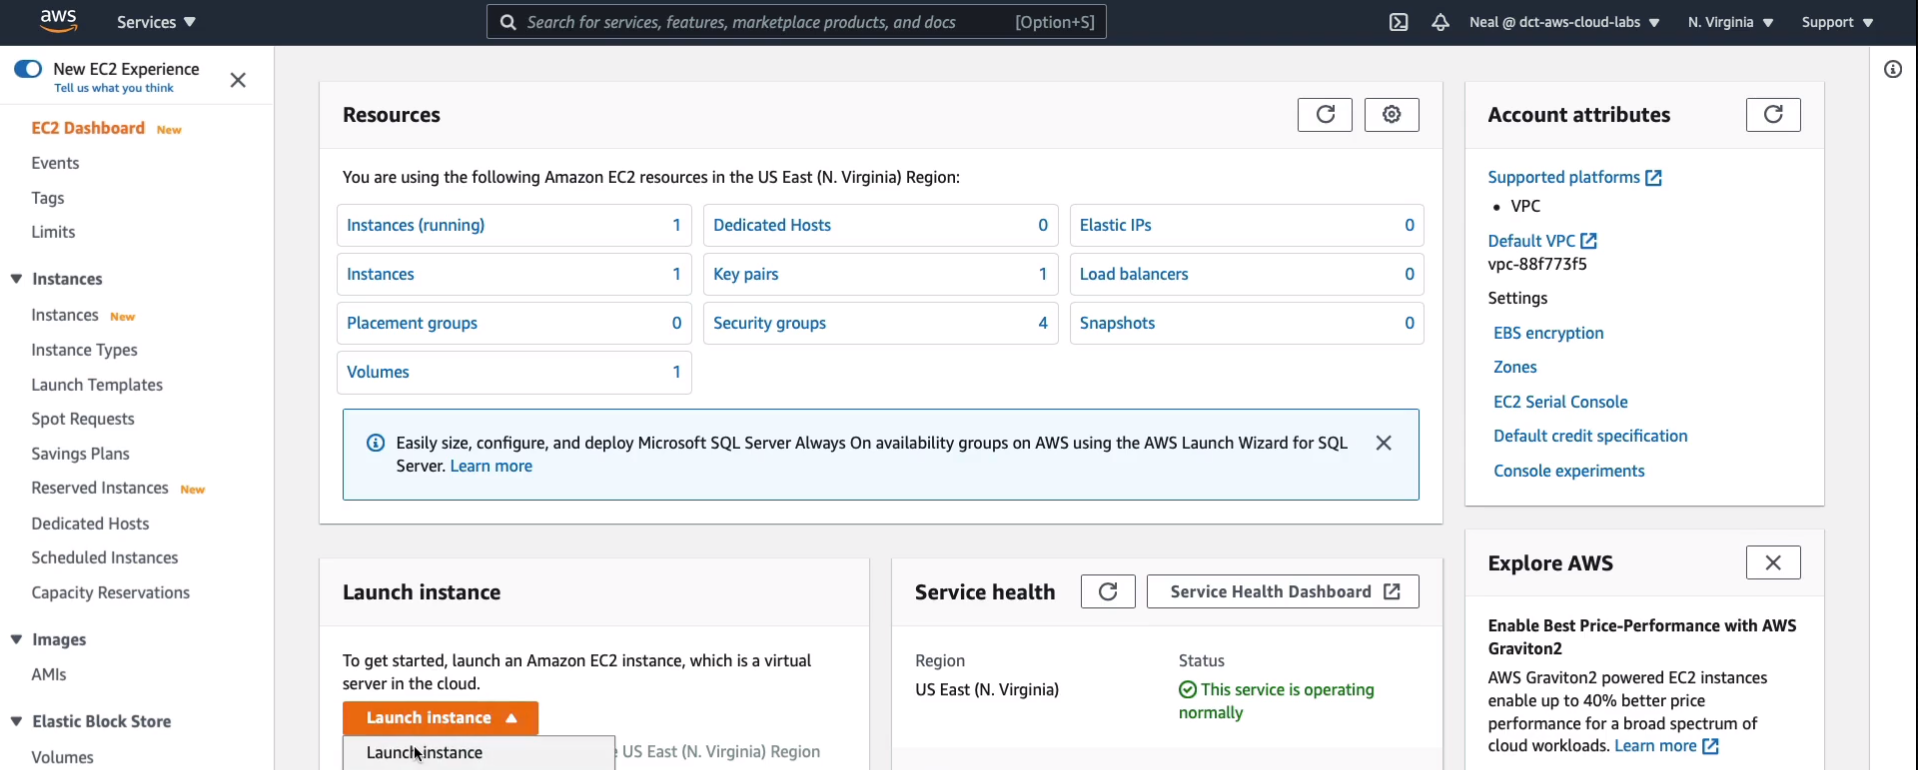
So we’ve got our role created. Now, we need to go to EC2 and launch an instance (Services > Compute > EC2). In EC2, I’m going to launch an instance.
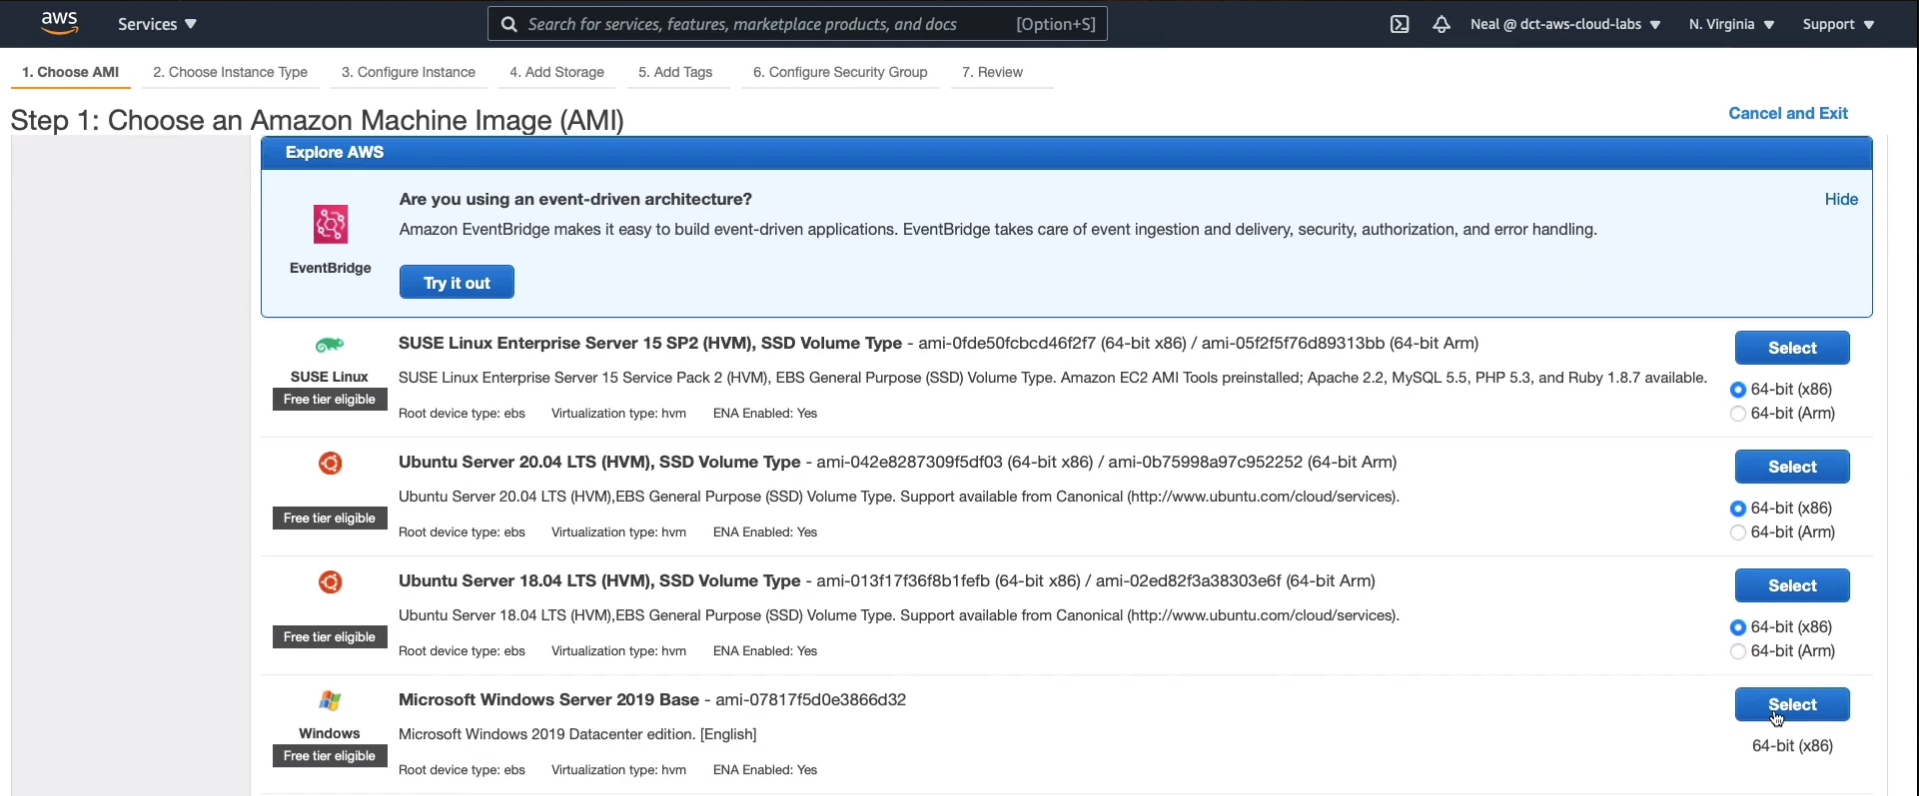
Now, the Amazon Linux 2 AMI already comes with the SSM agent as well as the Windows option here as well. So we can choose either one of these. Let’s choose the Windows option to make things a little different. So I’m going to choose the Windows Server 2019 Base.
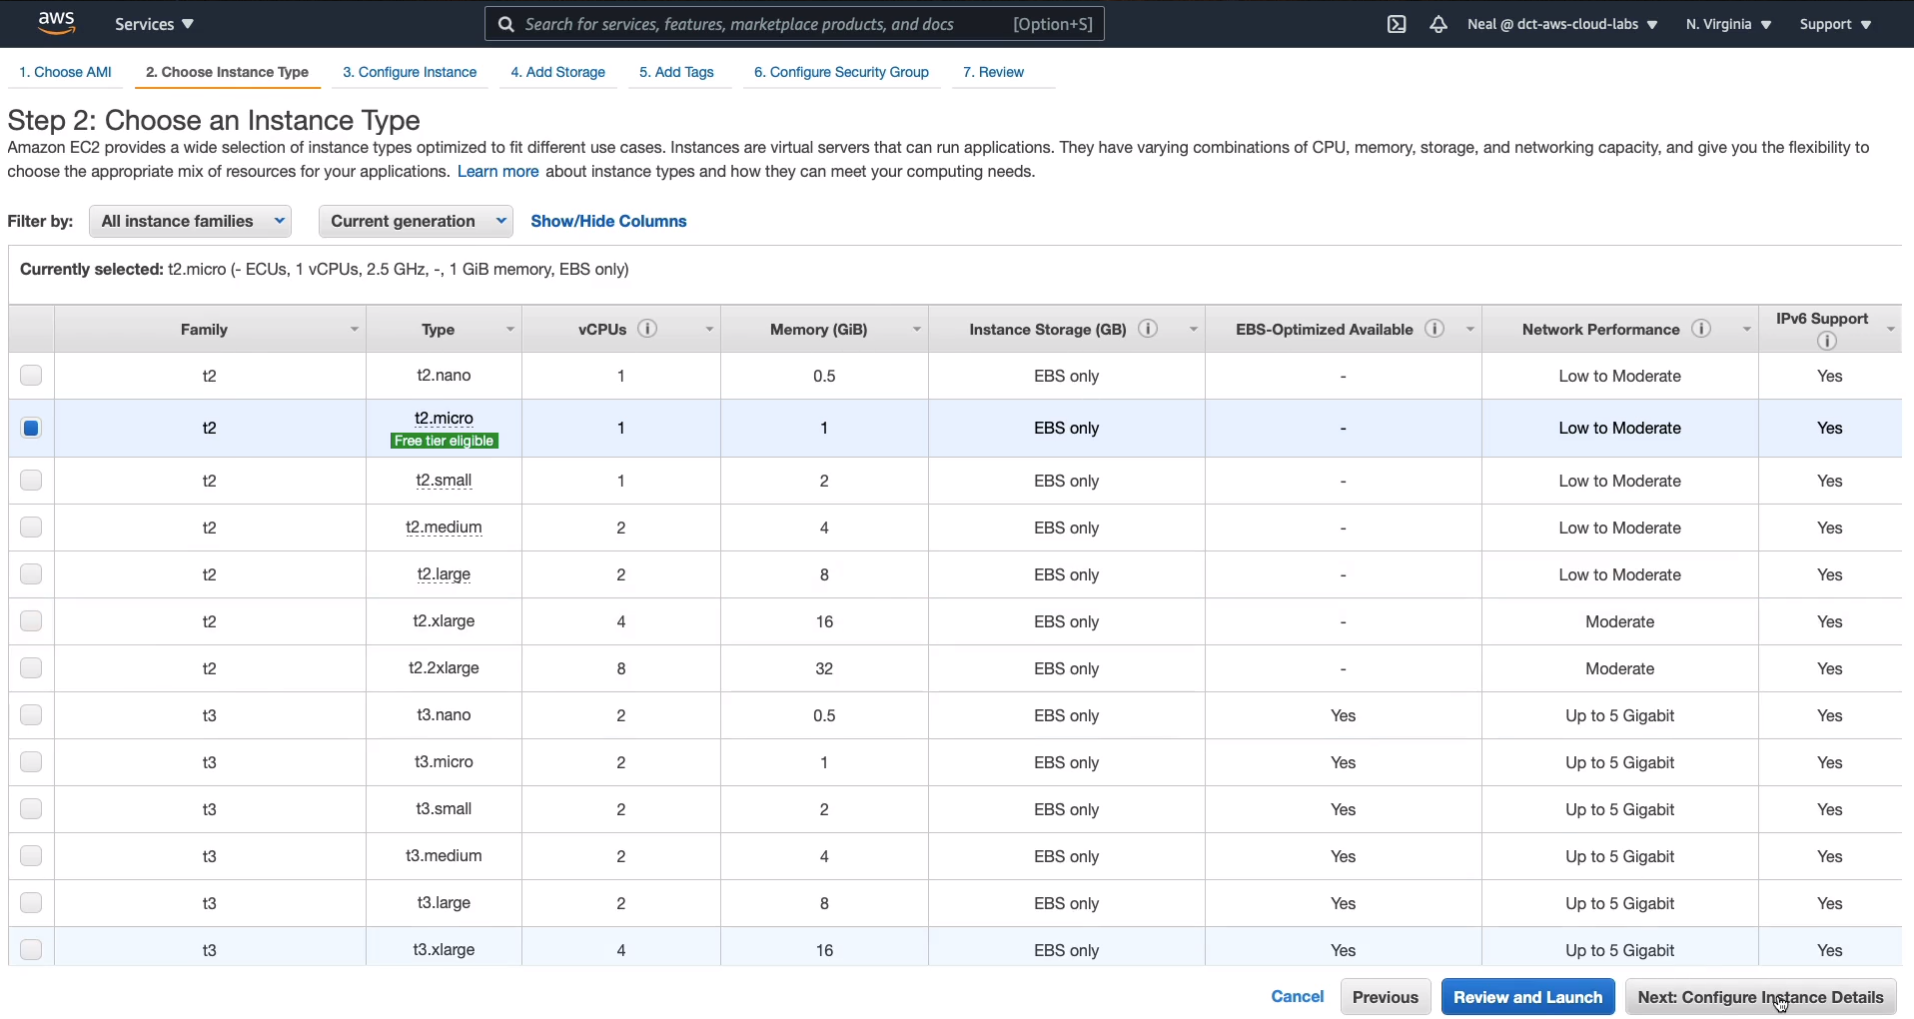
Once selected, I’m going to use t2.micro, and then click on Next: Configure Instance Details.
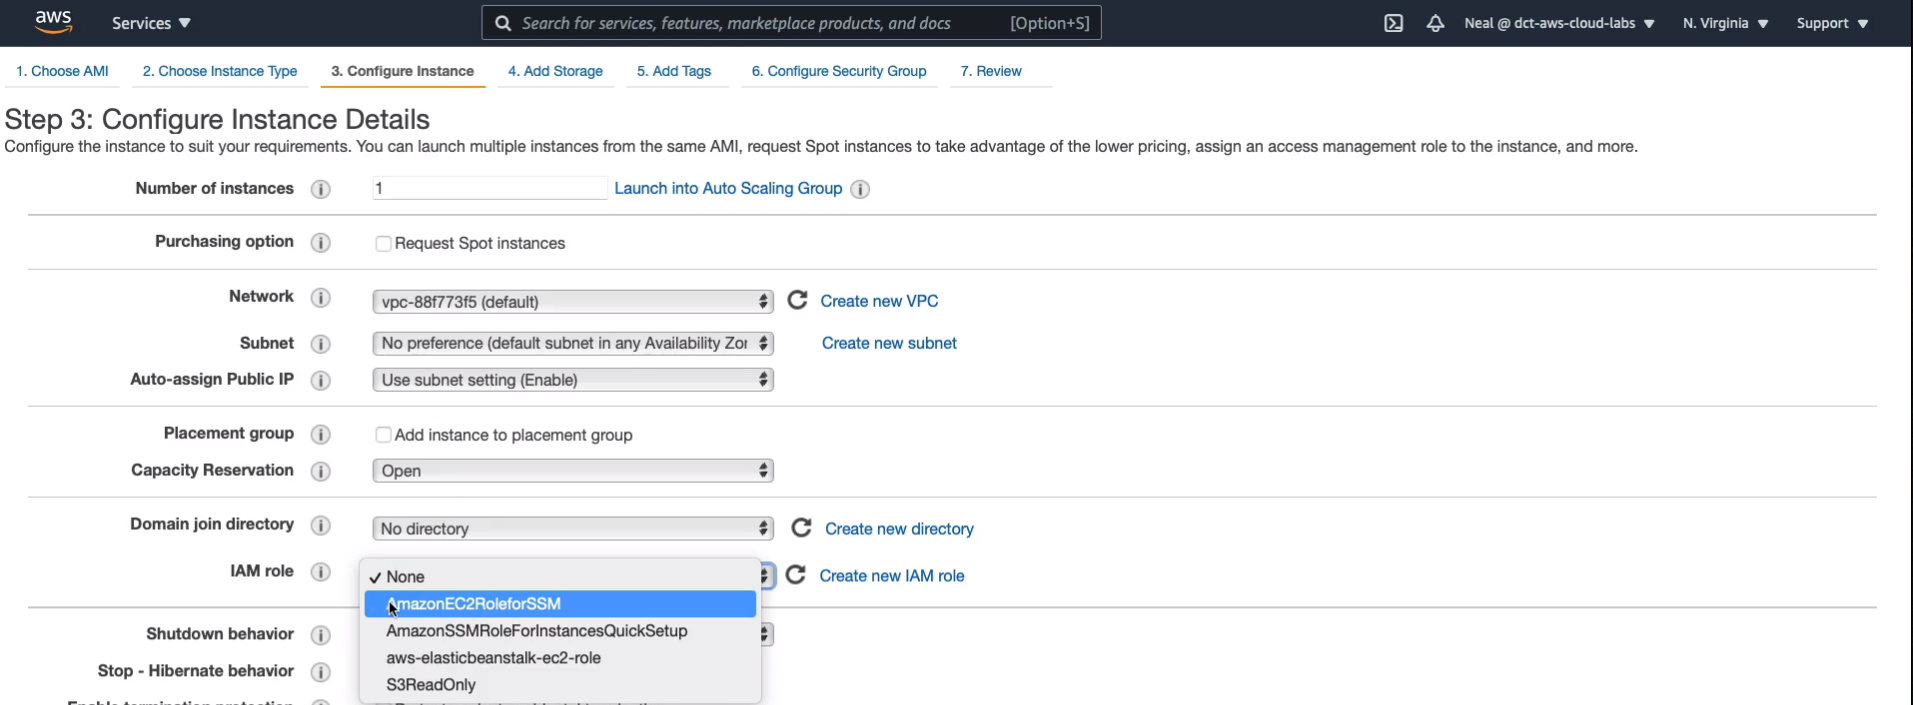
I need to make sure that I use my role. So that’s the AmazonEC2RoleforSSM. With that selected, let’s click on Next: Add Storage. Come through to Security Group.
Choose our WebAccess and then we’ll launch our instance.
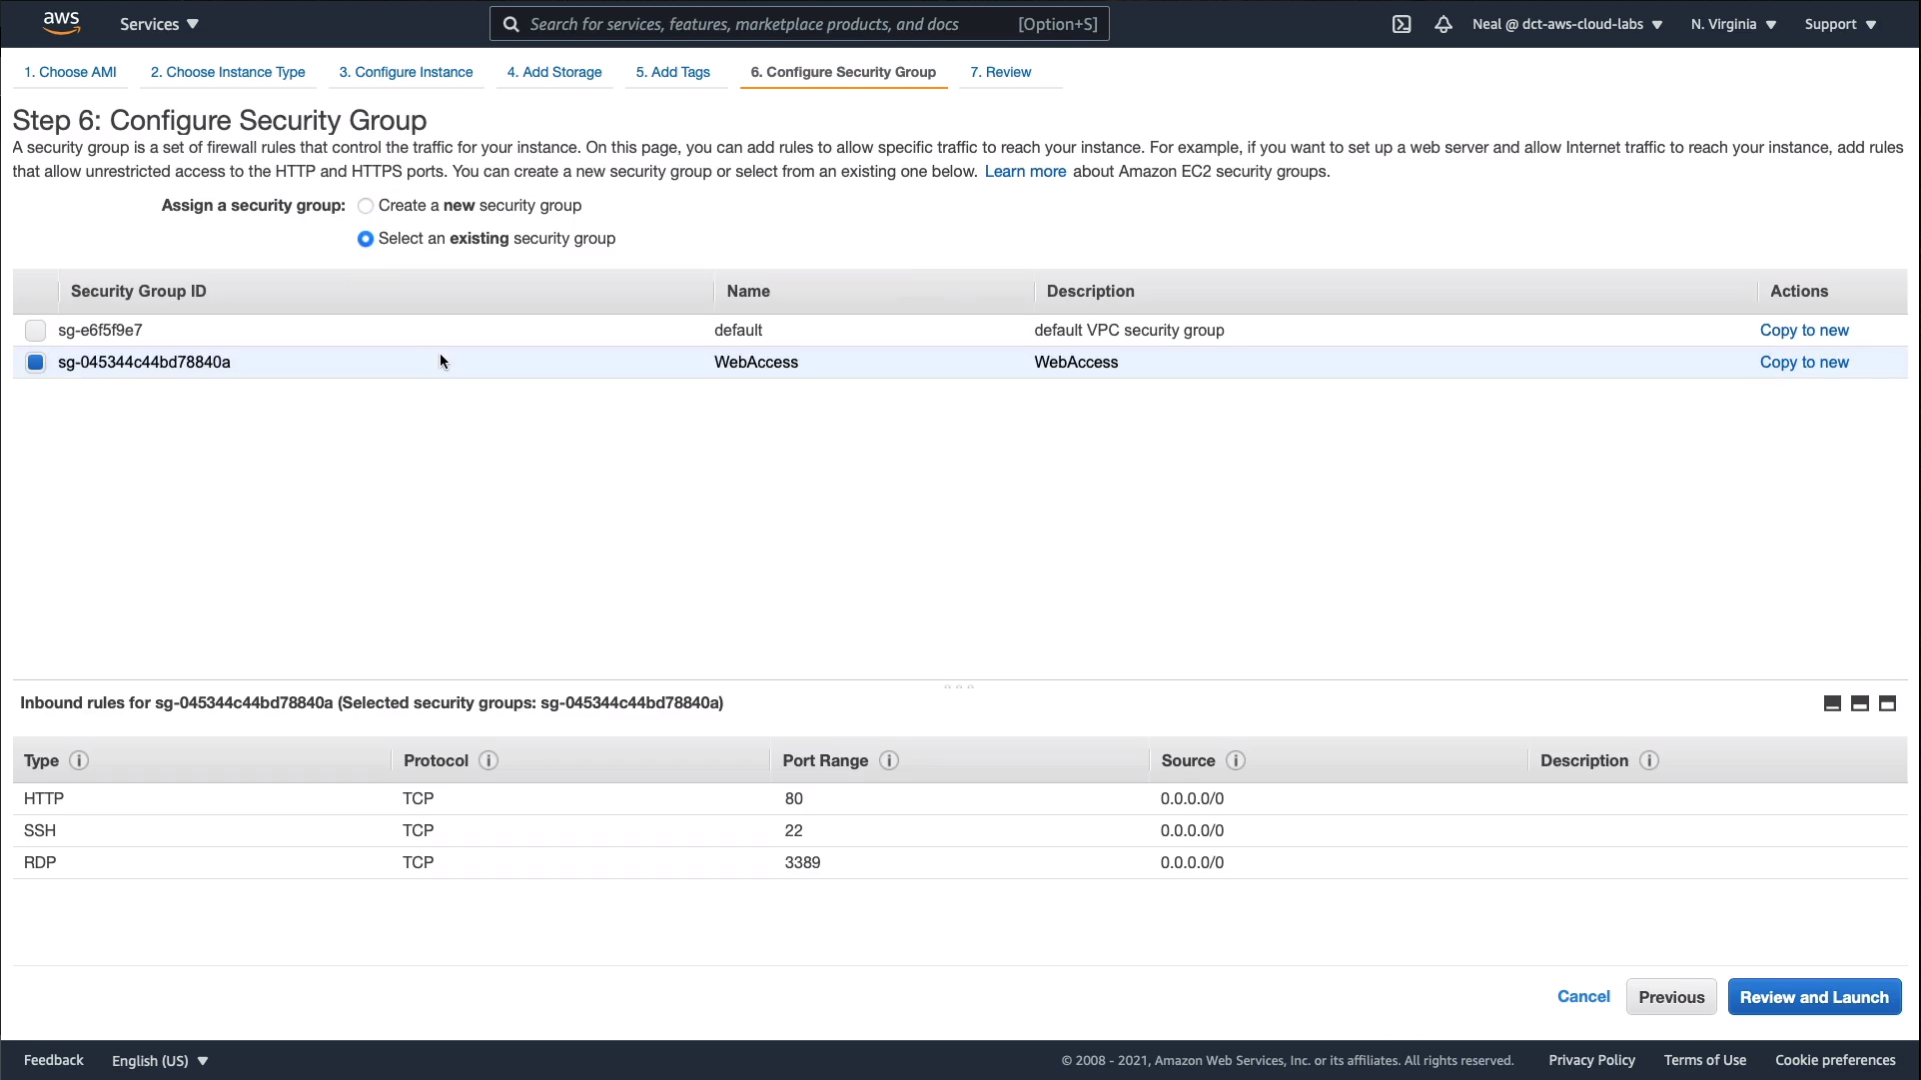
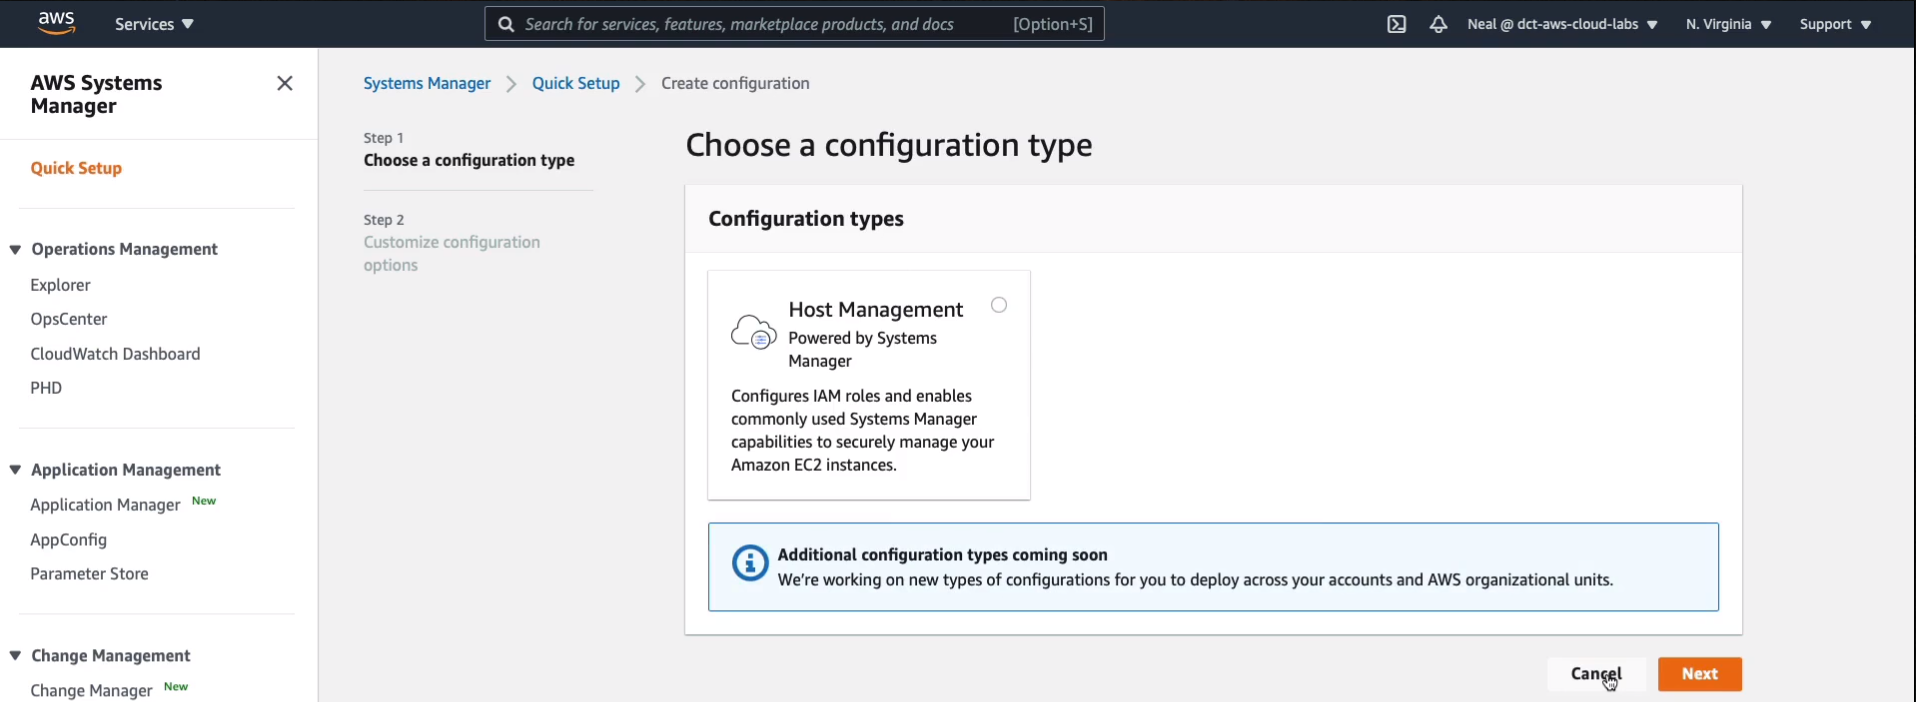
So the instance is launching. It has the permissions it needs for the systems manager and it has the agent preinstalled on it. So that should be everything we need. We can now go to the Services > Management & Governance > Systems Manager and within a few minutes, we should start seeing some information populated. Now in Systems Manager, you’ll probably get put on the Quick Setup page when you first arrive and all you have to do there is just click on Create and it will automatically have this Host Management option. You click on Next and essentially just finish. You don’t have to change any settings.
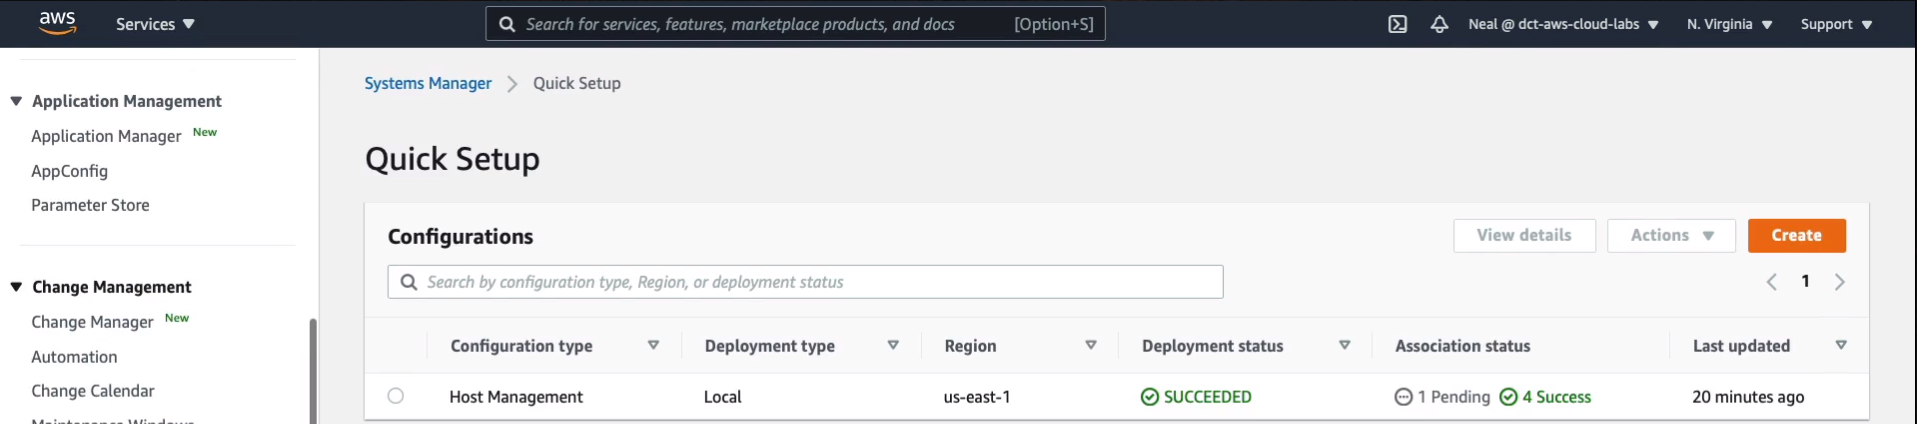
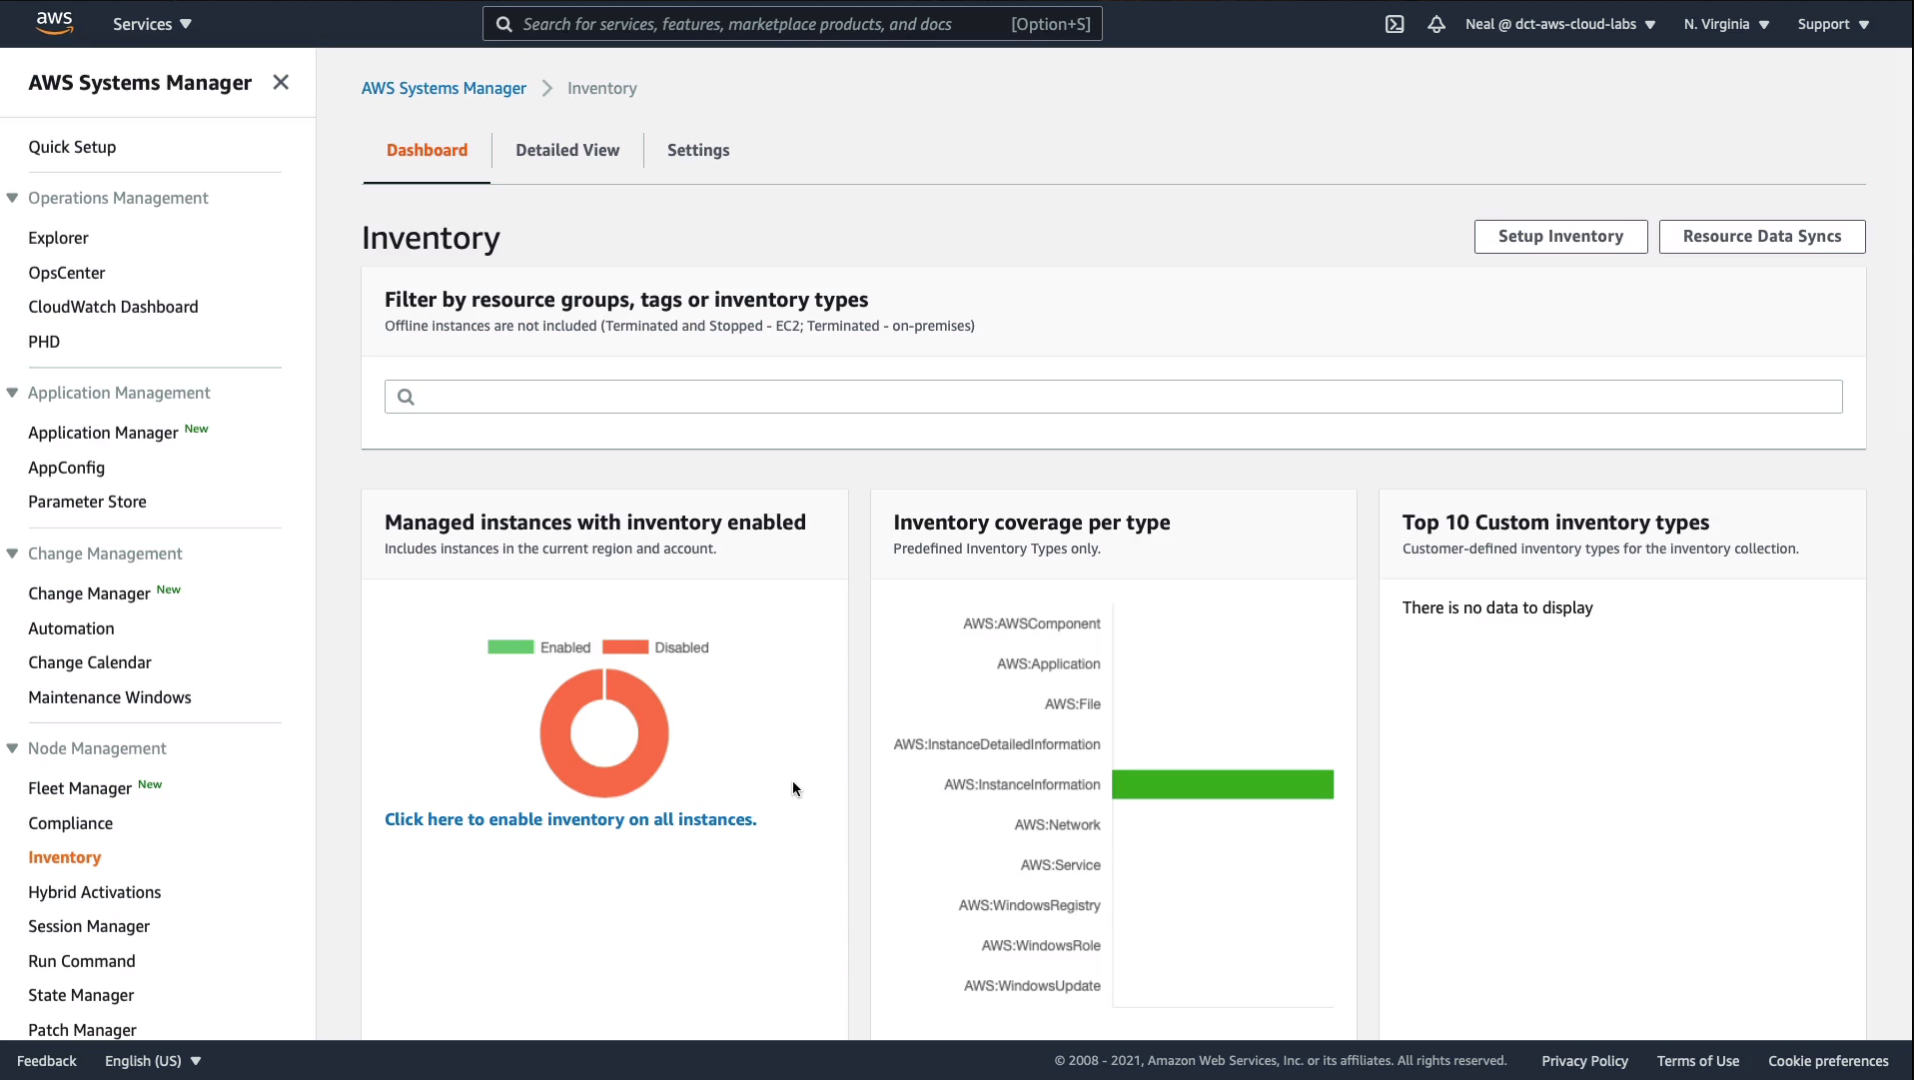
Then you have this Host Management configuration type here. So now it will take a few minutes for our instance to actually report information. But when it does, we should be able to find some information about its Node Management > Inventory.
After a few minutes, I can see that a small amount of information has been populated. We now know that we have the Windows Operating System version here and some more information may come soon.
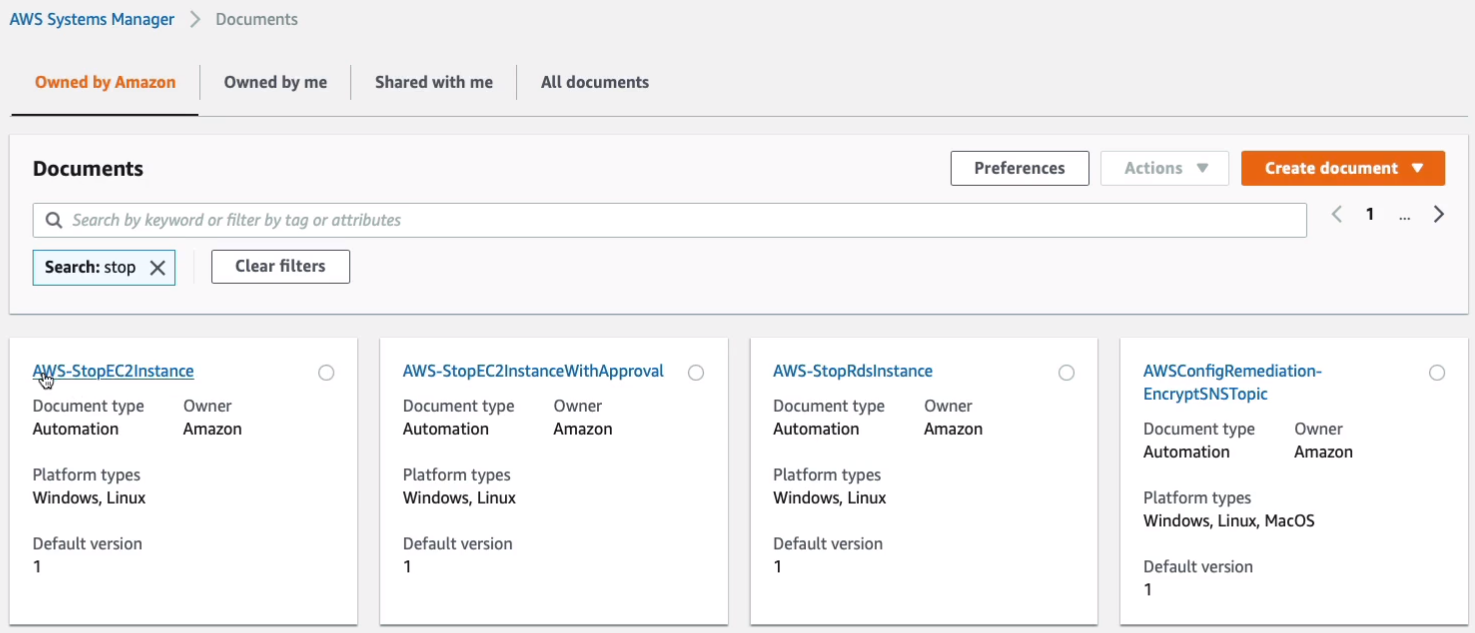
Now, what I want to do is go down to Shared Resources > Documents and under documents, here we have all of these documents we can use with run command and automation. Now I’m just going to search for the word “stop”.
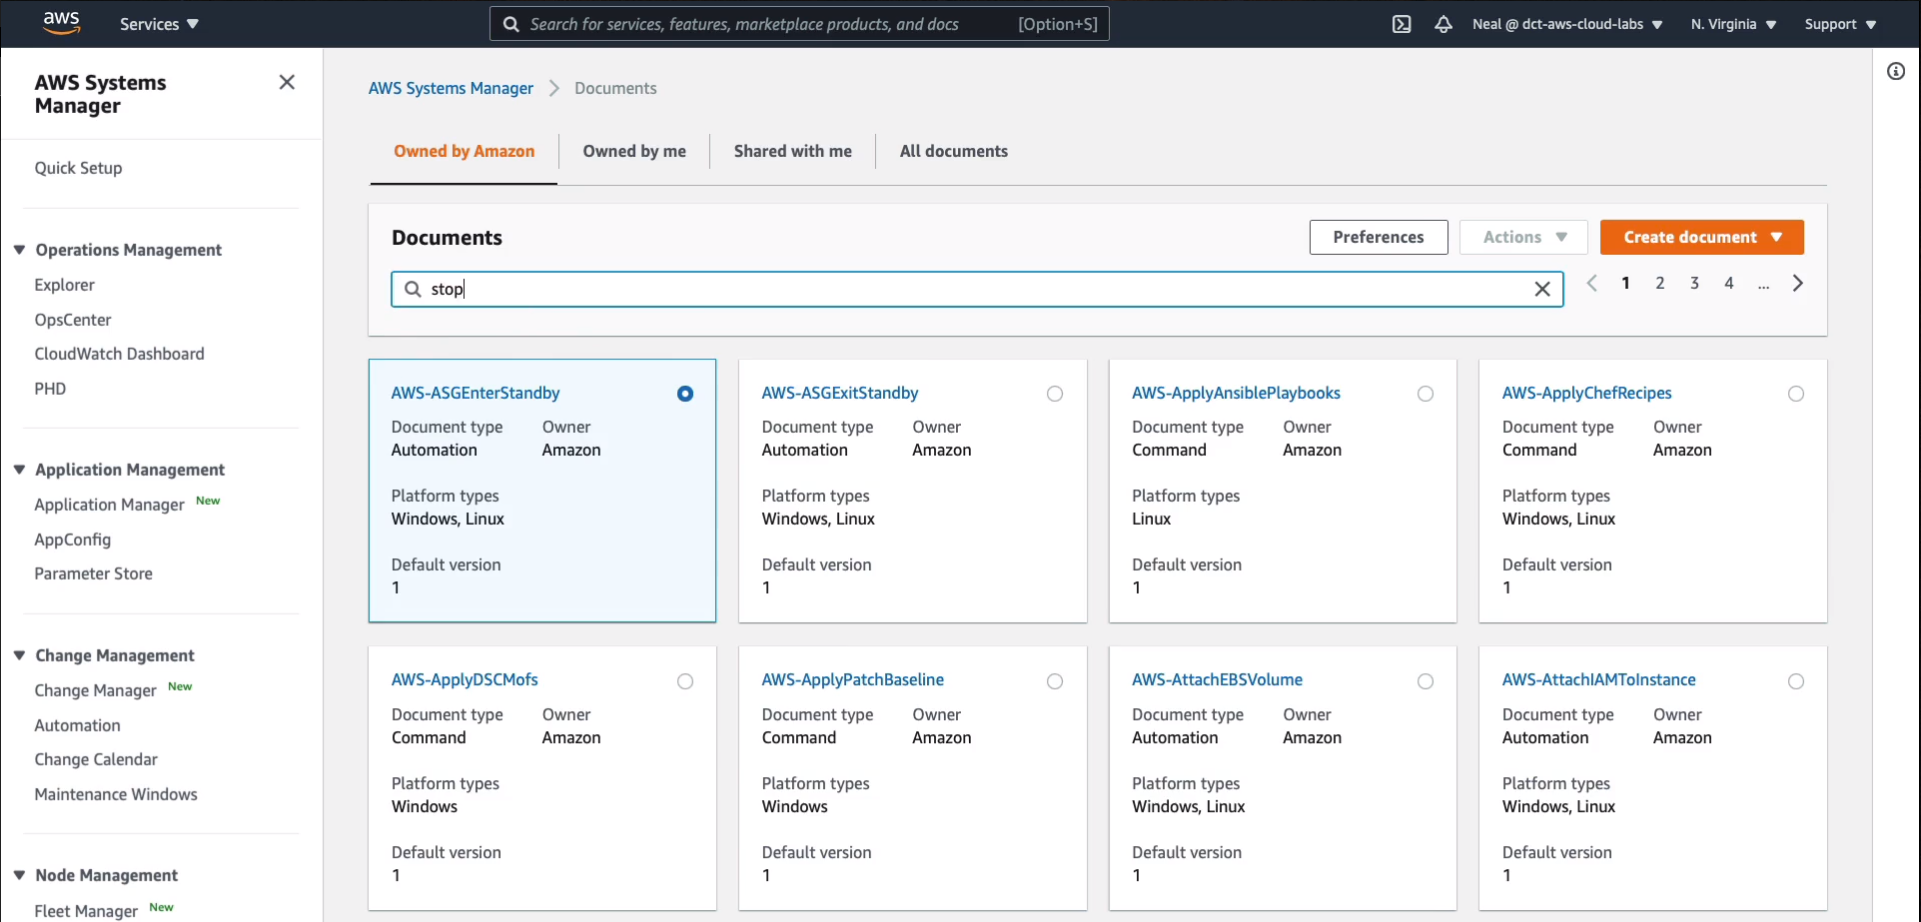
It filtered the list of results and I’ve got this option here to sop an EC2 instance.
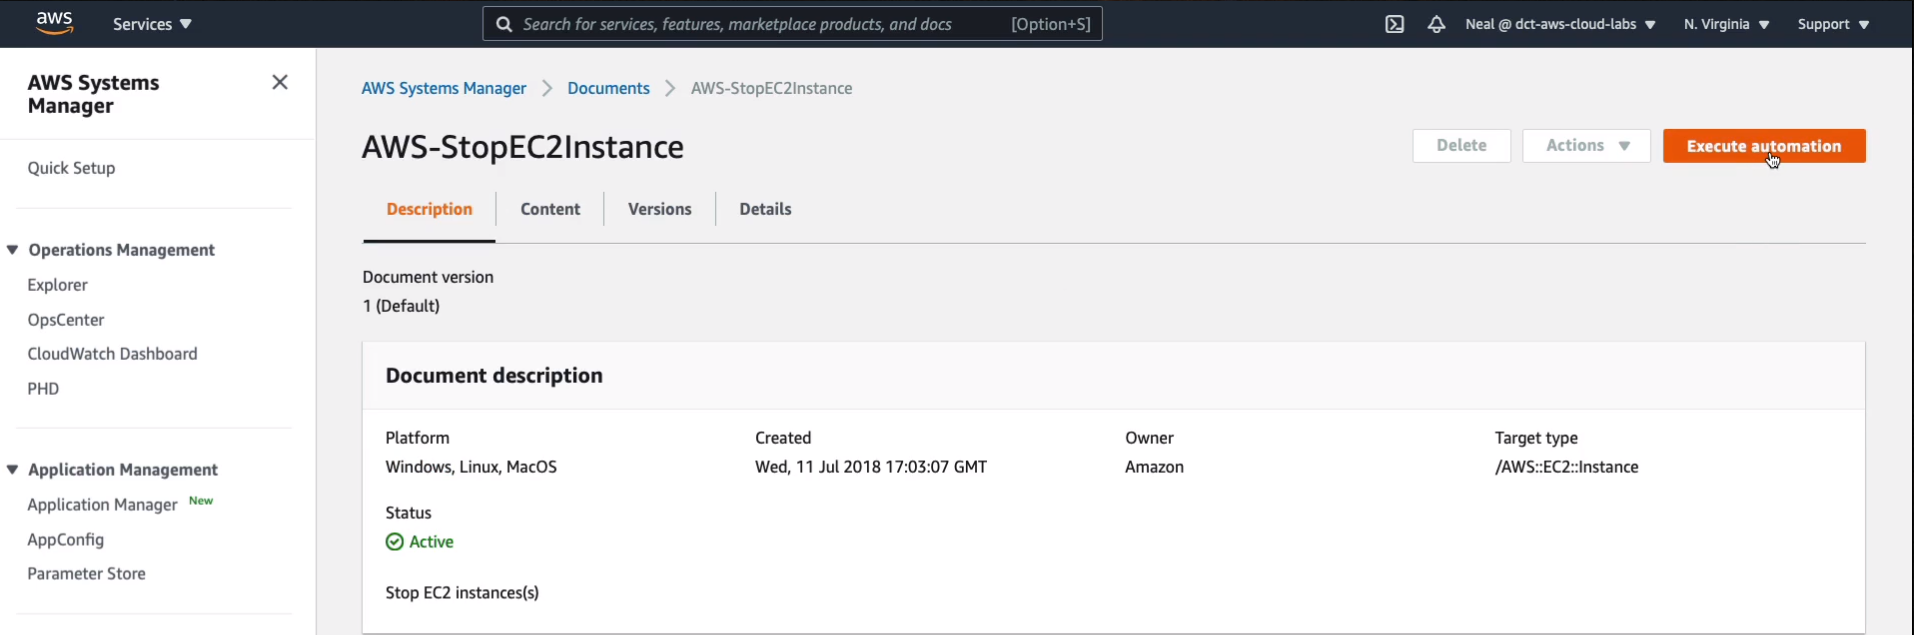
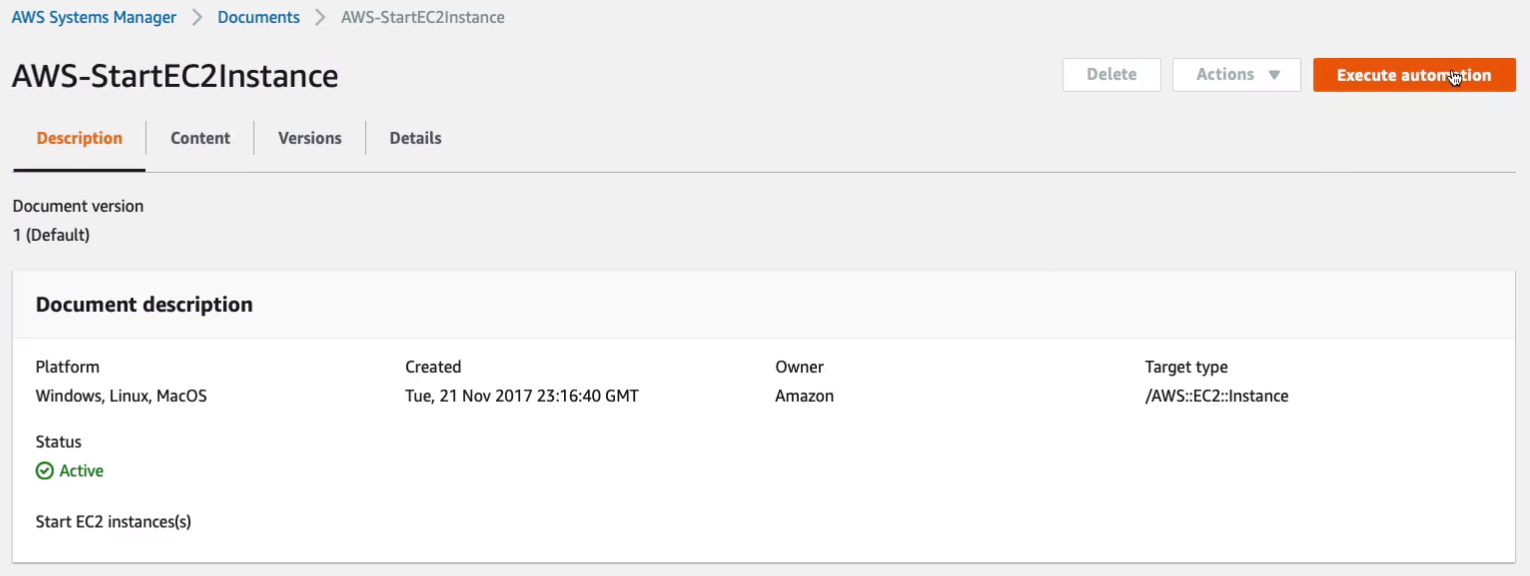
In the document configuration, we can see that it applies to Windows as well as Linux and macOS. So that’s good and what I want to do is click Execute automation.
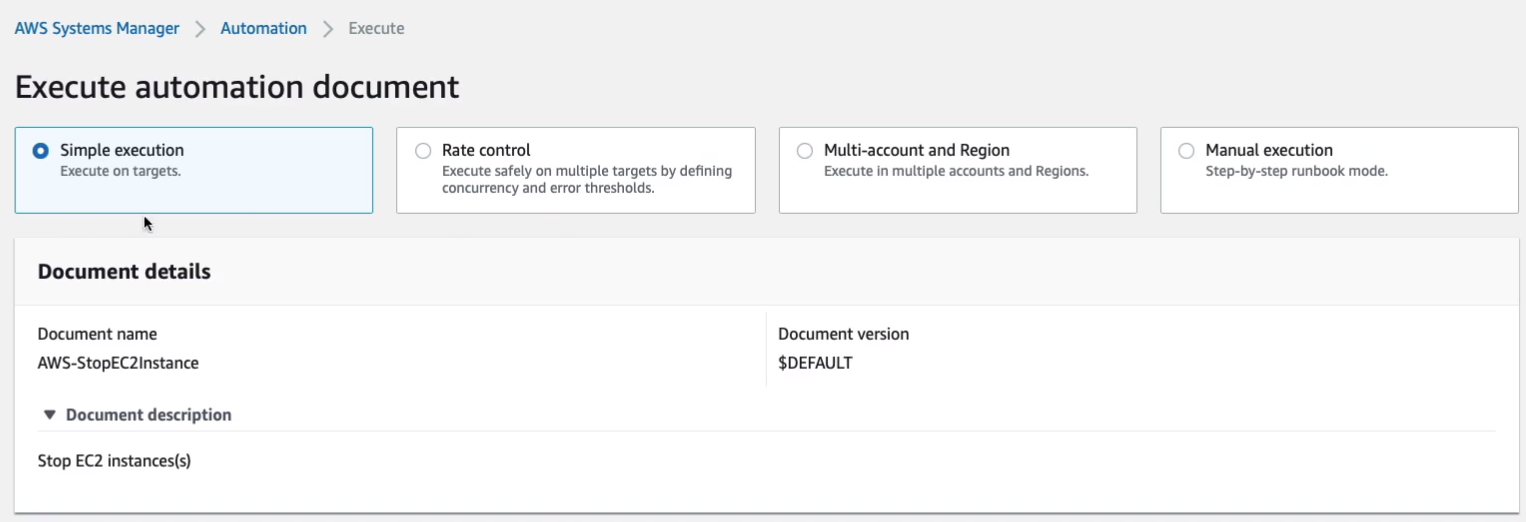
There are various options here. I’m going to leave it on Simple execution.
For Instance ID, I am going to flick this little box here and we can see our instance.
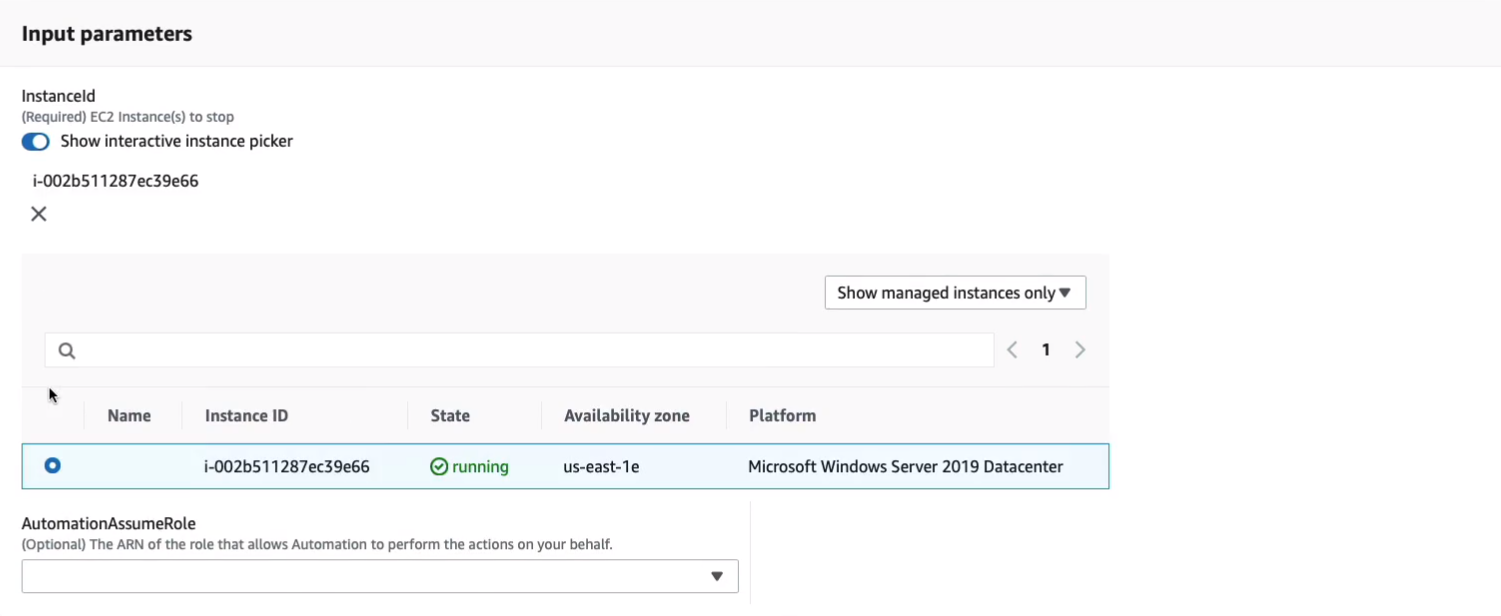
Now, often you can search by tags as well, which is a good way to actually use automation. So with our instance selected, I’m going to click on Execute.
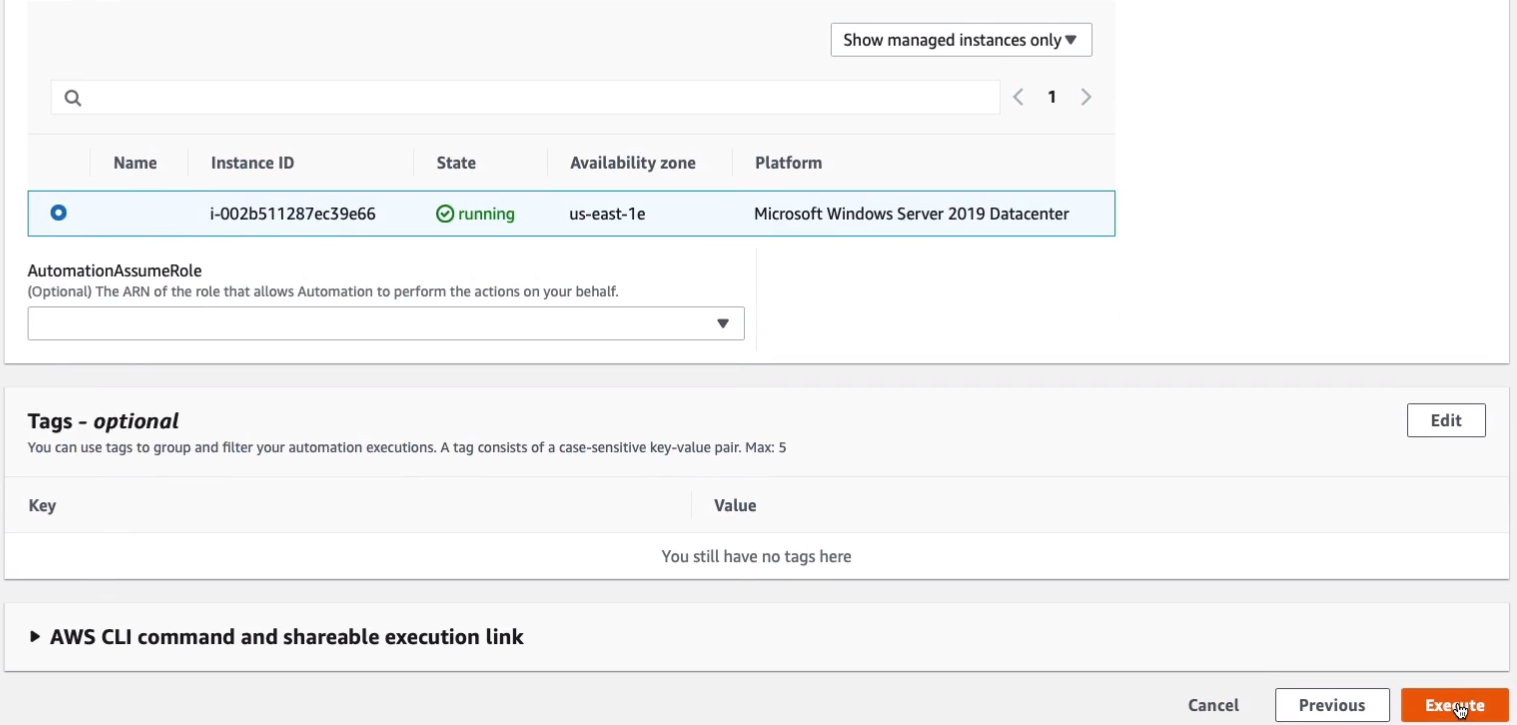
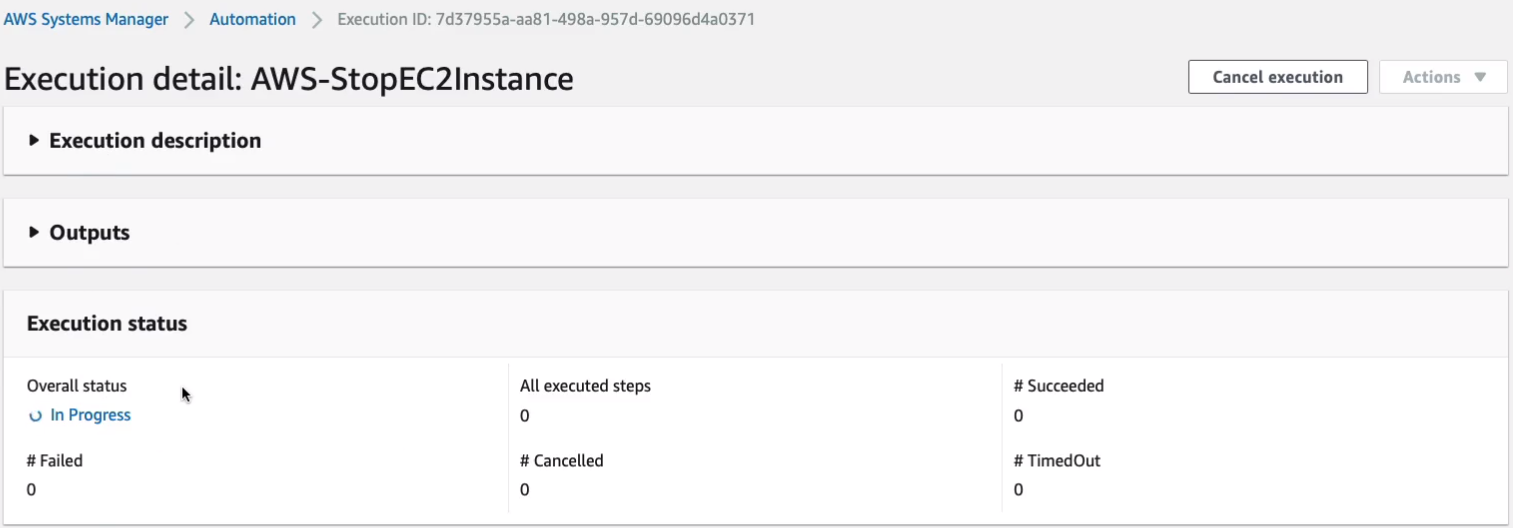
And hopefully, that should stop our EC2 instance because we now have it under management control, it has the agents, and so all we need to do is actually run this command from the systems manager and we can see that this is being executed. It’s in progress.
Back on EC2, I’ve just refreshed my page and it’s this bottom instance here. We can see it’s in the stopping state now.

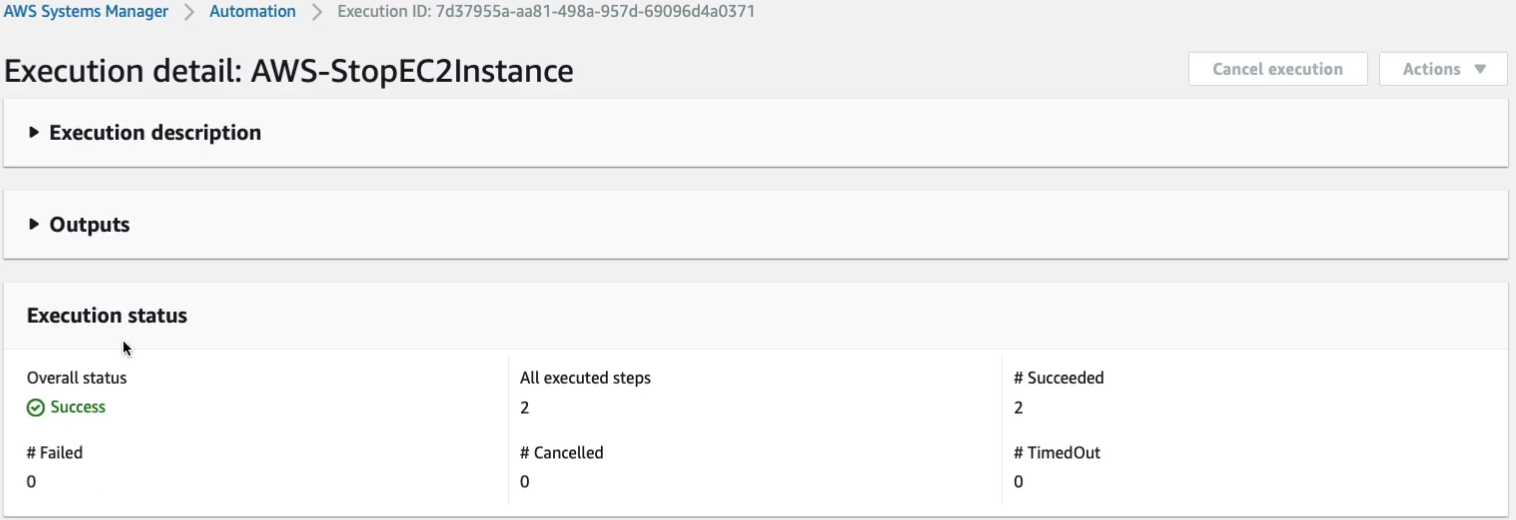
Once the instance is fully stopped, we get a success message.
So now, if we want to start it up again, we can go back to Documents, search for the “start”, and start EC2 instances the one we want.
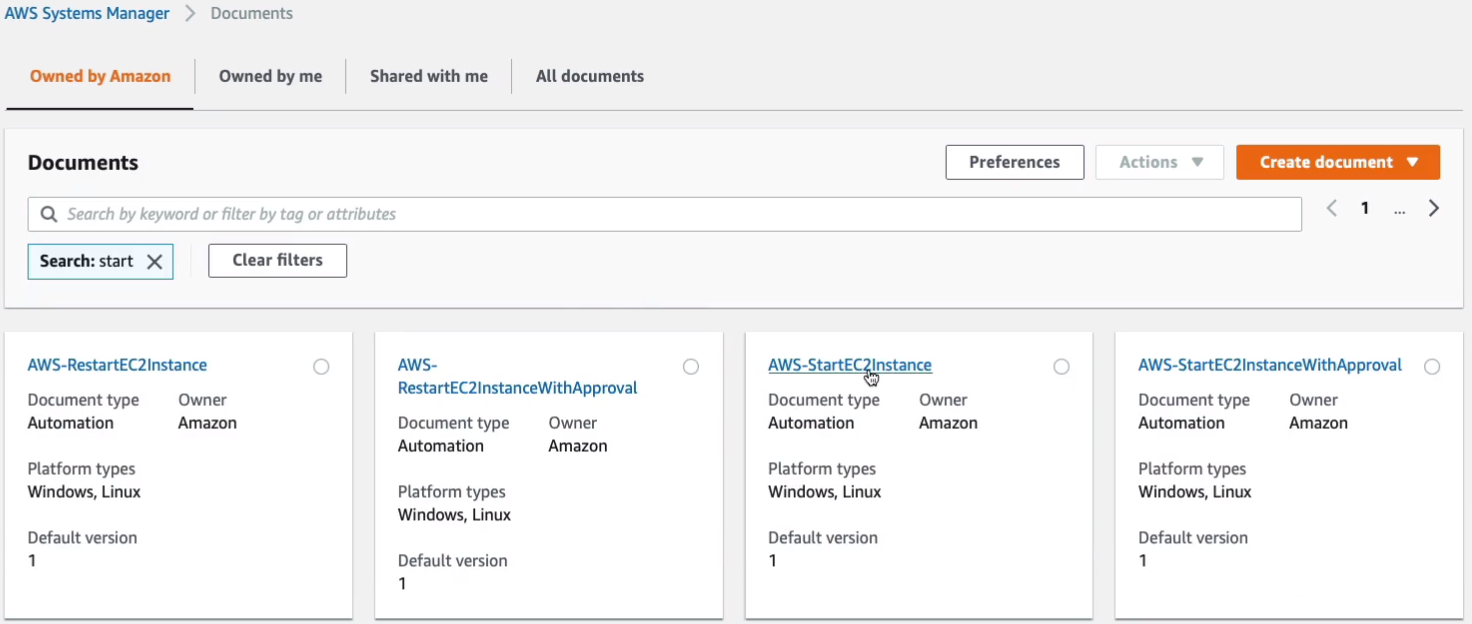
So now we’ll just execute this automation again.
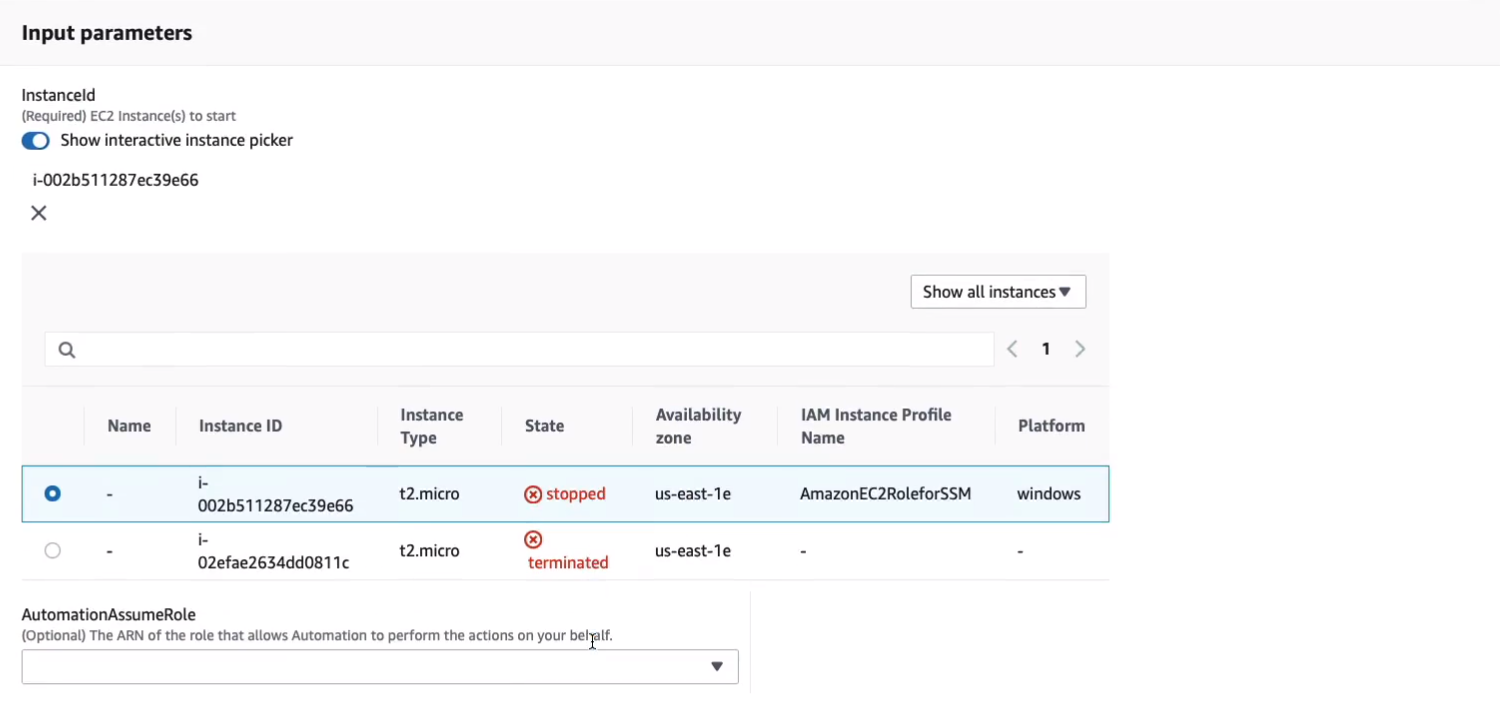
Choosing the instance we have and what we want to do here is show all instances because it’s in a stop state and so this is the instance, the one I just stopped. We can see it has the instance profile attached to it. So then, let’s click on Execute.
It’s been initiated.
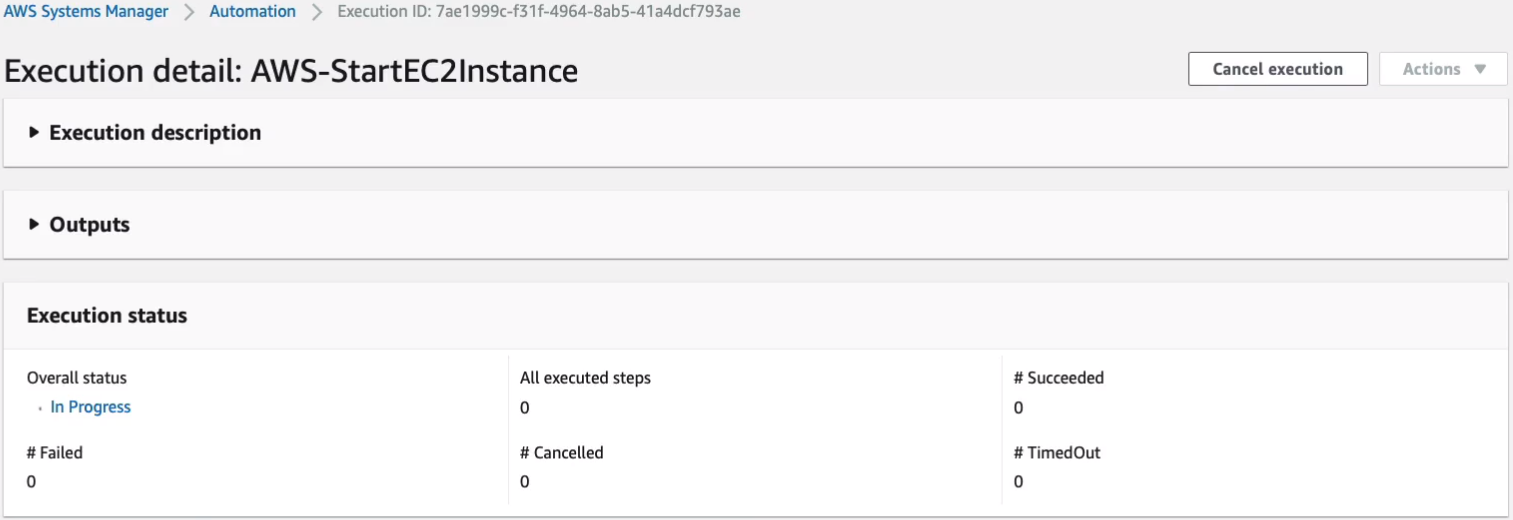
Back in EC2, if I click on refresh, I’ve now got pending. So that starting back up again.

So that’s a very simple demonstration of how to use Systems Manager. Now as you can see, there are a lot more documents in there. You can do things like scan for patches and install patches and various other activities as well. So all I need to do to clean up is just terminate my EC2 instance and there’s nothing else that we created that’s going to cost us any money.
AWS Service Catalog
AWS Service Catalog is a service that we can use to create catalogs of IT services that we can then pre-approve for consumption on AWS.
- AWS Service Catalog allows organizations to create and manage catalogs of IT services that are approved for use on AWS
- AWS Service Catalog allows you to centrally manage commonly deployed IT services
- So what we mean here is, the commonly deployed services would be ones that we can define a template for and actually relies on CloudFormation templates. So we define the application and then we publish it and allow our consumers to use these services.
- IT services can include virtual machine images, servers, software, databases, and multi-tier application architectures
- Enables users to quickly deploy only the approved IT services they need
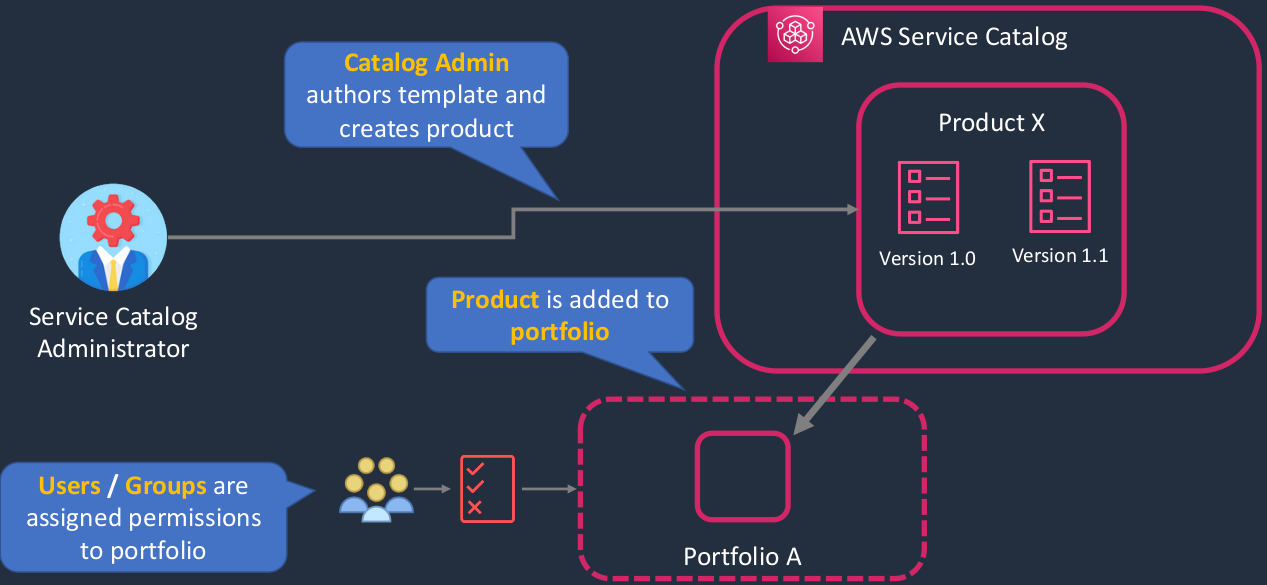
Well, we have our Catalog Administrator on the left here and he creates a service catalog of products. The product can then have different versions. Now, as I mentioned, the products actually rely on templates and those are CloudFormation templates because the CloudFormation service is what’s going to actually build out the service when a user accesses it. Then we can create portfolios and actually add the products into the portfolio and then grant our users access to the portfolio. So when a user is able to log in to AWS and they can see the services, the products that they’re allowed to actually consume, and they can very simply launch those products.
AWS Config
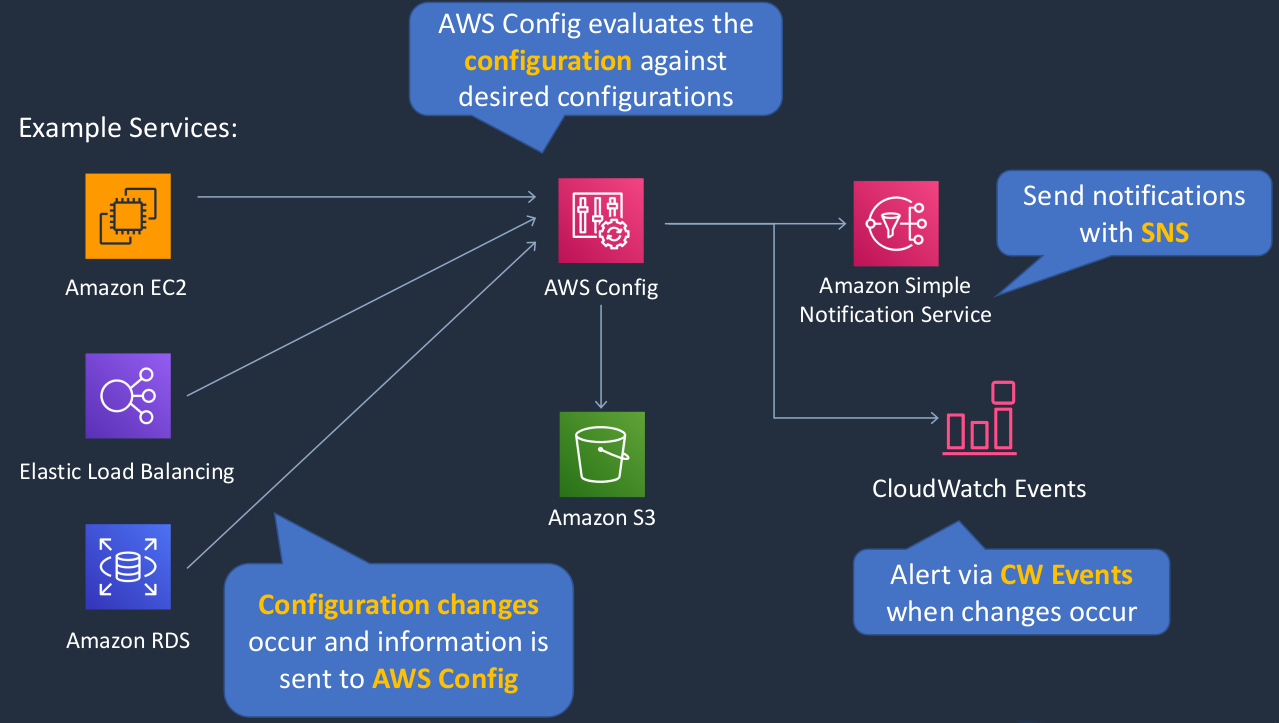
AWS Config is a service we can use to audit the configurations of our AWS resources and it can be used for compliance reasons. So e might want to validate that our resources are configured in a certain way. So we can define how we want them to be configured and then check whether they actually comply with that or not. So Config will evaluate the configuration against the desired configuration that we define. So maybe we have EC2 instances, Elastic Load Balancers, and RDS databases. Now, these services can report in the configuration status that they’re in and therefore, if there are any configuration changes, those will get reported to Config. The Config can record information in an Amazon S3 bucket and it can also then notify via the Simple Notification Service. You can also not just send notifications, but you can trigger CloudWatch Events. Now, that could be an alert or it could trigger some other service. It even does some configuration remediation for you as well. So it can use things like a Lambda function to then remediate the configuration of your resources to make sure they comply with your desired state.
| Example Rule | Description |
|---|---|
| s3-bucket-server-side-encryption-enabled | Checks that your Amazon S3 bucket either has S3 default encryption enabled or that the S3 bucket policy explicitly denies put-object requests without server-side encryption |
| restricted-ssh | Checks whether security groups that are in use disallow unrestricted incoming SSH traffic - So in other words, if you’re using unrestricted sources, any source can SSH to your instances, then that would be out of compliance. |
| rds-instance-public-access-check | Checks whether the Amazon Relational Database Service (RDS) instances are not publicly accessible |
| cloudtrail-enabled | Checks whether AWS CloudTrail is enabled in your AWS account |
Configuration Compliance
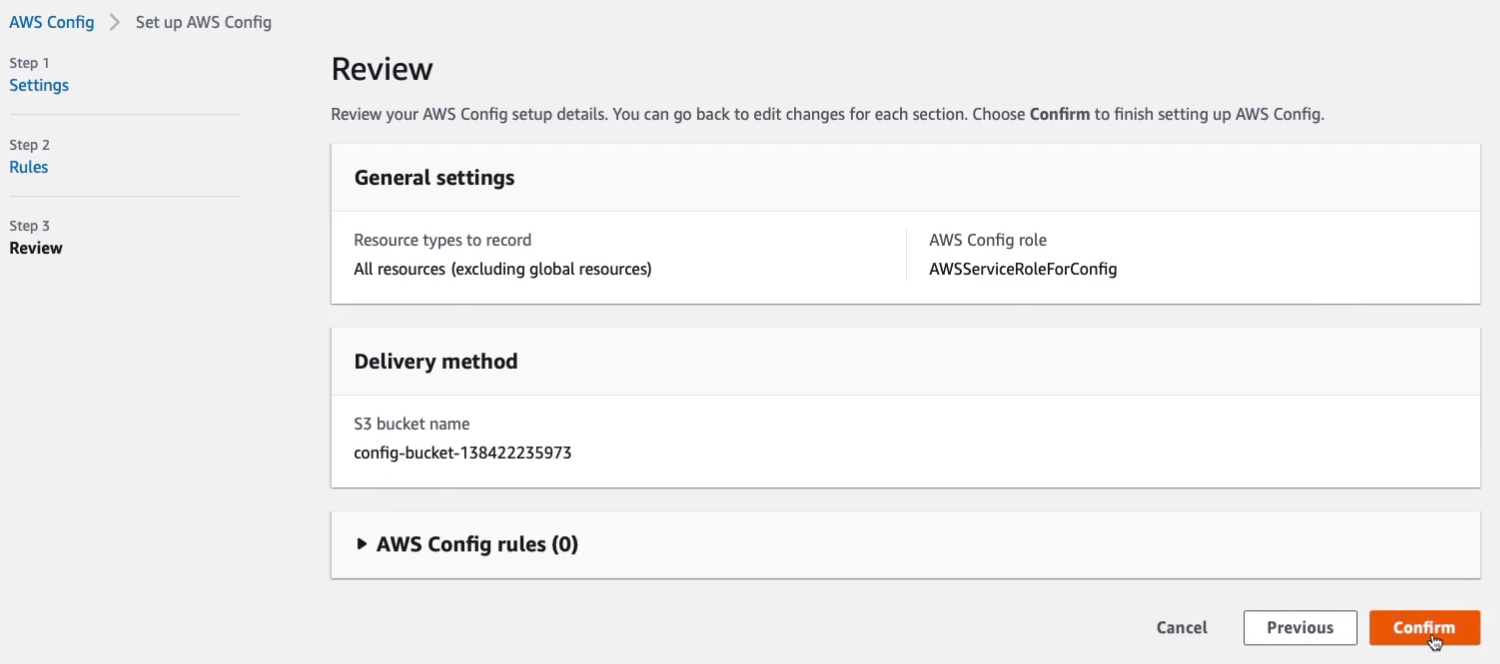
In the Management Console, Services > Management & Governance > Config. In the Config Console, we can click on 1-click setup and simply confirm to set up AWS Config.
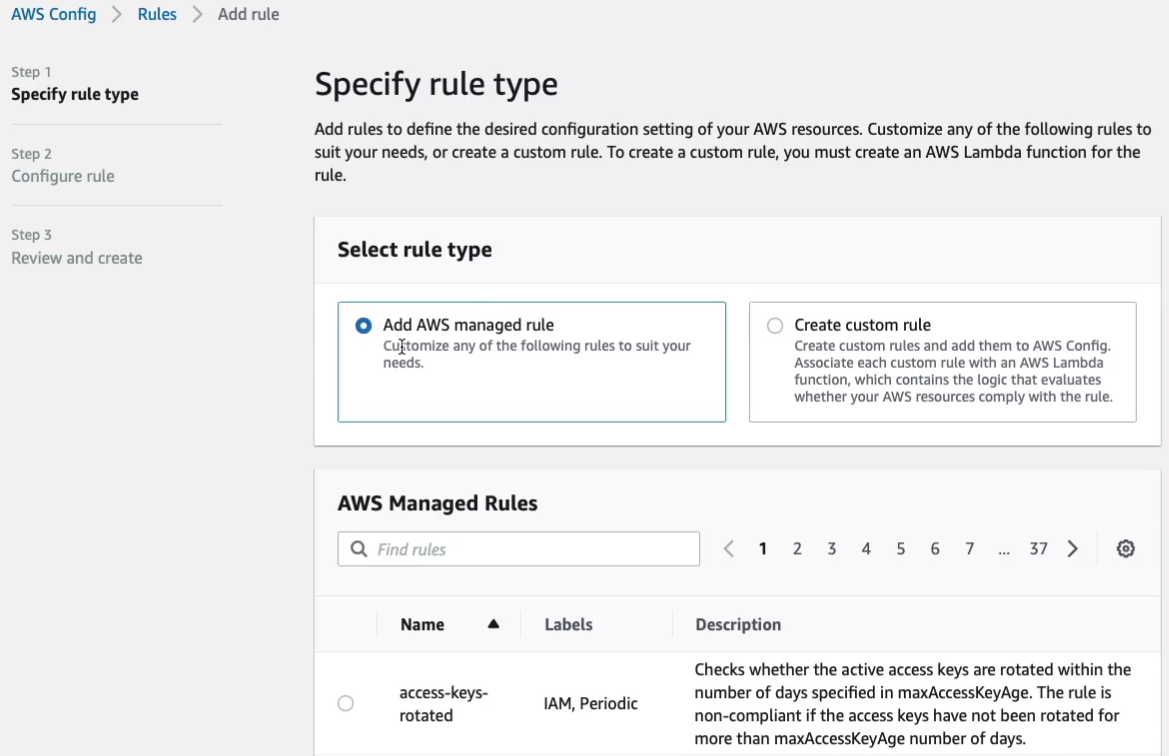
Now, we’re ready to go. So if we click on Rules we’ll be able to see rules. Now, we don’t have any at this stage, click on Add rule.

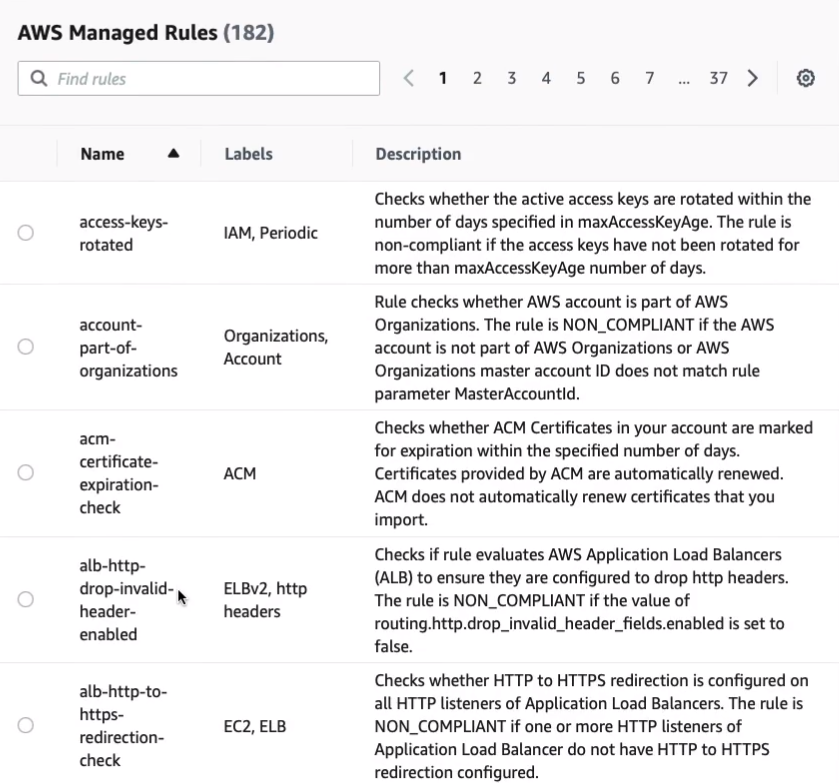
You’ll see that we have the AWS-managed rules or Custom rule that we can create ourselves. So let’s have a look at AWS managed rules.
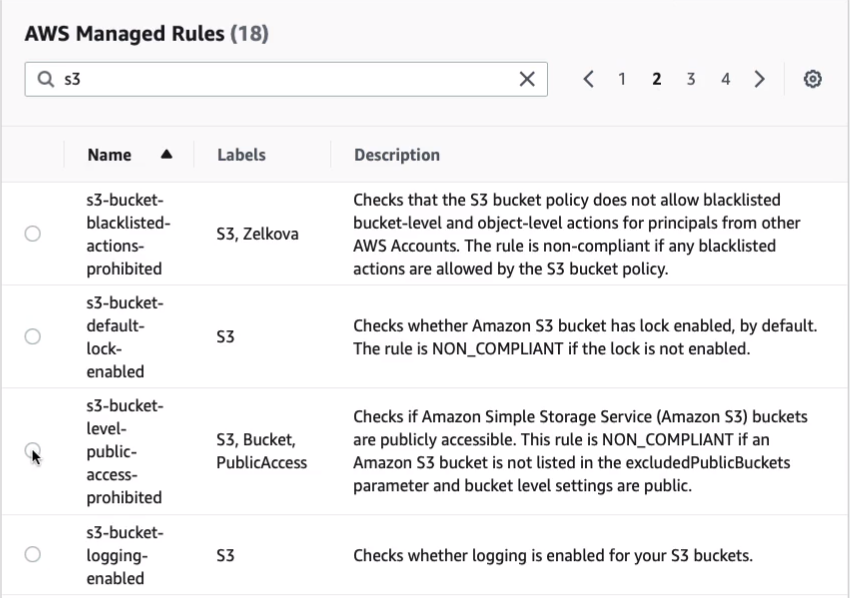
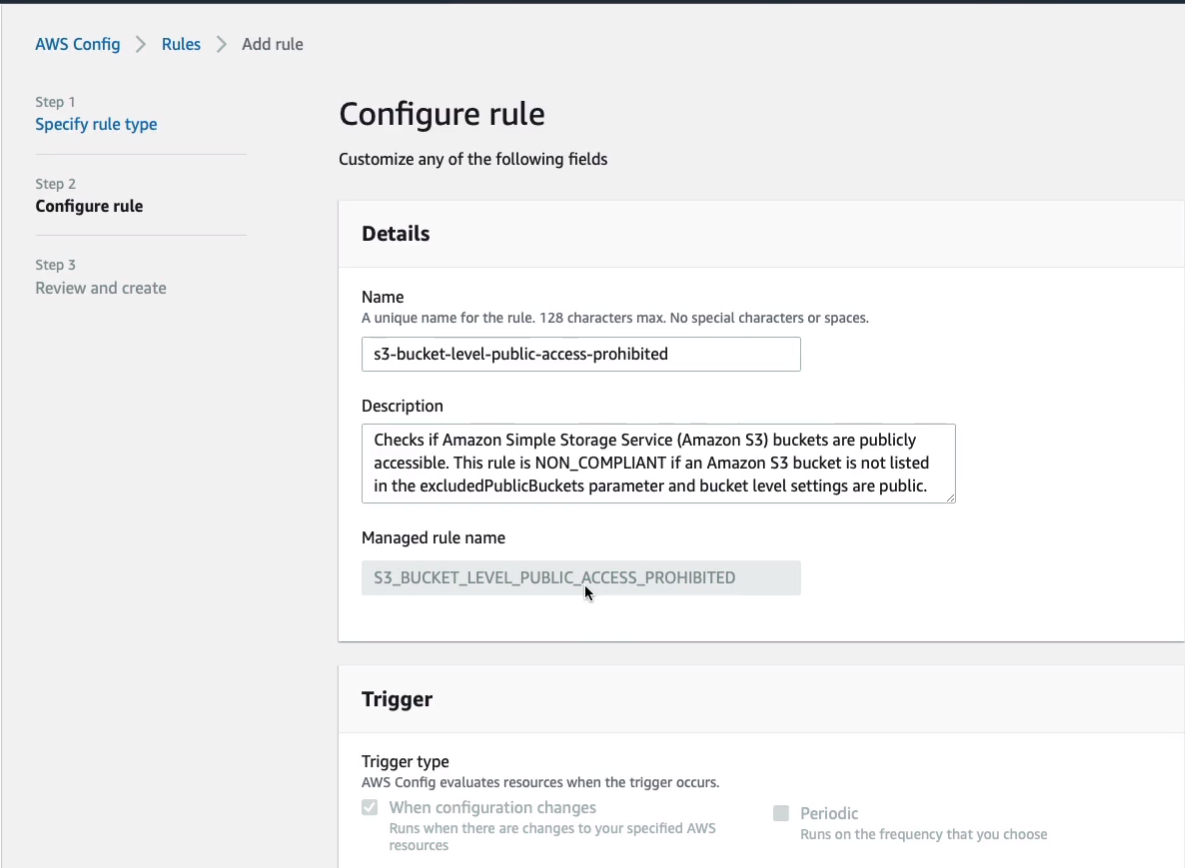
In here, you’ll get quite a few pages of rules that already exist. So, for example, let’s type in S3 and we have 18 matches for S3. Let’s go on to the second page of results and let’s select s3-bucket-level-public-access-prohibited. So this one checks if your S3 buckets are publicly accessible. Now I know that we have at least one bucket that is publicly accessible. Let’s click on Next.
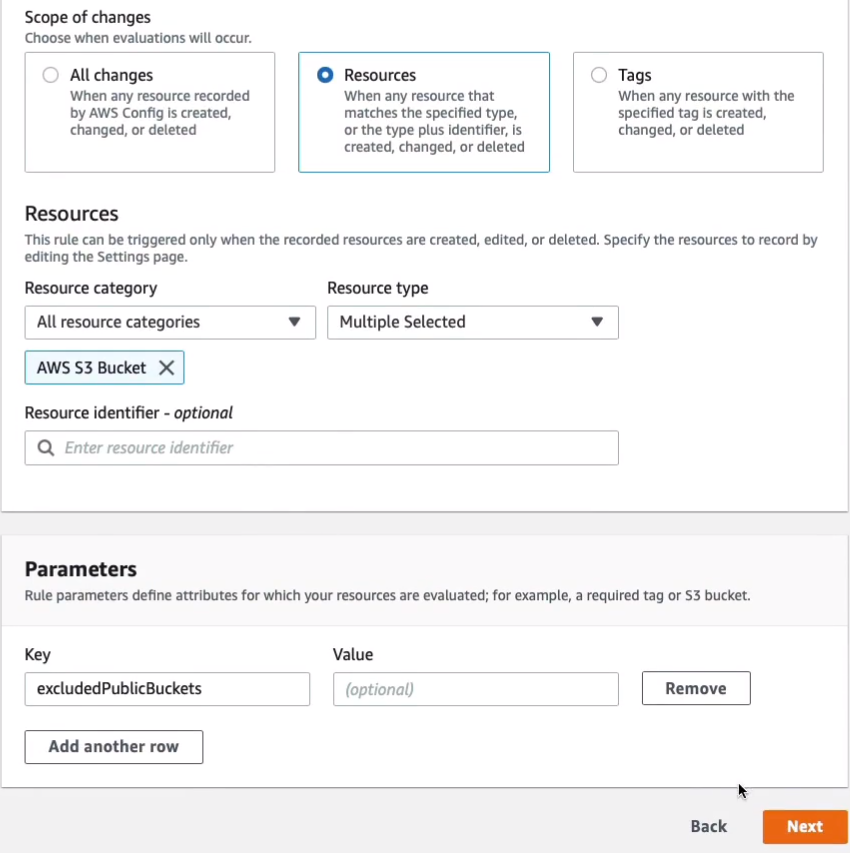
We’ll just leave all the defaults here.
Scroll down to the bottom, click on Next.
Then just Add rule.

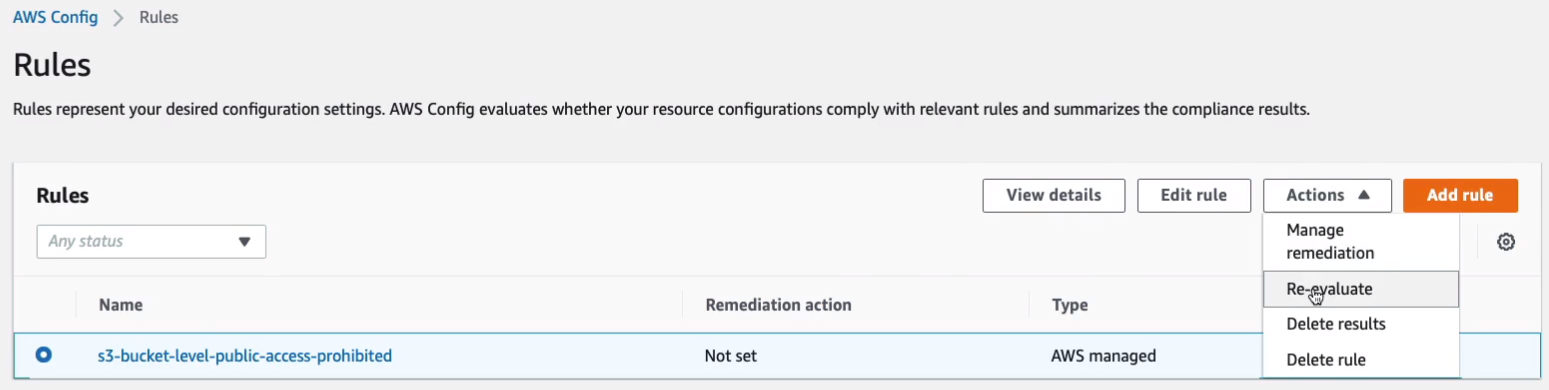
So the rule has been created and if we select the rule here, go to Actions, we can click on Re-evaluate to try and sort of force it to actually take place now.
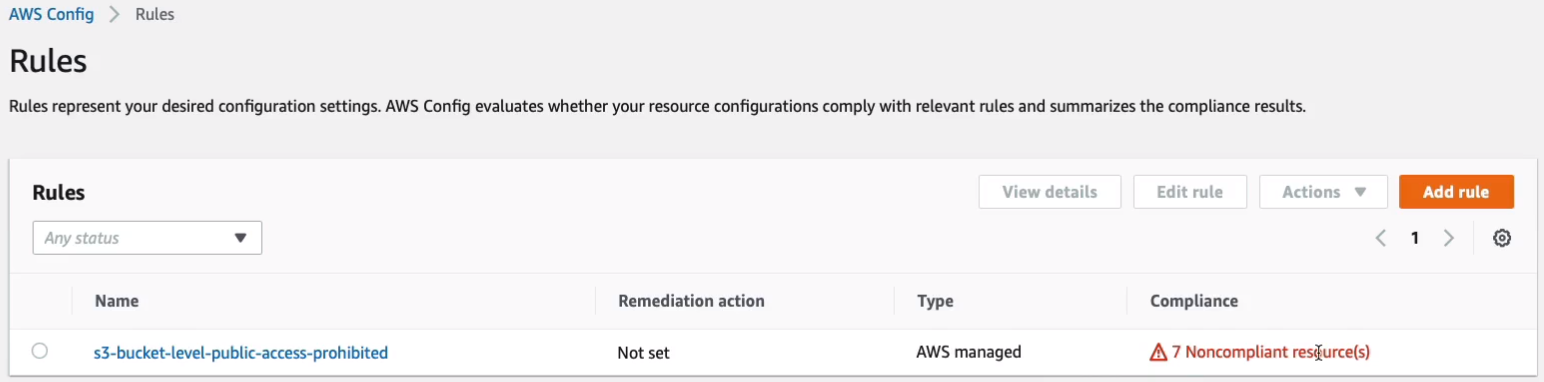
Very quickly, we get this result. We can see we get seven non-compliant resources.
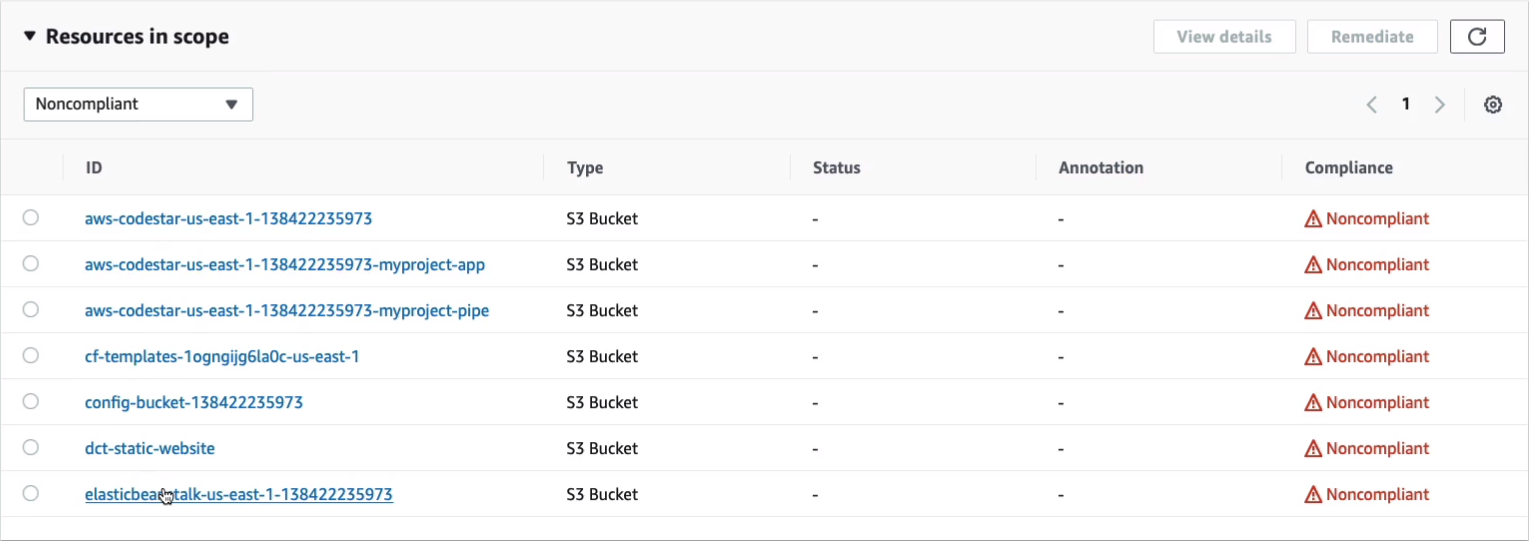
Let’s go in s3-bucket-level-public-access-prohibited. Within the rule here, we can see the results of non-compliance here. We’ve got several buckets and some of these have been created by AWS services we’ve used like CodeStar and CloudFormation and Elastic Beanstalk. Others we’ve created ourselves like a static website.
Now, if we go to Compliance, then we do have a bucket here that isn’t publicly accessible.

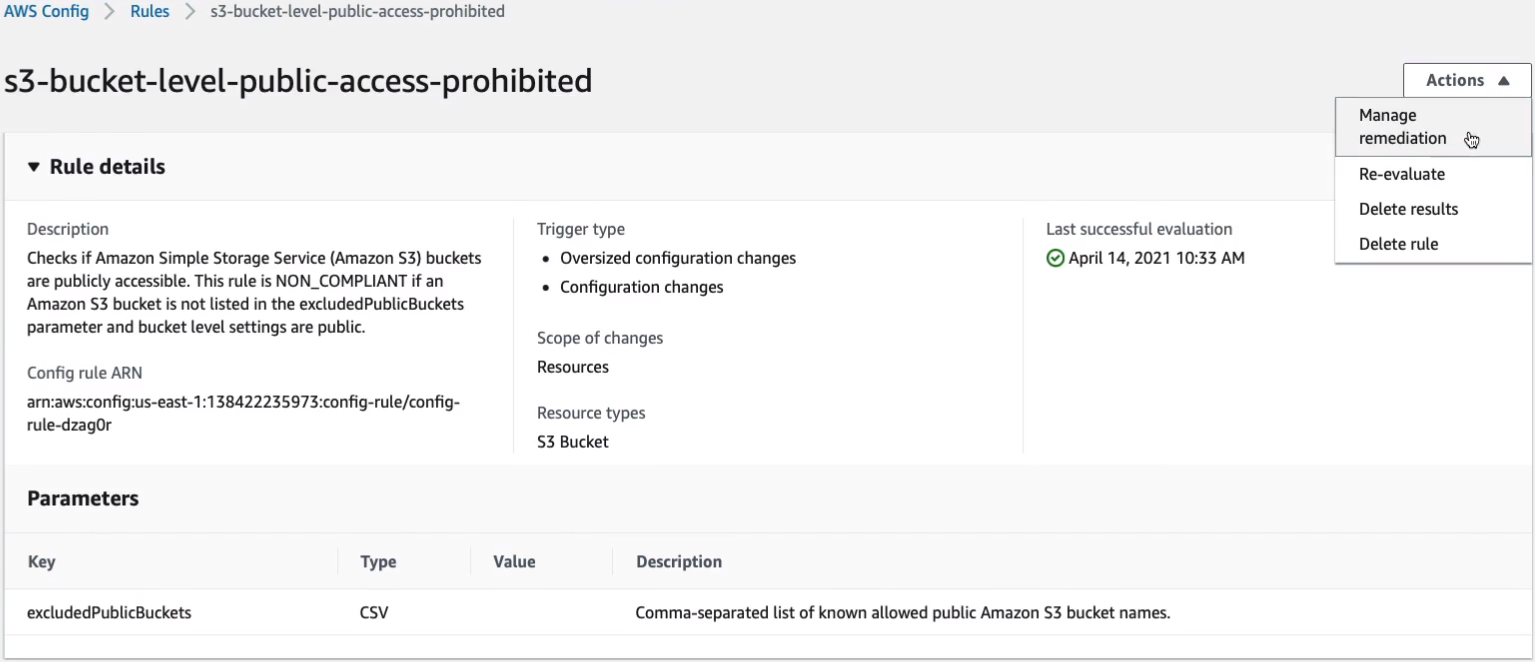
Now, under Actions, there’s also a Managed remediation option.
On the Remediation action page, we can choose Automatic or Manual remediation, and then we can choose from some predefined actions. So, for example, maybe I type in public and we’ve got this AWS-DisableS3BucketPublicReadWrite. So that could very well stop the public access or at least stop the ability to read and write to our buckets for the public and then you could go ahead and execute that automation. So we won’t do that now. We’ll just leave our buckets as they are.

But this is how we can configure compliance for our resources. Click on Add rule and as you can see, there’s a lot of rules in here. So you can do quite a lot of stuff. You can check for the encryption status of your data in buckets and EBS volumes. You can check whether access keys are being rotated. So how long or how old are your access keys, that kind of thing.
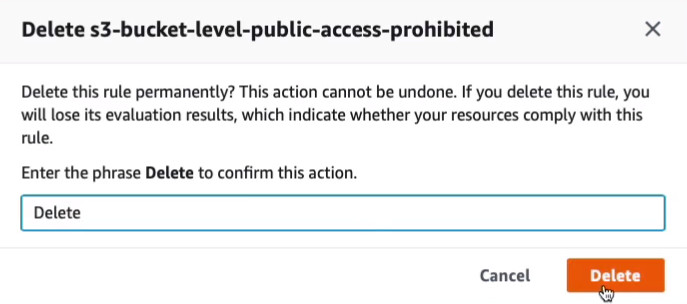
You can always get rid of this rule by simply going into the Actions > Delete rule.

Type on Delete and then Delete.
AWS Trusted Advisor
- Trusted Advisor is an online resource that helps to reduce cost, increase performance and improve security by optimizing your AWS environment
- Trusted Advisor provides real-time guidance to help you provision your resources following best practices
- Advisor will advise you on Cost Optimization, Performance, Security, and Fault Tolerance
The key facts you need to know are that it provides advice. That’s why it’s called Trusted Advisor, it’s giving you advice and it’s giving you real-time guidance about best practices and those best practices are in the areas of cost optimization, performance, security, and fault tolerance.
AWS Health API and Dashboards
Health API is, as the name suggests, an application programming interface to get health-related information. Now, that’s information about your resources and that information can also be viewed in a console called the Personal Health Dashboard.
AWS Personal Health Dashboard
- AWS Personal Health Dashboard provides alerts and remediation guidance when AWS is experiencing events that may impact you
- This is all about personalized information about events that may impact you and your resources
- Personal Health Dashboard gives you a personalized view into the performance and availability of the AWS services underlying your AWS resources
- So, for example, if AWS is experiencing some kind of failure of systems, if they are planning to take down some systems for a while, and they can see that those events are going to impact you and your resource, then you’re going to get notified through the Personal Health Dashboard.
- Also provides proactive notification to help you plan for scheduled activities
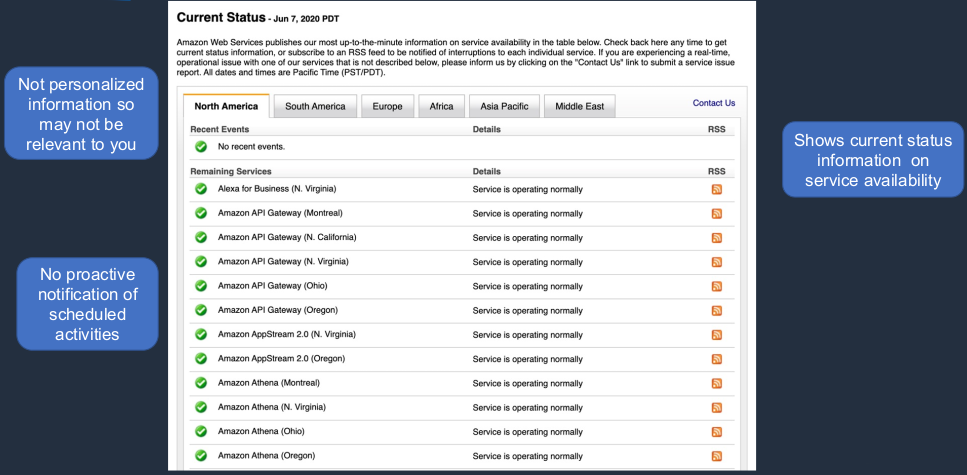
AWS Service Health Dashboard
Now, we then have the Service Health Dashboard and here everything appears to be nice and healthy. Obviously, that’s not always the case. The key thing about the Service Health Dashboard that makes it different from the Personal Health Dashboard is the information here is not personalized to you. This is general information that anybody can view. It doesn’t mean that it’s going to affect your resources. If you see an event in here, you’ve got to work whether it’s going to affect your resources or not whereas the Personal Health Dashboard does give you that information. So it shows you the current status information on service availability and it’s generalized. There’s no proactive notification of scheduled activities here. So the Service Health Dashboard is showing you the status of AWS resources right now, and it’s not personalized in any way, whereas the Personal Health Dashboard is giving you that personalized view. It’s showing you what’s happening that might impact your resources right now, and it’s notifying you proactively of any events that might happen to affect your resources in the future.
Exam-Cram
AWS Organization
- Allows you to consolidate multiple AWS accounts into an organization that you create and centrally manage
- Availabile in two feature sets:
- Consolidated Billing
- All features — gives you consolidated billing and other controls such as service control policies.
- Includes root accounts and organizational units
- Root account — account from which you create the organization
- Organizational unit — can organize your accounts into those OUs
- Policies are applied to root accounts or OUs
- Consolidated billing includes:
- Paying Account — independent and cannot access resources of other accounts
- There’s one bill
- Pays a bill for all accounts
- Linked Accounts — all linked accounts are independent
- Accounts that get linked to the paying account in the organization
- Paying Account — independent and cannot access resources of other accounts
AWS Control Tower
- Simplifies the process of creating multi-account environments
- Sets up governance, compliance, and security guardrails for you
- Integrates with other services and features to set up the environment for you including:
- AWS Organizations, SCPs, OUs, AWS Config, AWS CloudTrail, Amazon S3, Amazon SNS, AWS CloudFormation, AWS Service Catalog, AWS Sinlge Sign-On (SSO)
AWS System Manager
- Manages many AWS resources including Amazon EC2, Amazon S3, Amazon RDS etc.
- Systems Manager Components:
- Automation — uses documents to run automations
- Run Command — run commands on EC2 instances
- Inventory — gather inventory information
- Patch Manager — manage patching schedules and installation
- Session Manager — connect securely without SSH or RDP
- Parameter Store — store secrets and configuration data securely
AWS Service Catalog
- Allows organizations to create and manage catalogs of IT services that are approved for use on AWS
- Allows you to centrally manage commonly deployed IT services
- IT services can include virtual machine images, servers, software, databases, and multi-tier application architectures
- Enables users to quickly deploy only the approved IT services they need
AWS Config
- Fully-managed service for compliance management
- Helps with compliance auditing, security analysis, resource change tracking and troubleshooting
Trusted Advisor
- Online resource that helps to reduce cost, increase performance and improve security by optimizing your AWS environment
- Provides real-time guidance to help you provision your resources following best practices
- Advises you on Cost Optimization, Performance, Security, and Fault Tolerance
AWS Personal Health Dashboard
- Provides alerts and remediation guidance when AWS is experiencing events that may impact you
- Gives you a personalized view into the performance and availability of the AWS services underlying your AWS resources
- Also provides proactive notification to help you plan for scheduled activities
Service Health Dashboard
- Shows you the current status of AWS services
- Not personalized